Salesforce Winter ’25 Release: 6 Major Experience Cloud Changes You’ve Got to See
The Salesforce Winter ’25 Release brings refreshing updates to Experience Cloud, from improving the look and feel of LWR sites to customizing URLs for Accounts and Contacts for better SEO. As we want you to stay in the loop of the latest advancements Salesforce makes to its products, we’ve gathered 6 major Experience Cloud enhancements from the upcoming release in this post. For those who like a video format, we’ve shot a quick clip with all the changes in detail:
Salesforce Winter ’25 Release: 6 Key Experience Cloud Updates
The upcoming Winter ’25 Salesforce release revolves around the design, layouts, and SEO specifics of Experience Cloud sites. Here, you will find 6 major enhancements and some minor ones that will make you rethink the way you embellish your sites. For the whole list of changes and release notes, please click here.
1. Brush up on the Look and Feel of an LWR Site
The latest Salesforce Winter ’25 Release lets us play around with more design and layout controls. If previously, you could customize only a full section or an entire site, you can now customize the color palette for an individual Column component.
New features available in Experience Builder come with robust options for a Theme panel – you can style buttons and headings. Besides, you can anchor the header region of a site to the top of the page – it remains visible even while scrolling.
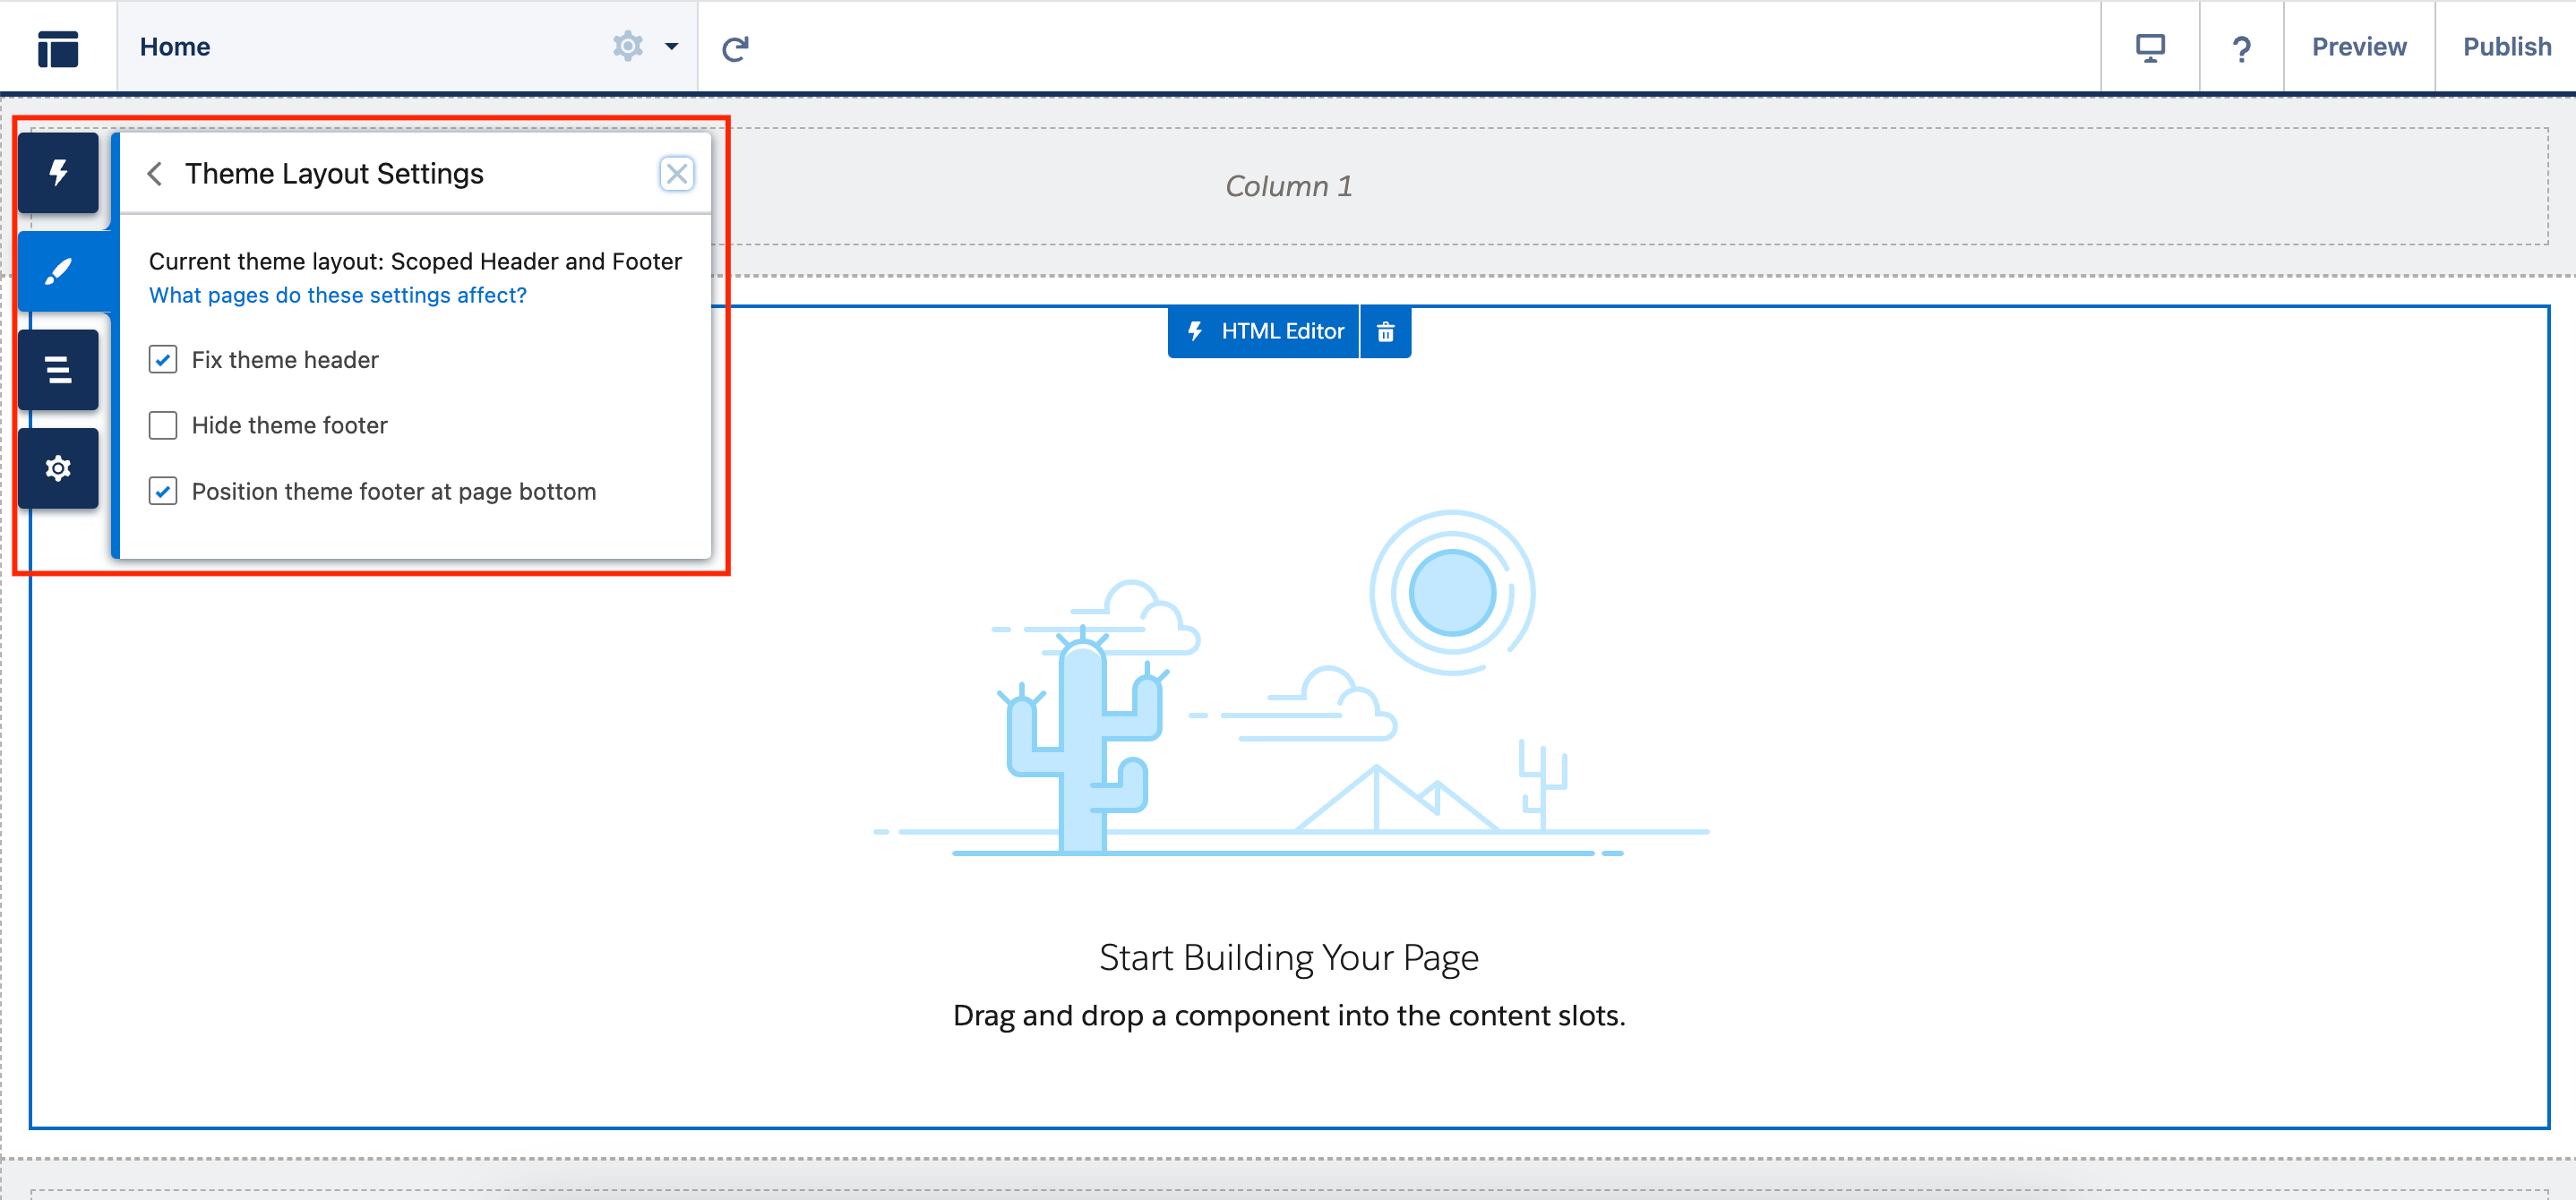
Pages with a Scoped Header and Footer theme layout component on LWR sites created using the Build Your Own template provide access to the new Theme Layout Settings panel. To set this up, enter your Build Your Own (LWR) site, go to Experience Builder → Theme → Theme Layout Settings. Select Fix theme header so that the entire header region sticks to the top of the page. Choose Position theme footer at page bottom so that the footer region sticks to the bottom of the page, no matter the content length.
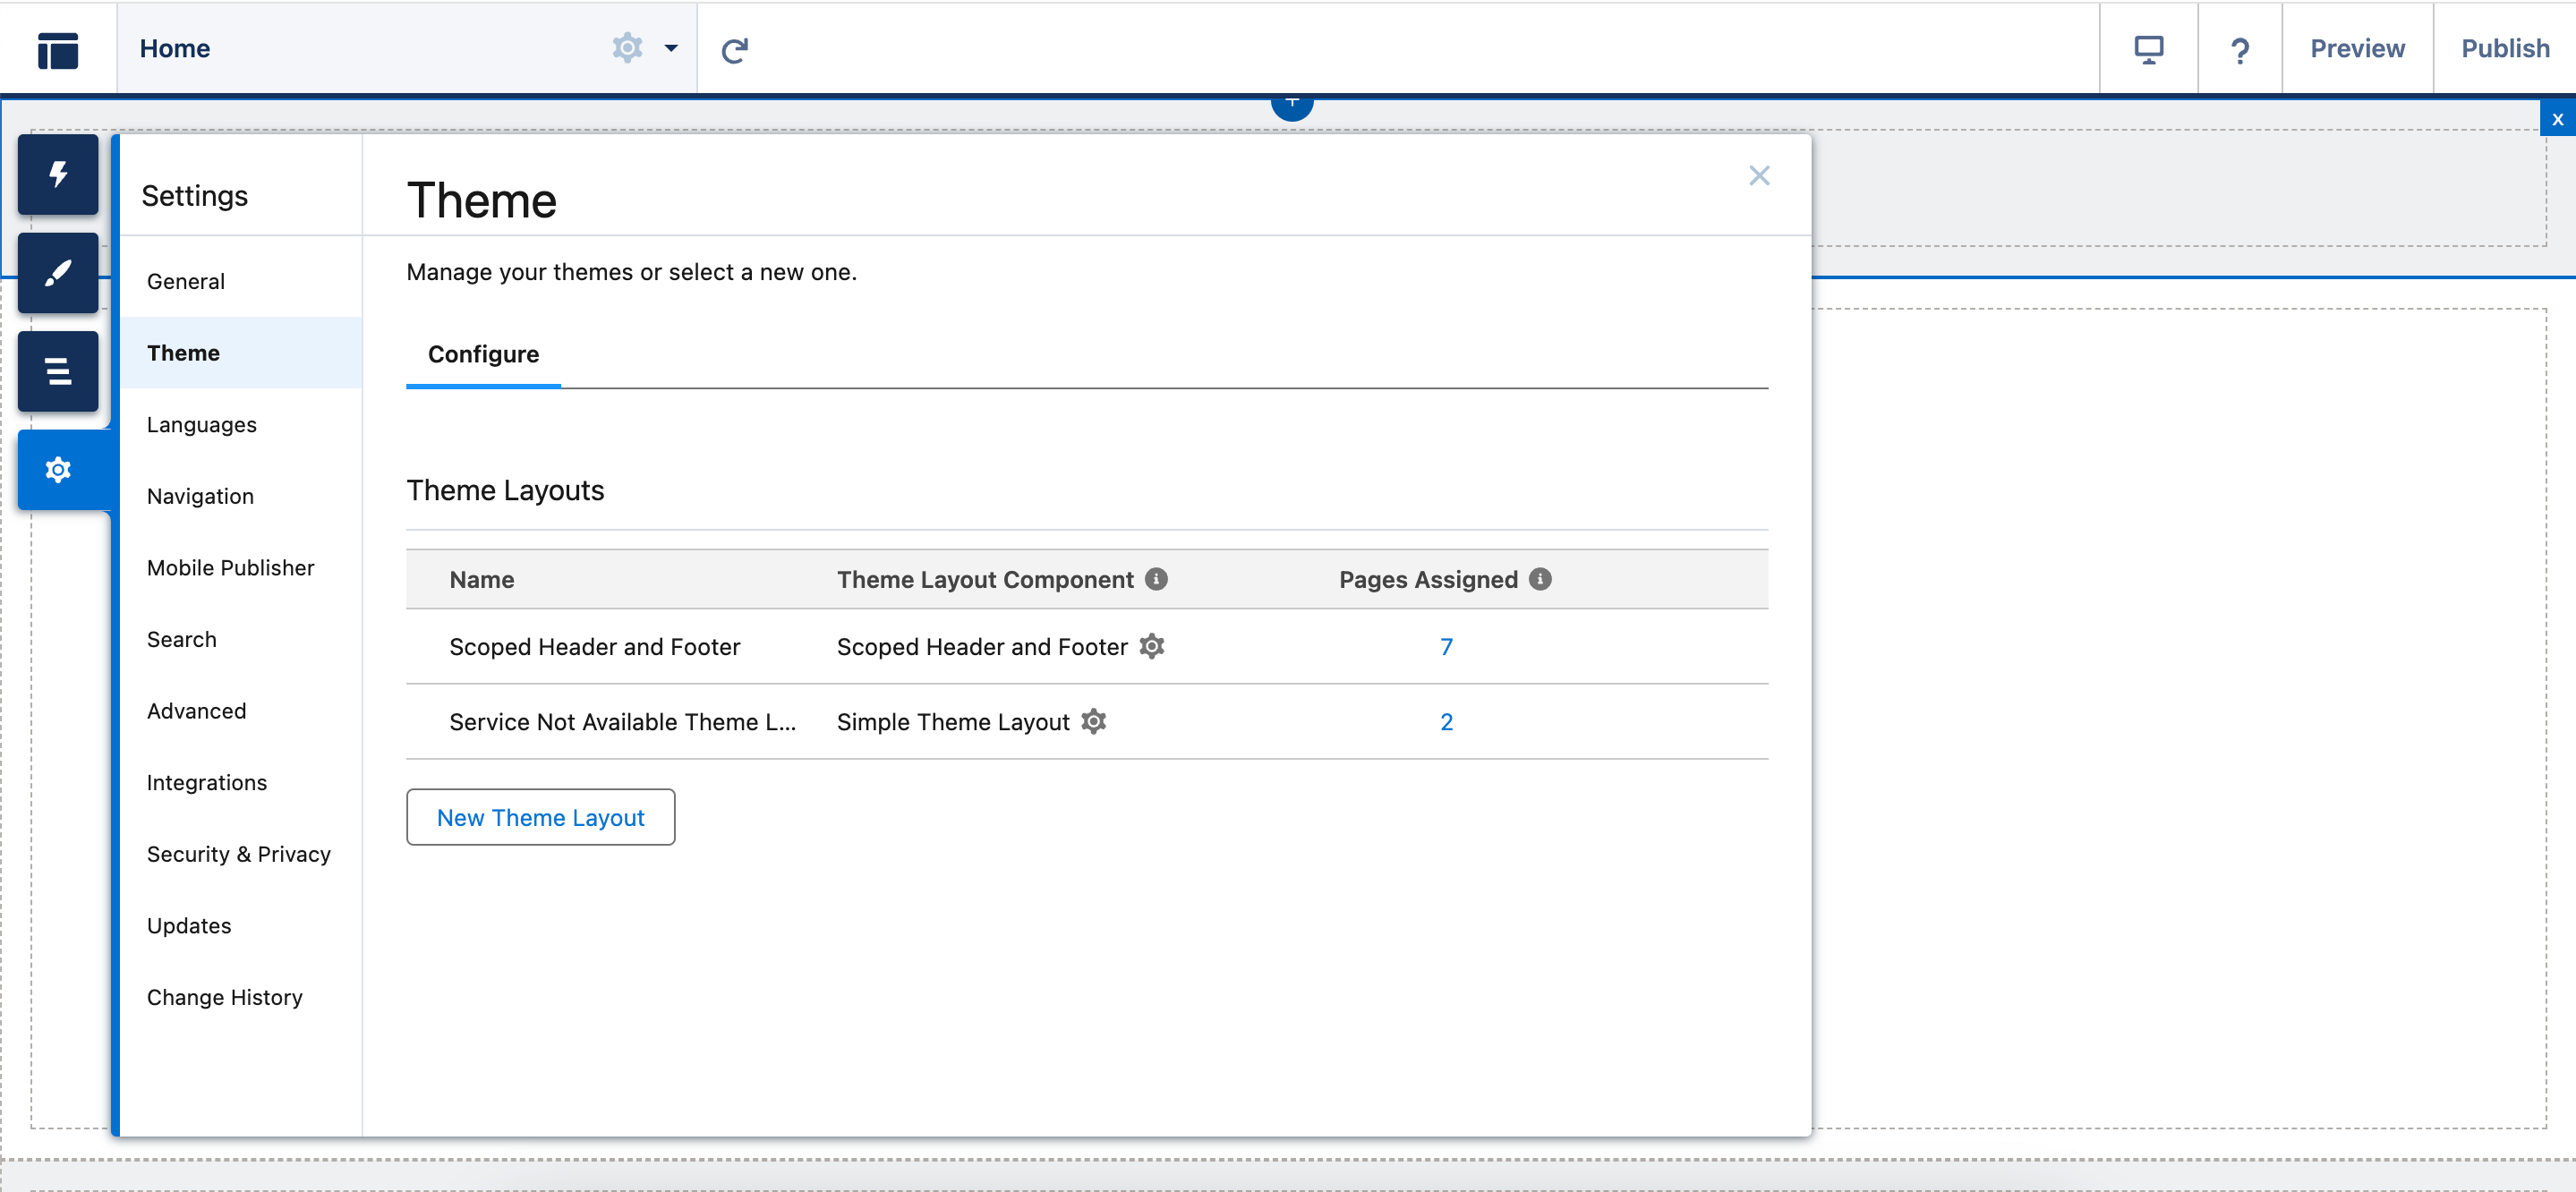
You can also do that via Settings → Theme in the Scoped Header and Footer section.
But that’s just the tip of it. Additional customization choices for button and column colors on all LWR sites are now available. In the updated Theme → Buttons section, you can define colors for primary, secondary, and tertiary buttons. You can specify the background, border, and text colors for each button in all three states—default, hover, and focus.
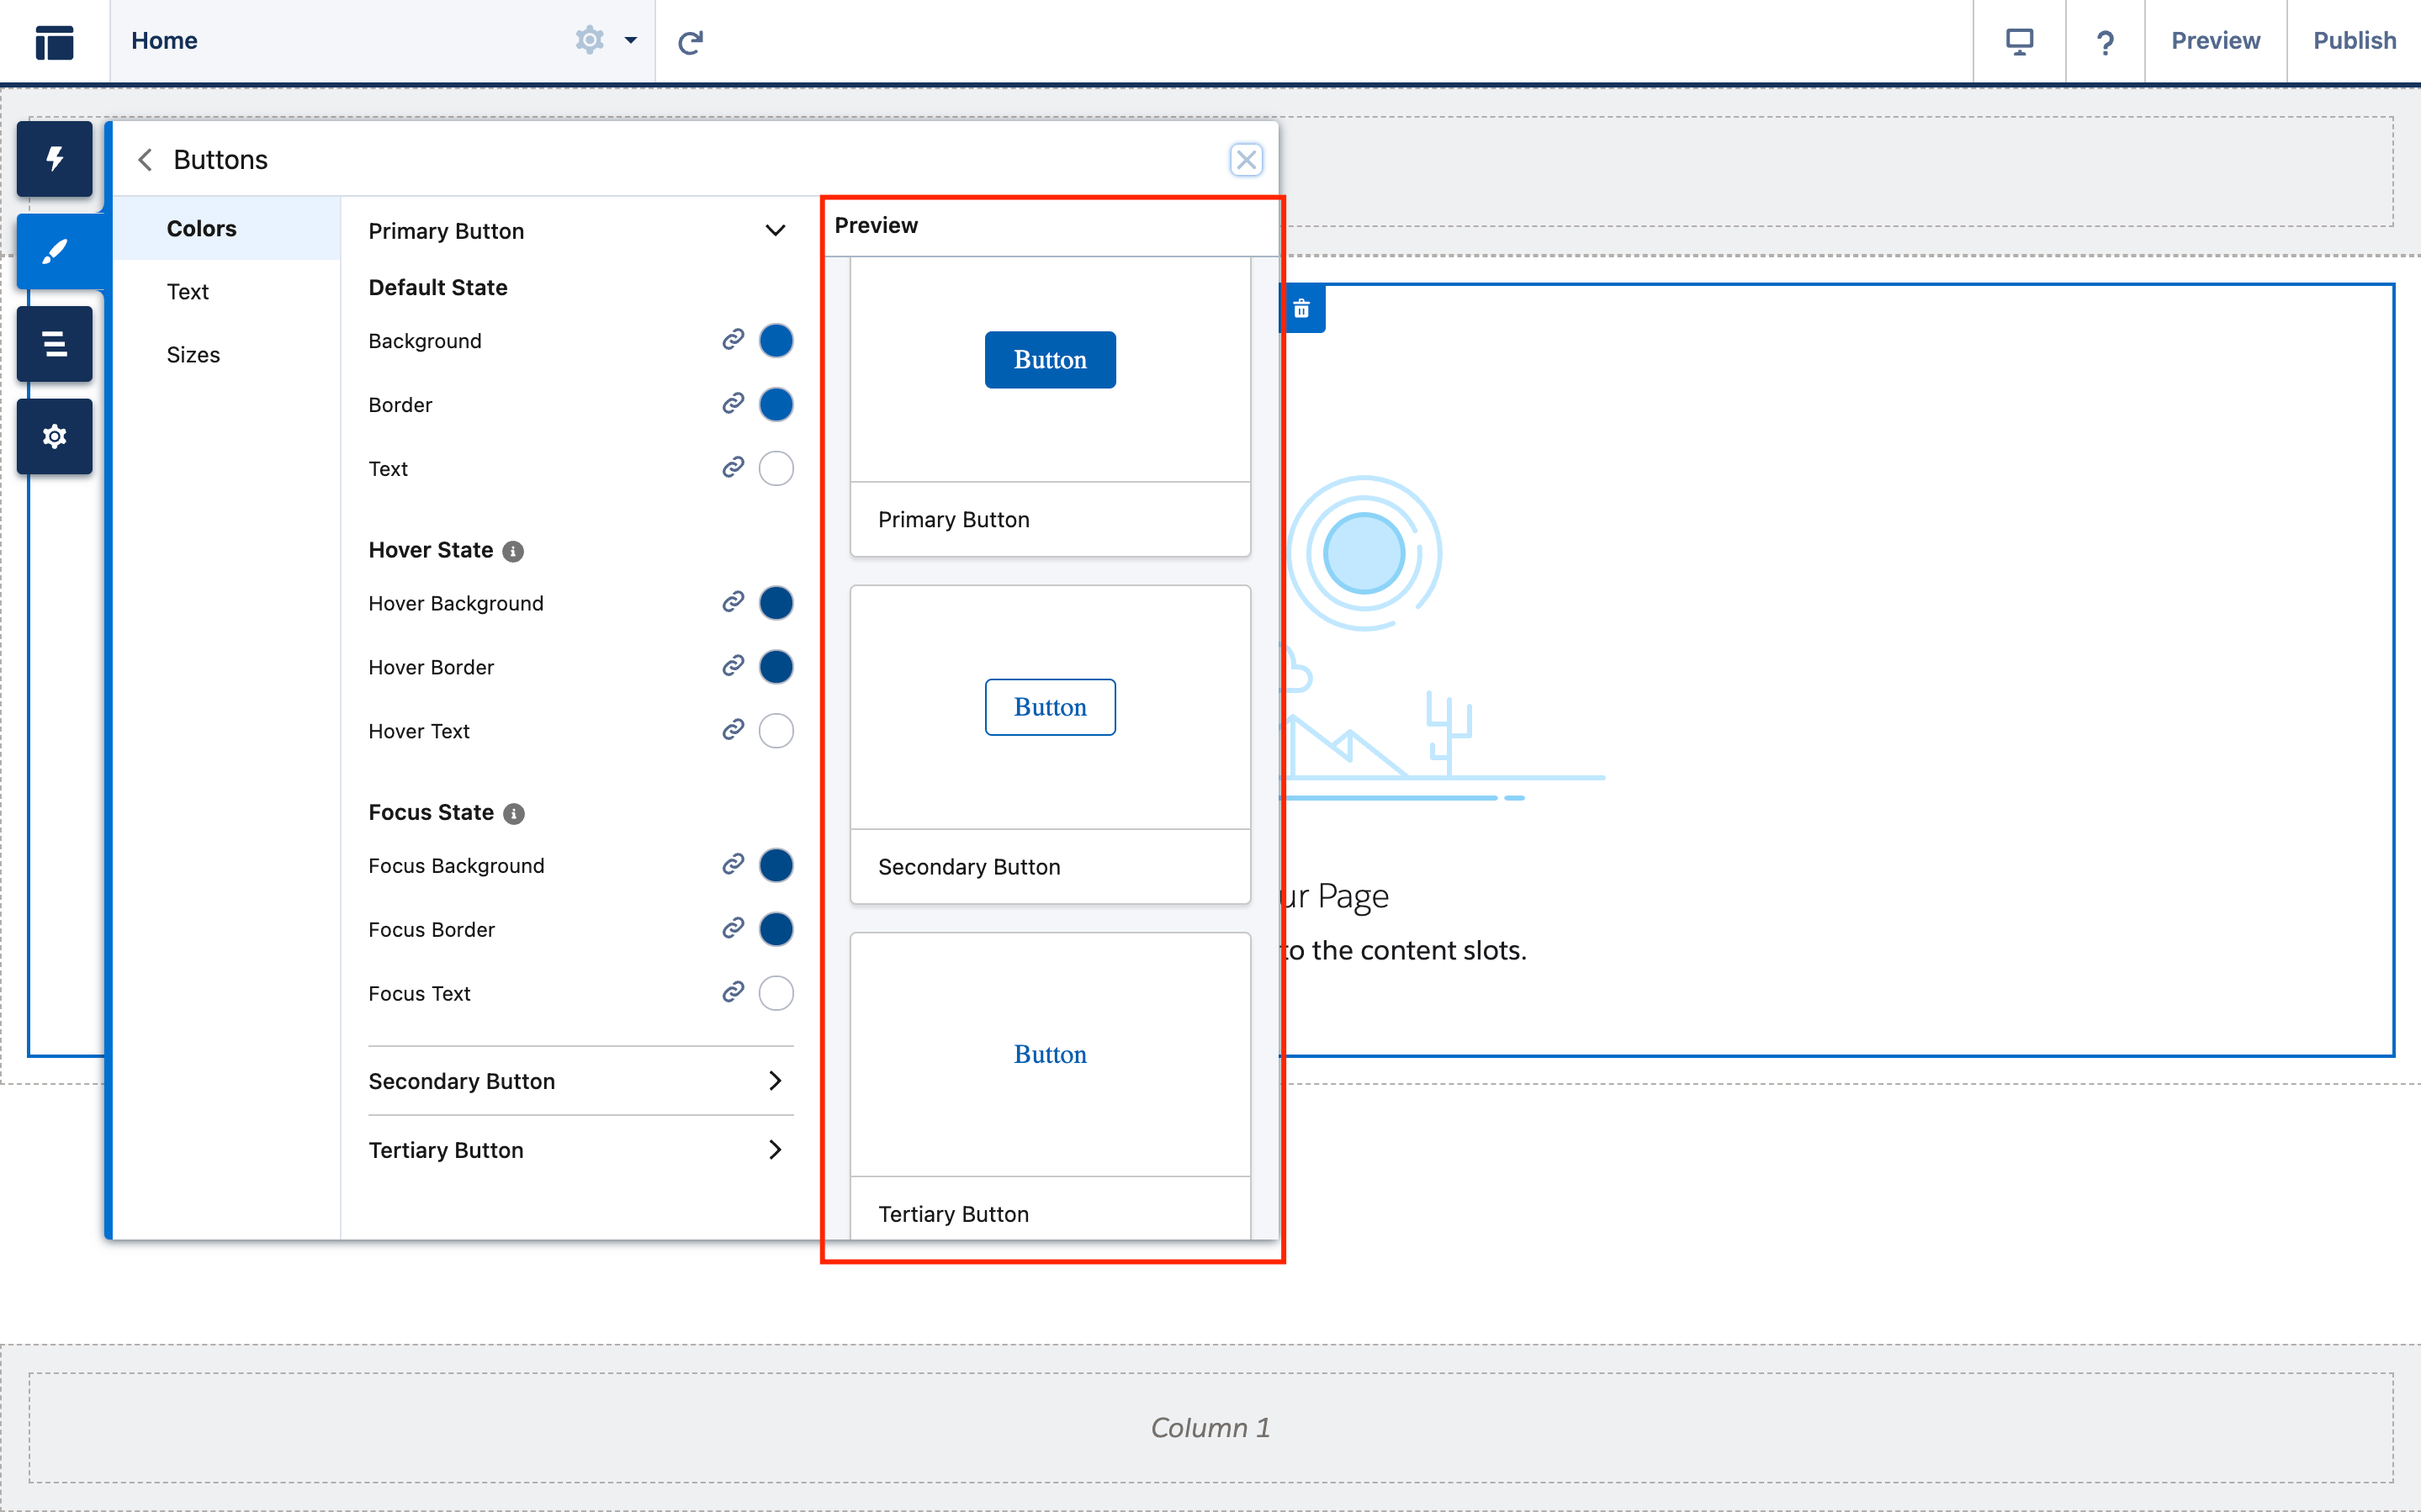
With the updated Theme → Buttons panel, you won’t find the property for Button Active color anymore. Nevertheless, you still have the option to utilize the –dxp-s-button-color-active styling hook in your CSS to define the color of an active button.
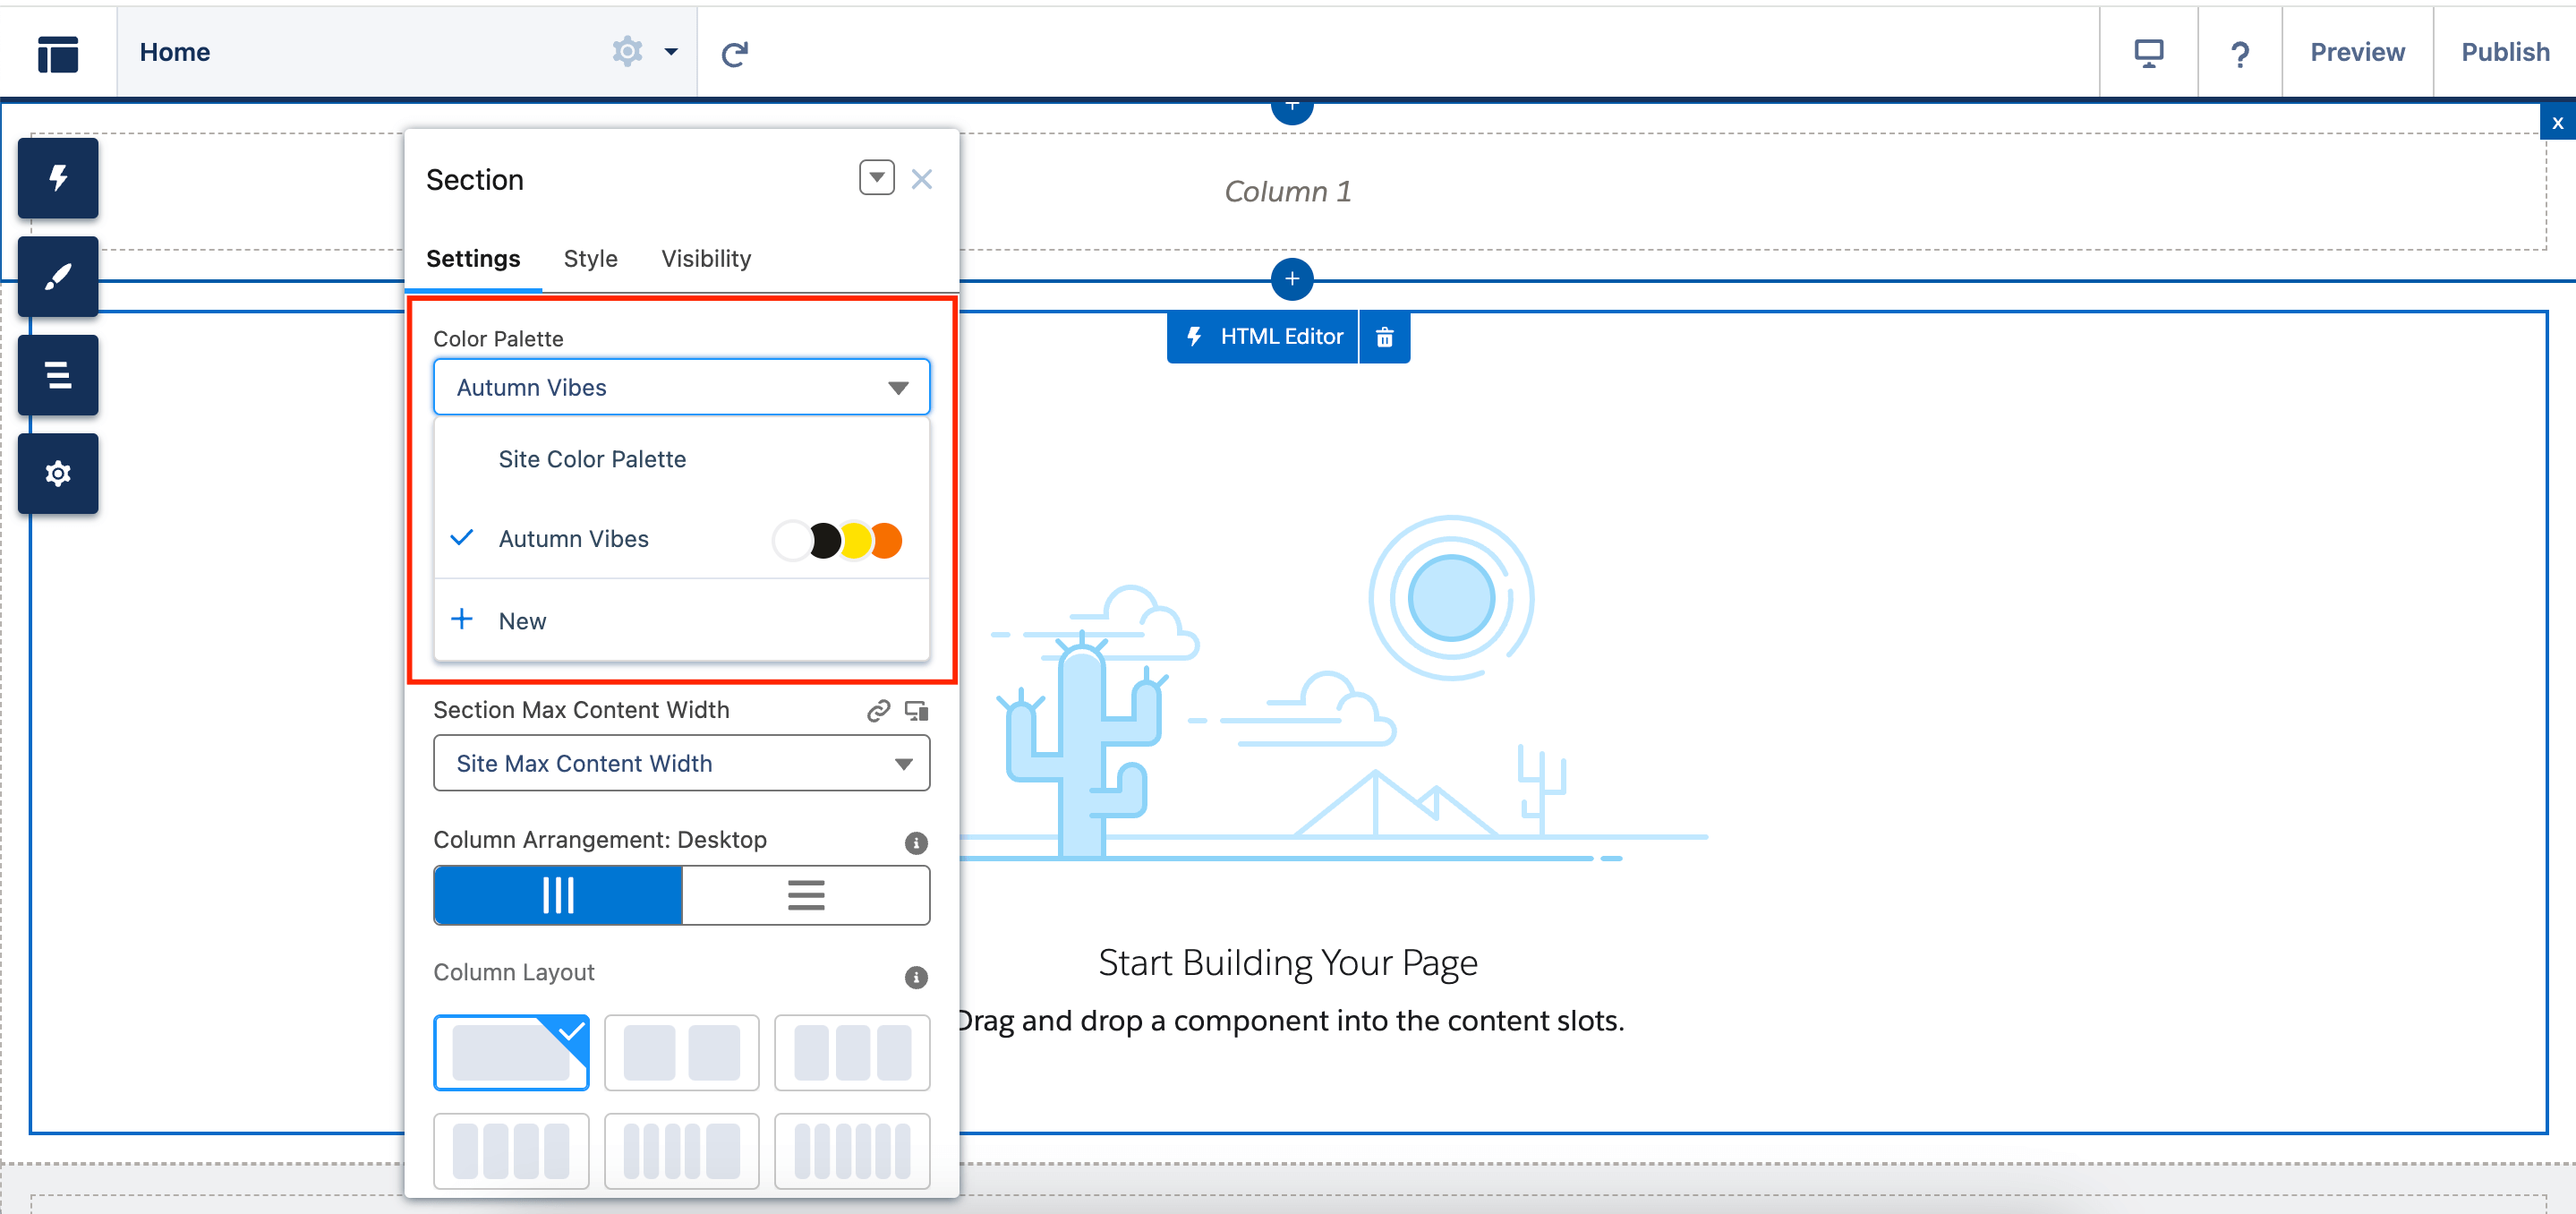
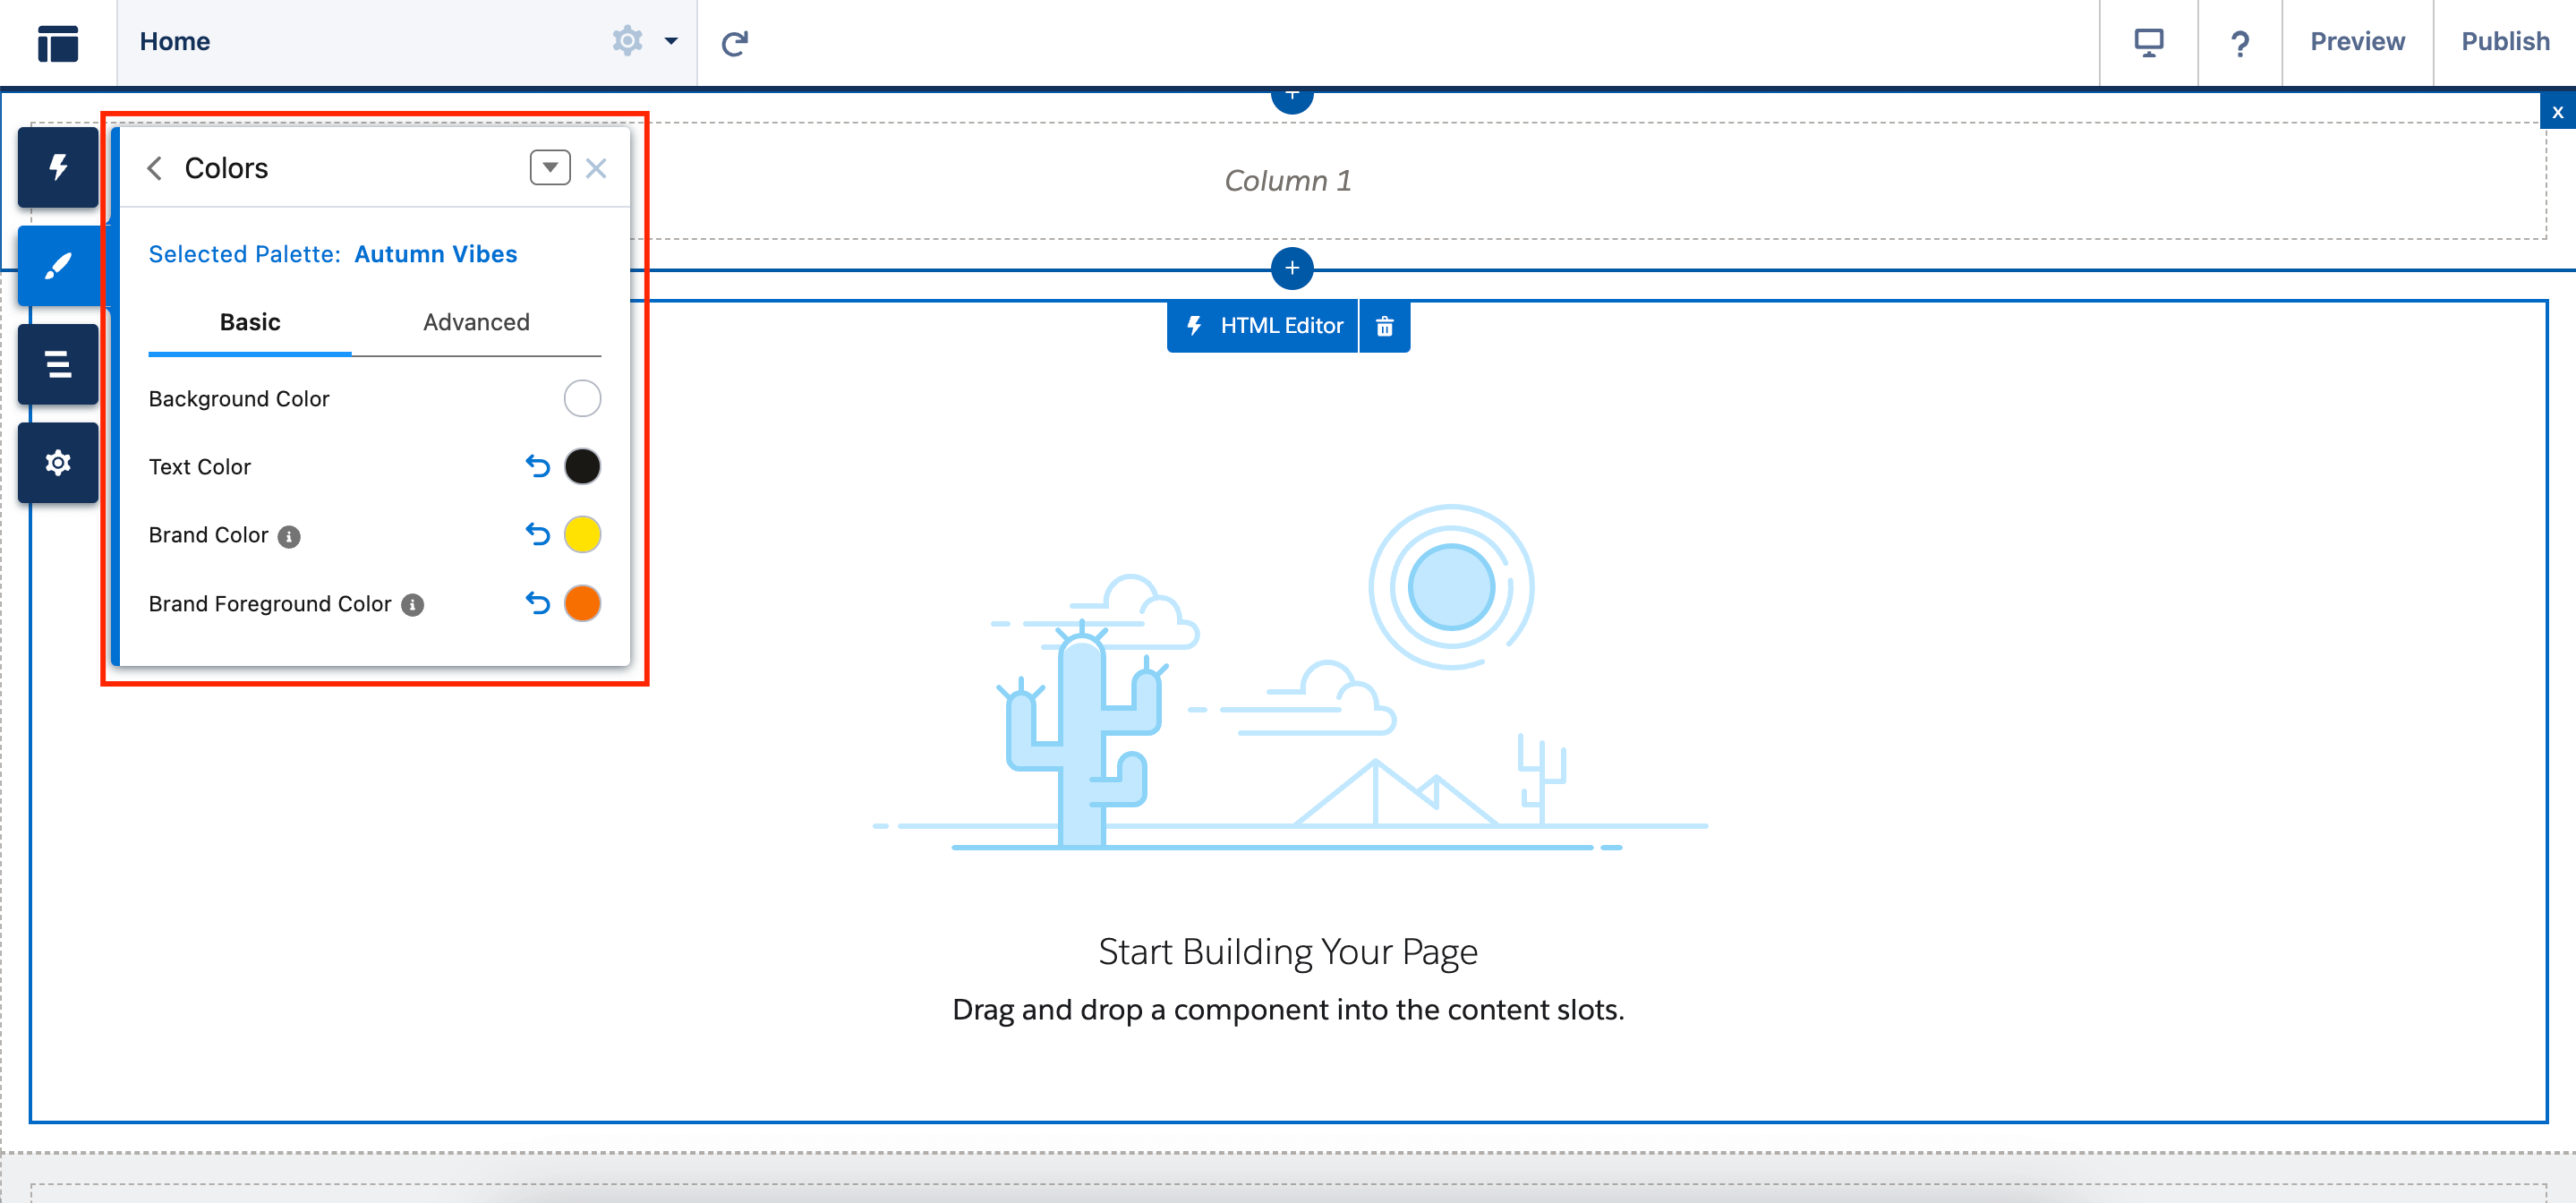
Apply a color scheme to the Columns component on all LWR sites. Choose a color from the Color Palette menu in the component property panel, or click New to make a palette for that component. When you make or modify a color palette for a column or section, a new Color Palette panel will be accessible in the Theme panel.
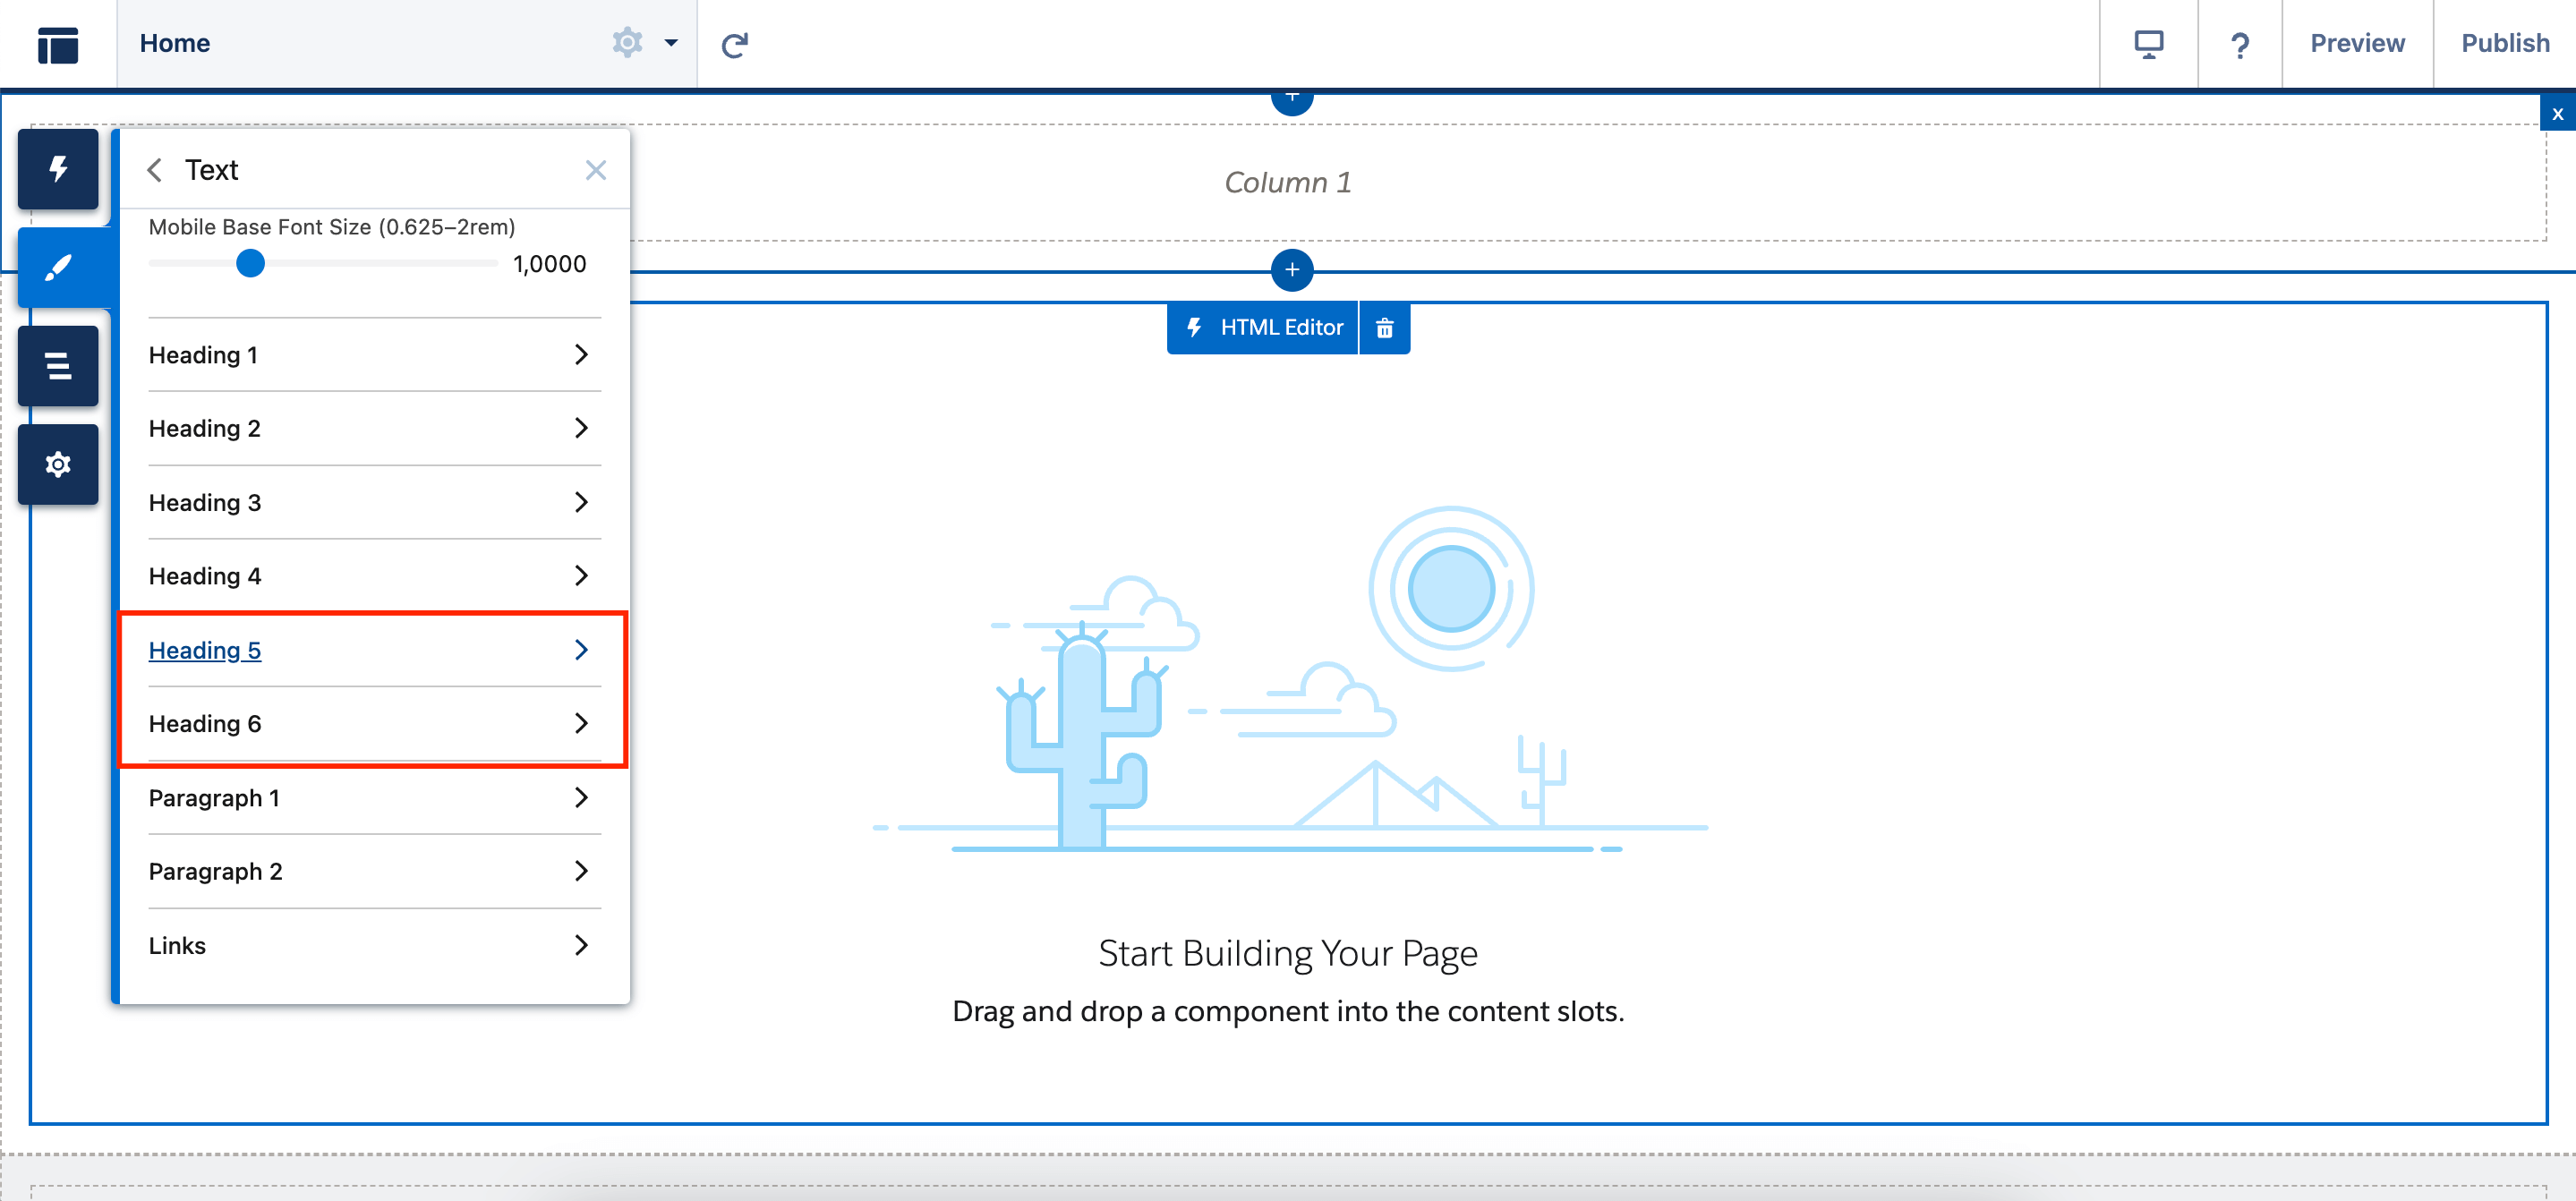
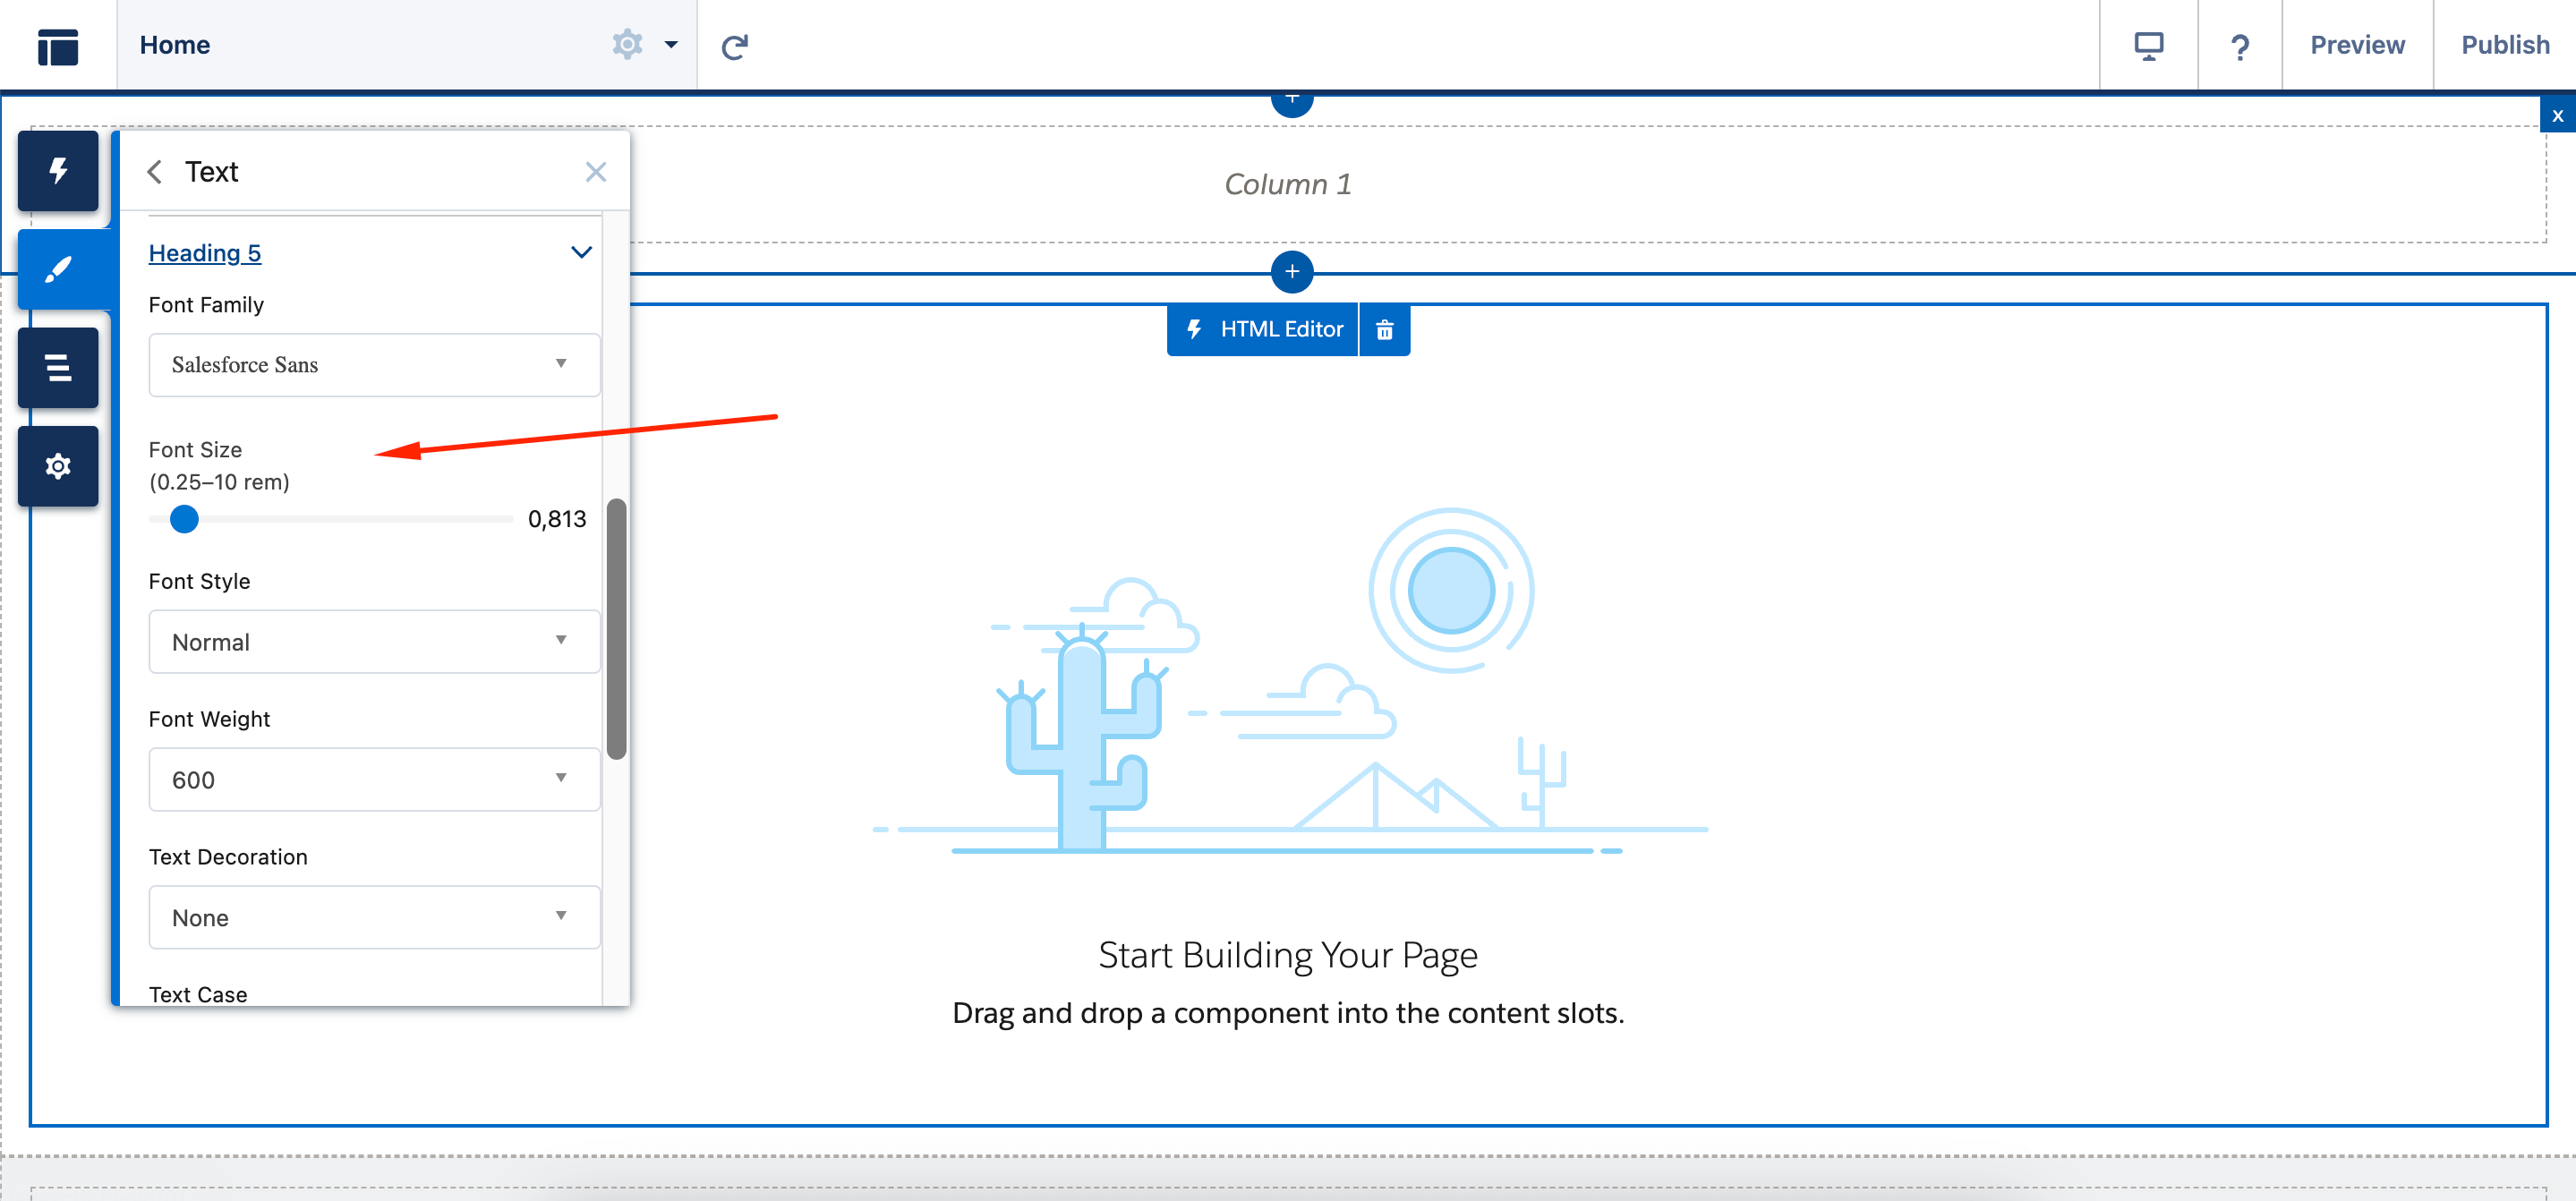
In the Theme → Text panel for all LWR sites, you can personalize the appearance of Headings 5 and 6. As with all other text elements, you can define the font family, font size, character spacing, and other attributes. Headings 5 and 6 are also accessible through the Text Style menu in the Text Block component.
2. Customize the URLs for Accounts and Contacts to Enhance SEO (Generally Available)
Enhance organic traffic to your LWR sites by utilizing new URL configuration solutions that enhance search engine optimization (SEO). Generate SEO-friendly URL snippets, or slugs, for your site’s account and contact pages.
A slug substitutes the record ID in the URL with pertinent and easily understandable information, ensuring that search engines effectively display your site’s page. Previously, SEO-friendly URLs were only accessible for custom object pages in enhanced LWR sites and Product and Catalog pages in LWR Commerce sites.
To set SEO-friendly URLs, go to your site’s Workspace, choose Administration tile → Preferences, and enable Use SEO-Friendly URL Slugs.
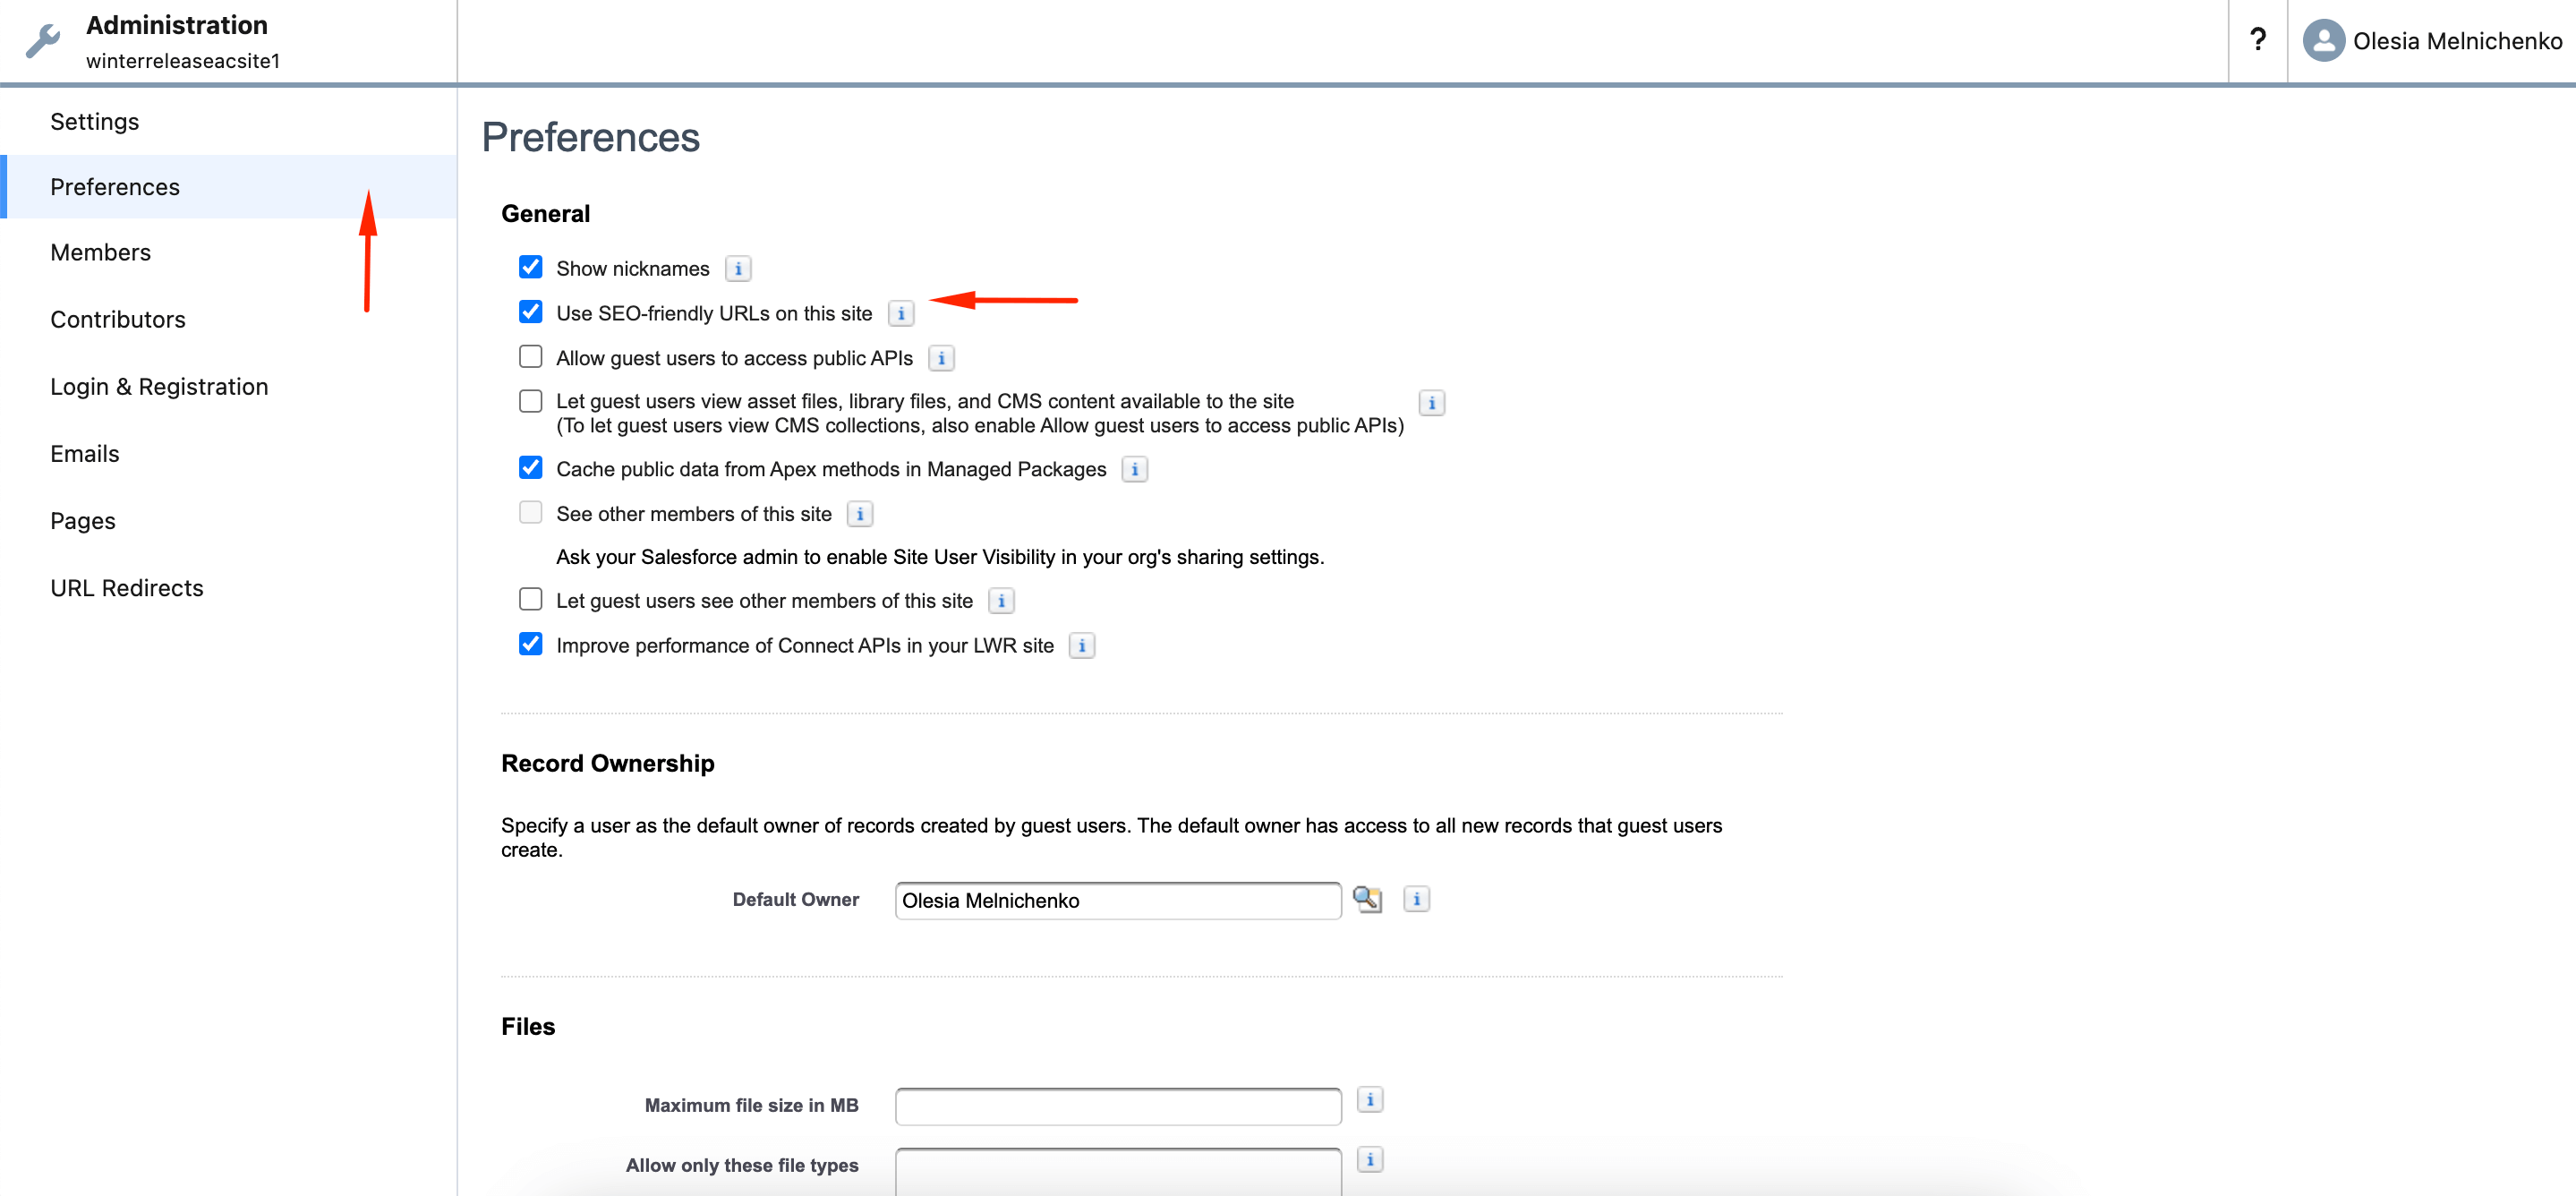
Plus, you can import slugs for your pages from a CSV file in bulk from Object Manager. Add the SEO tab to Lightning record pages, and then slugs can be added and edited at the record level.
3. Enhance Your LWR Site Experience by Curating Data Providers on a Page (Beta)
With the latest Salesforce Winter ’25 Release for Experience Cloud, you can set up and customize data providers on a page in Experience Builder for LWR sites to retrieve data from various sources. Besides, you have the option to utilize data from Apex or Record data providers in the page and its elements.
Data Provider Configuration is a pilot or beta service that is subject to the Beta Services Terms at Agreements – Salesforce.com or a written Unified Pilot Agreement if executed by Customer, and applicable terms in the Product Terms Directory. Use of this pilot or beta service is at the Customer’s sole discretion.
To make data providers work on an LWR site page, go to Experience Builder, click the Pages menu, find the three dots right next to it to enter the Page Action menu, and choose Page Settings. After that, hit the Data (Beta) tab.
4. Customize Navigation and More with Revamped Components for LWR Sites
The upcoming Salesforce Winter ’25 Release allows you to customize the Navigation Menu component extensively. Thus, you can create a navigation experience for visitors to your desktop and mobile site, all code-free. Experiment with the beta version of the Site Header component to design page headers that feature your company’s logo and reflect your brand’s style.
Use the Grid component to ensure that the cells have consistent heights, leading to a neater visual presentation. The Site Logo component is now accessible in the component palette on all site pages.
On top of it, you can customize the Navigation Bar for desktop screens and Mobile Navigation for mobile screens within the Navigation Menu component. Fine-tune colors, borders, spacing, text styles, accent lines, and more for both screen sizes. To get this done, go to Page Structure → Navigation Bar → Settings.
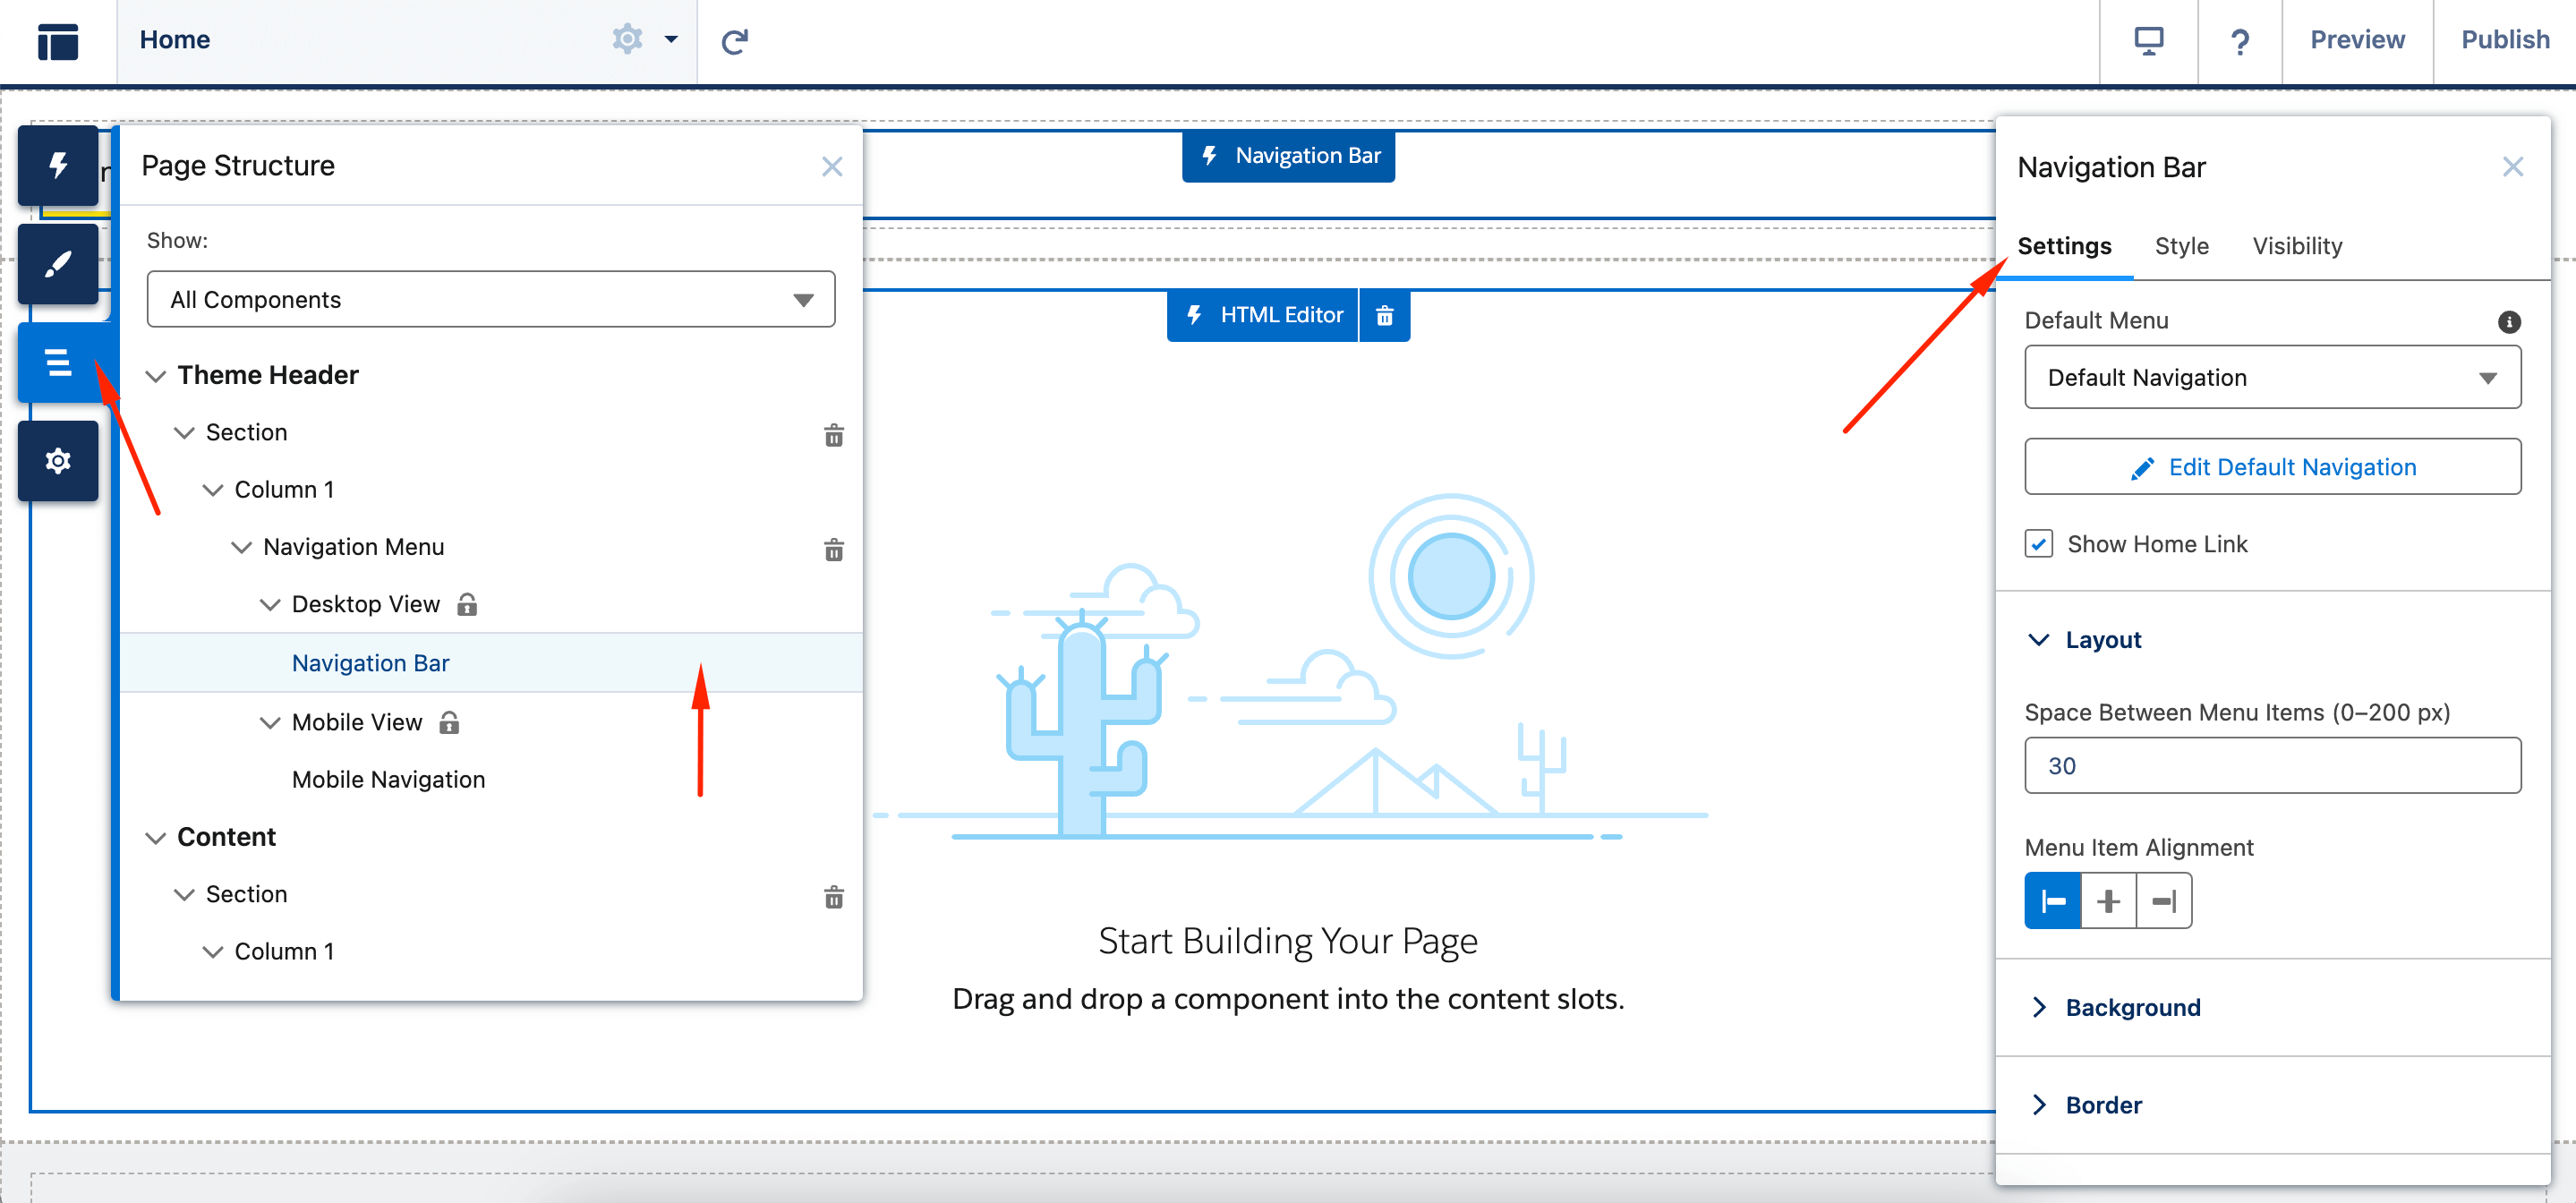
When viewed on a tablet in landscape mode, the desktop navigation is displayed, while in portrait mode, the mobile navigation is shown. You have the option to include these kinds of menu items: External URL, Menu Label, Salesforce Object, and Site Page.
The beta version of the new Site Header component includes options for your company’s logo, a navigation menu, and a button. Customize the header by adding or removing components according to your website’s requirements. Responsive properties are only functional in enhanced LWR sites for this component.
To utilize the Site Header with the Microsite template, navigate to Settings → Theme and generate a theme layout using the Simple Theme Layout feature. Apply the new layout to the pages where you want the site header to be displayed, remove the default header from those pages, and substitute it with the Site Header.
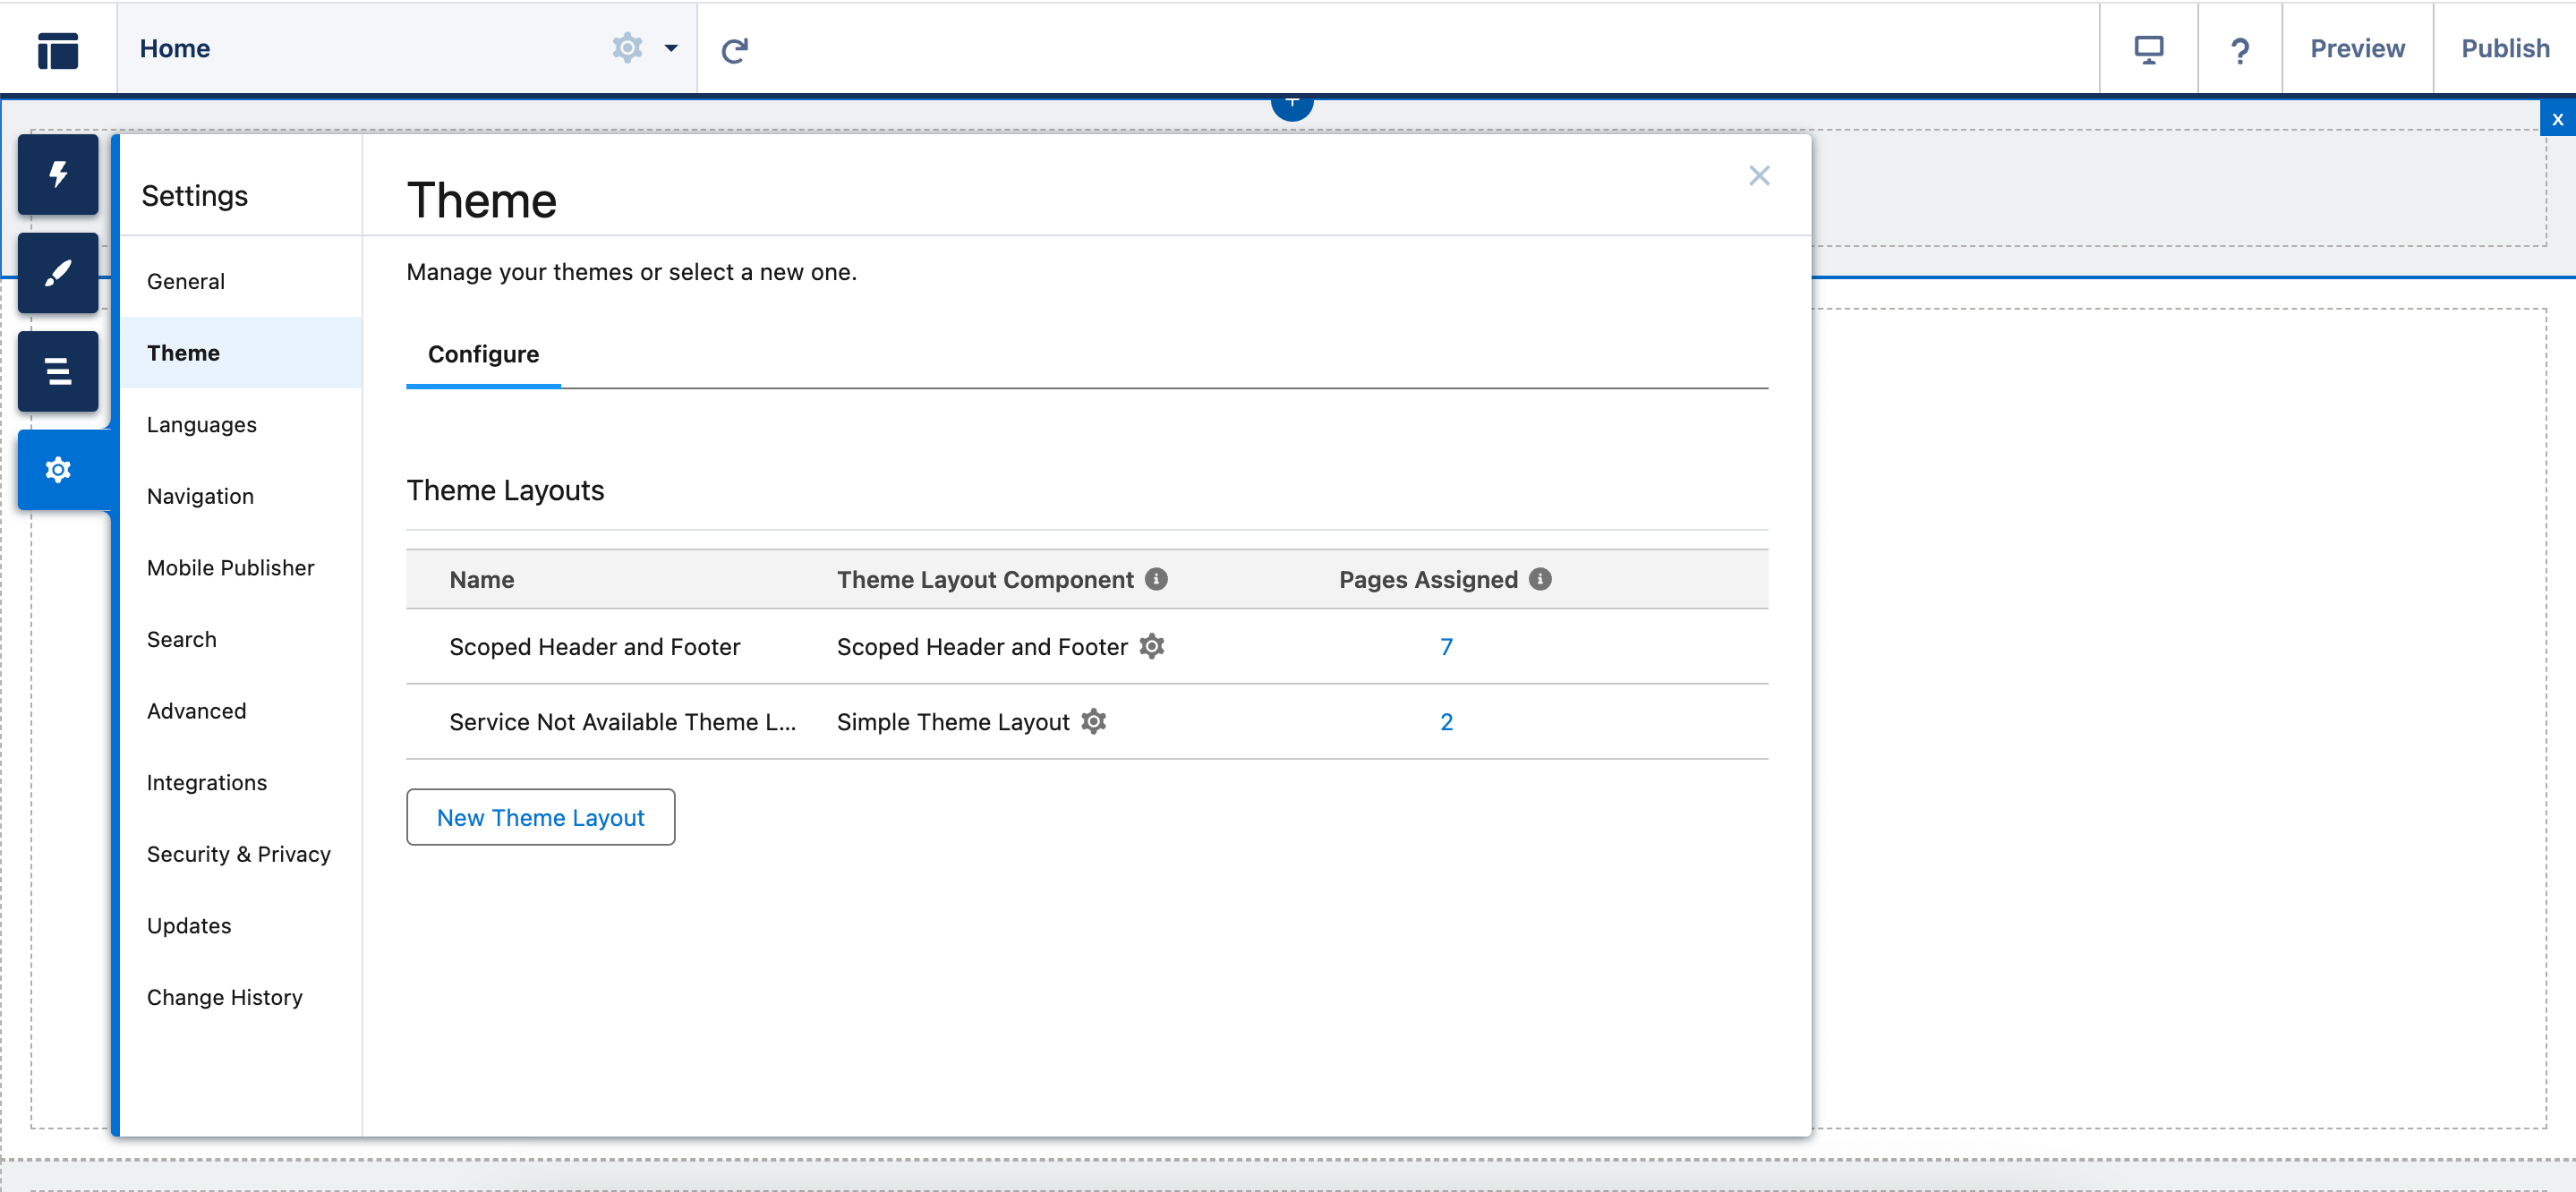
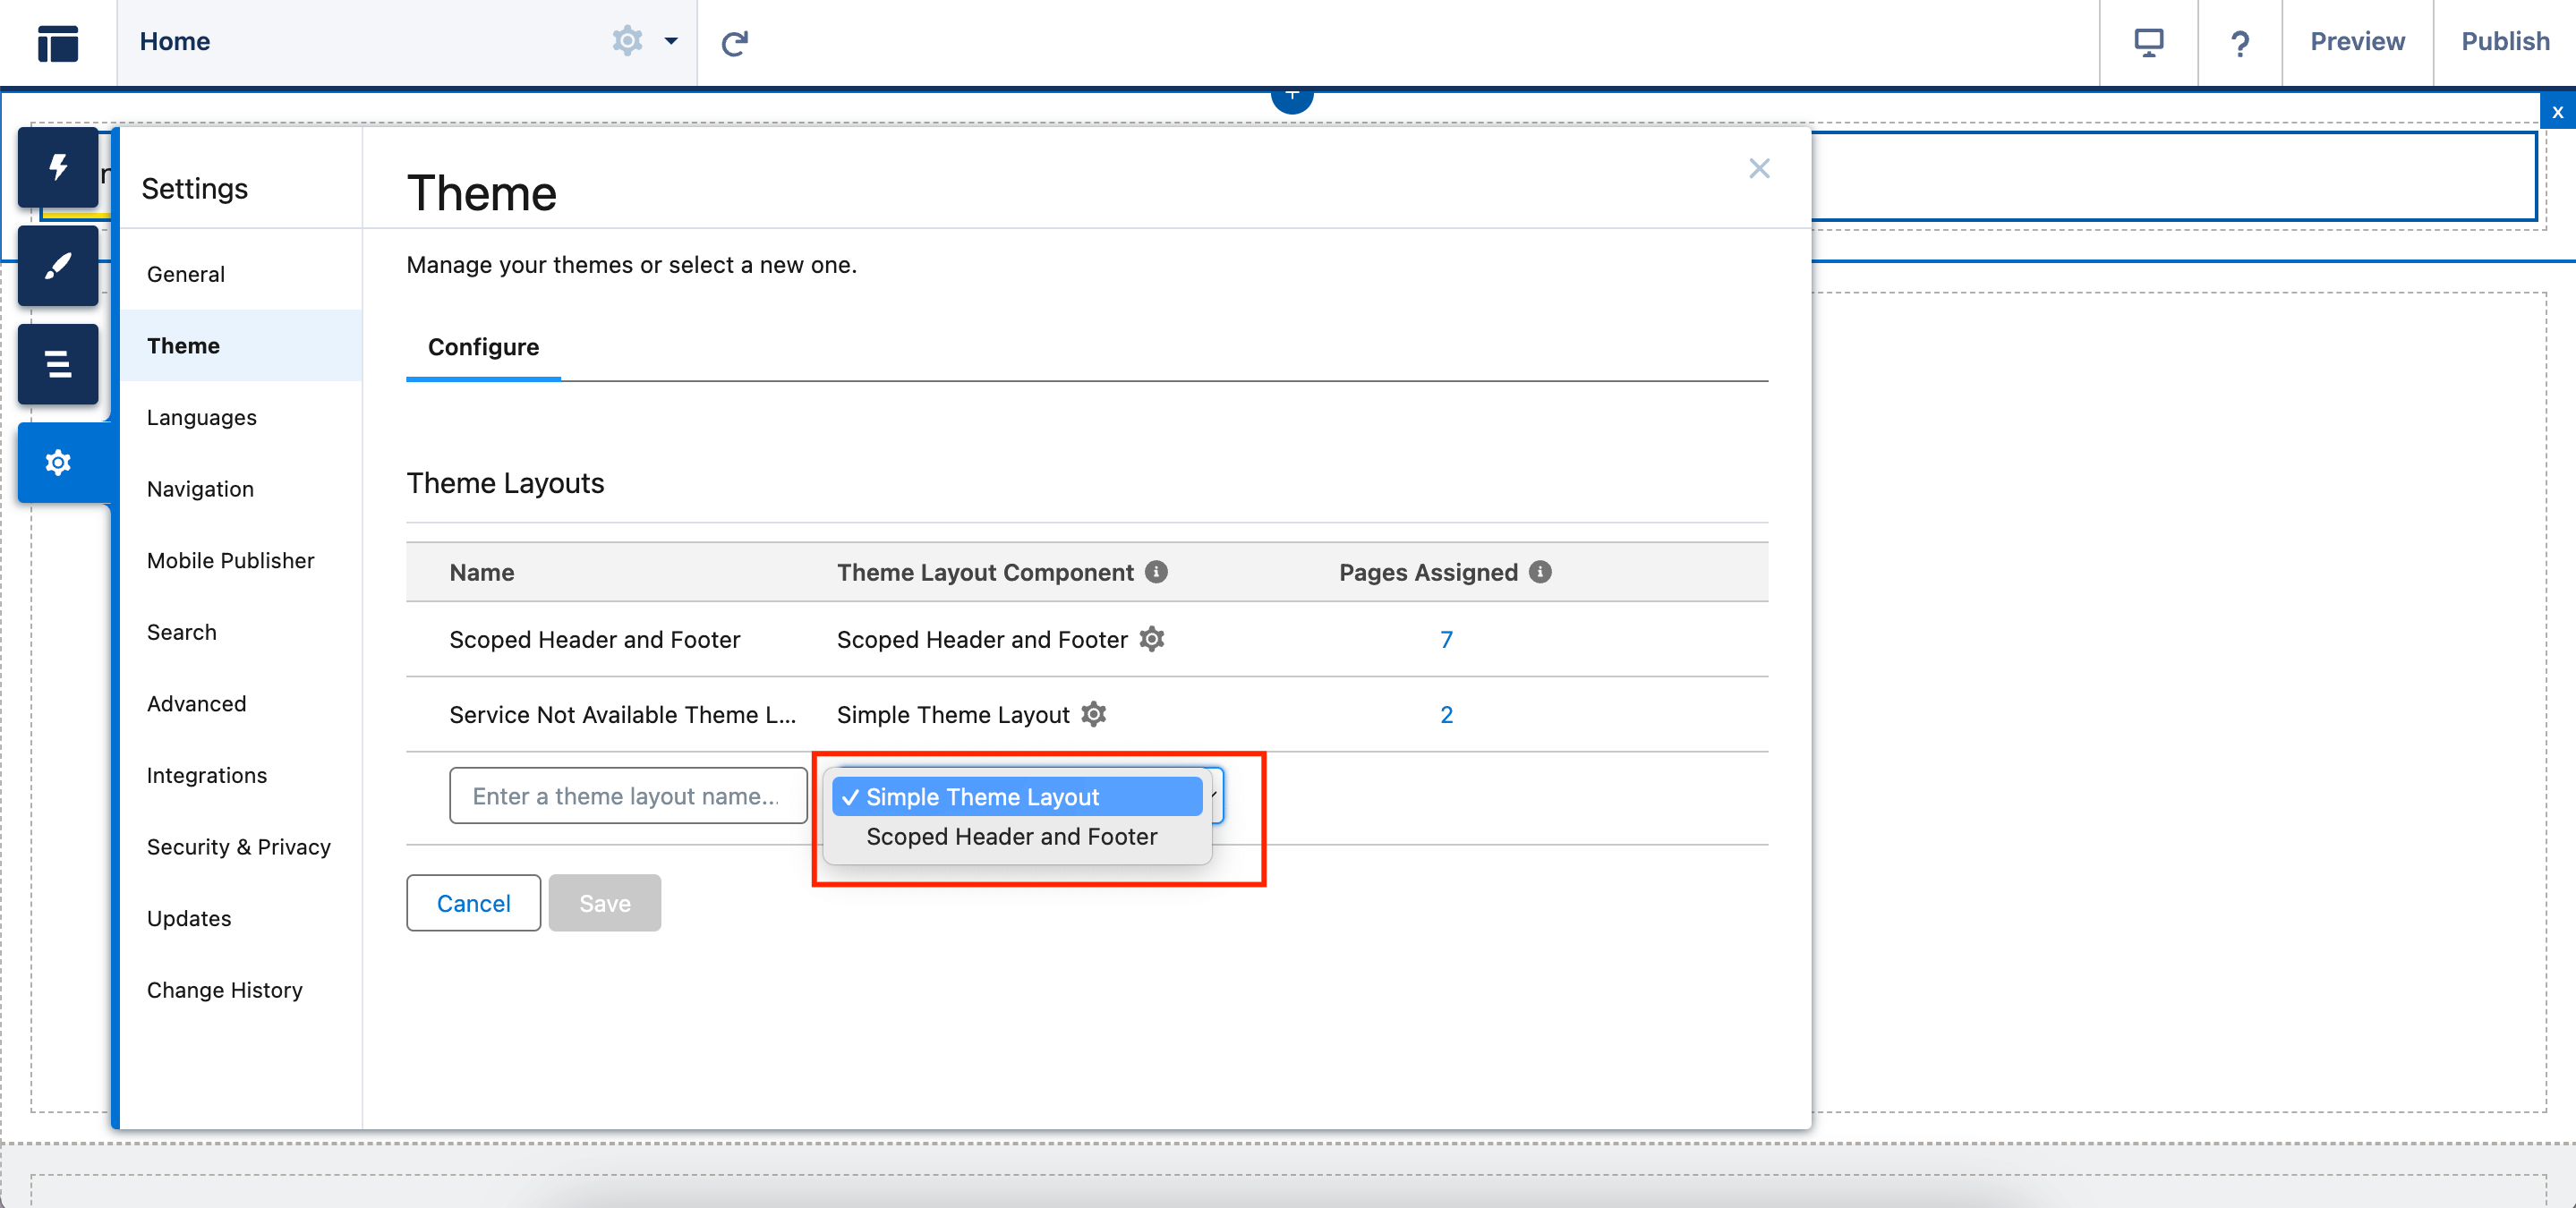
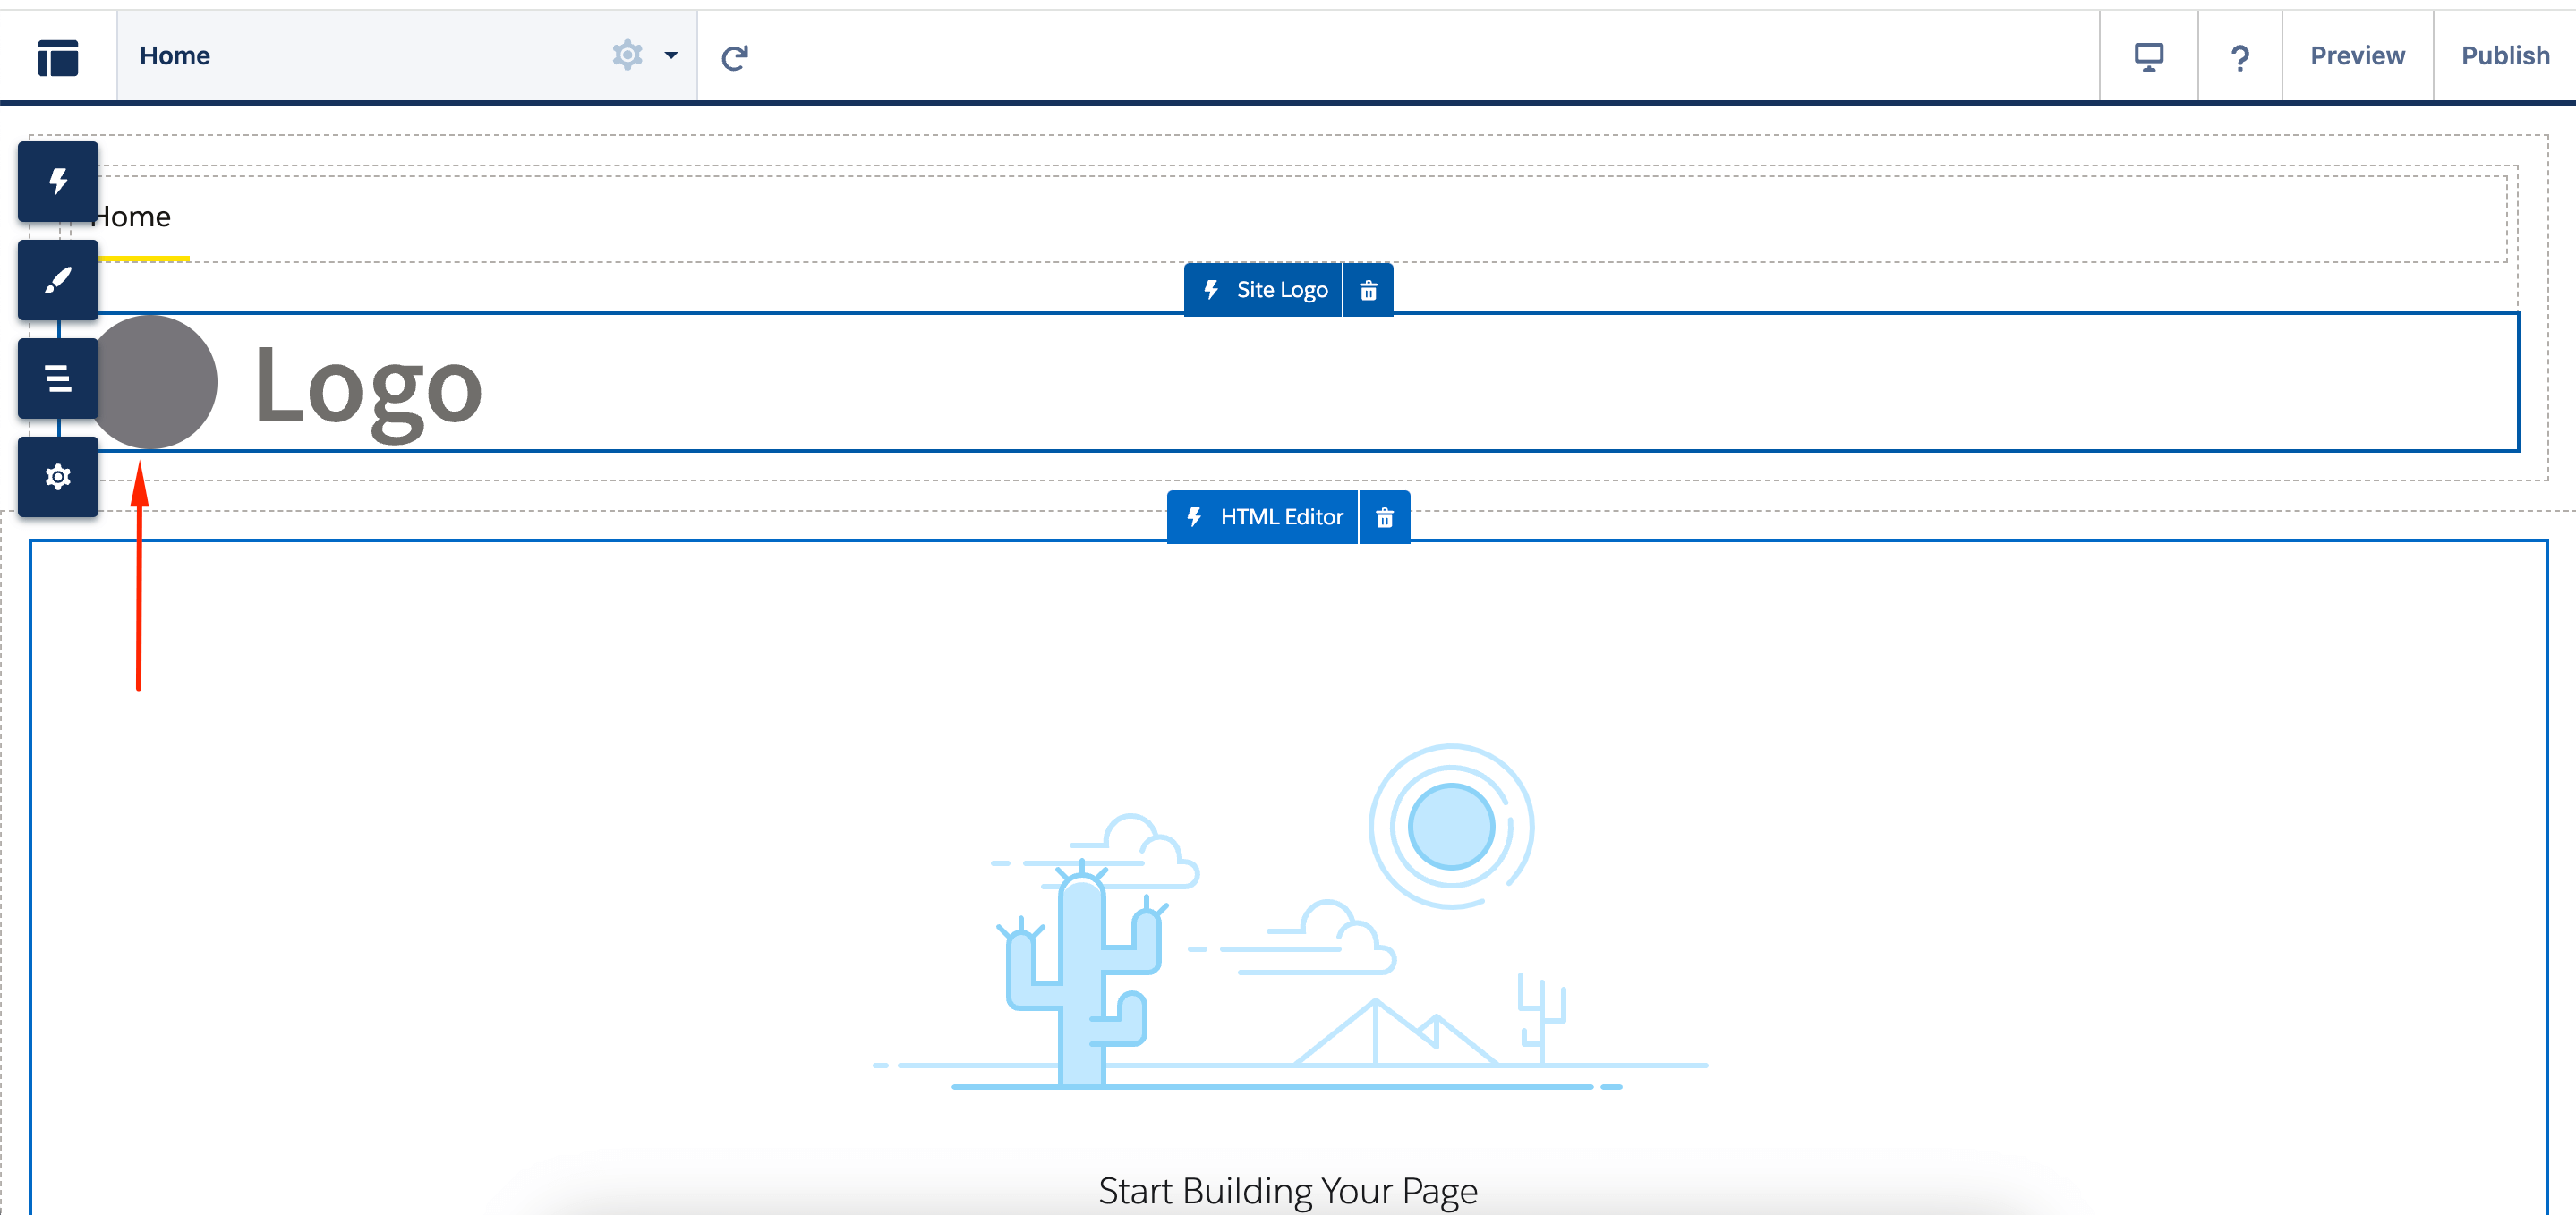
The Site Logo component in the latest Salesforce Winter ’25 update for LWR sites made with the Build Your Own or Microsite template now features a placeholder graphic for the logo, which enhances the visibility and customization of this field.
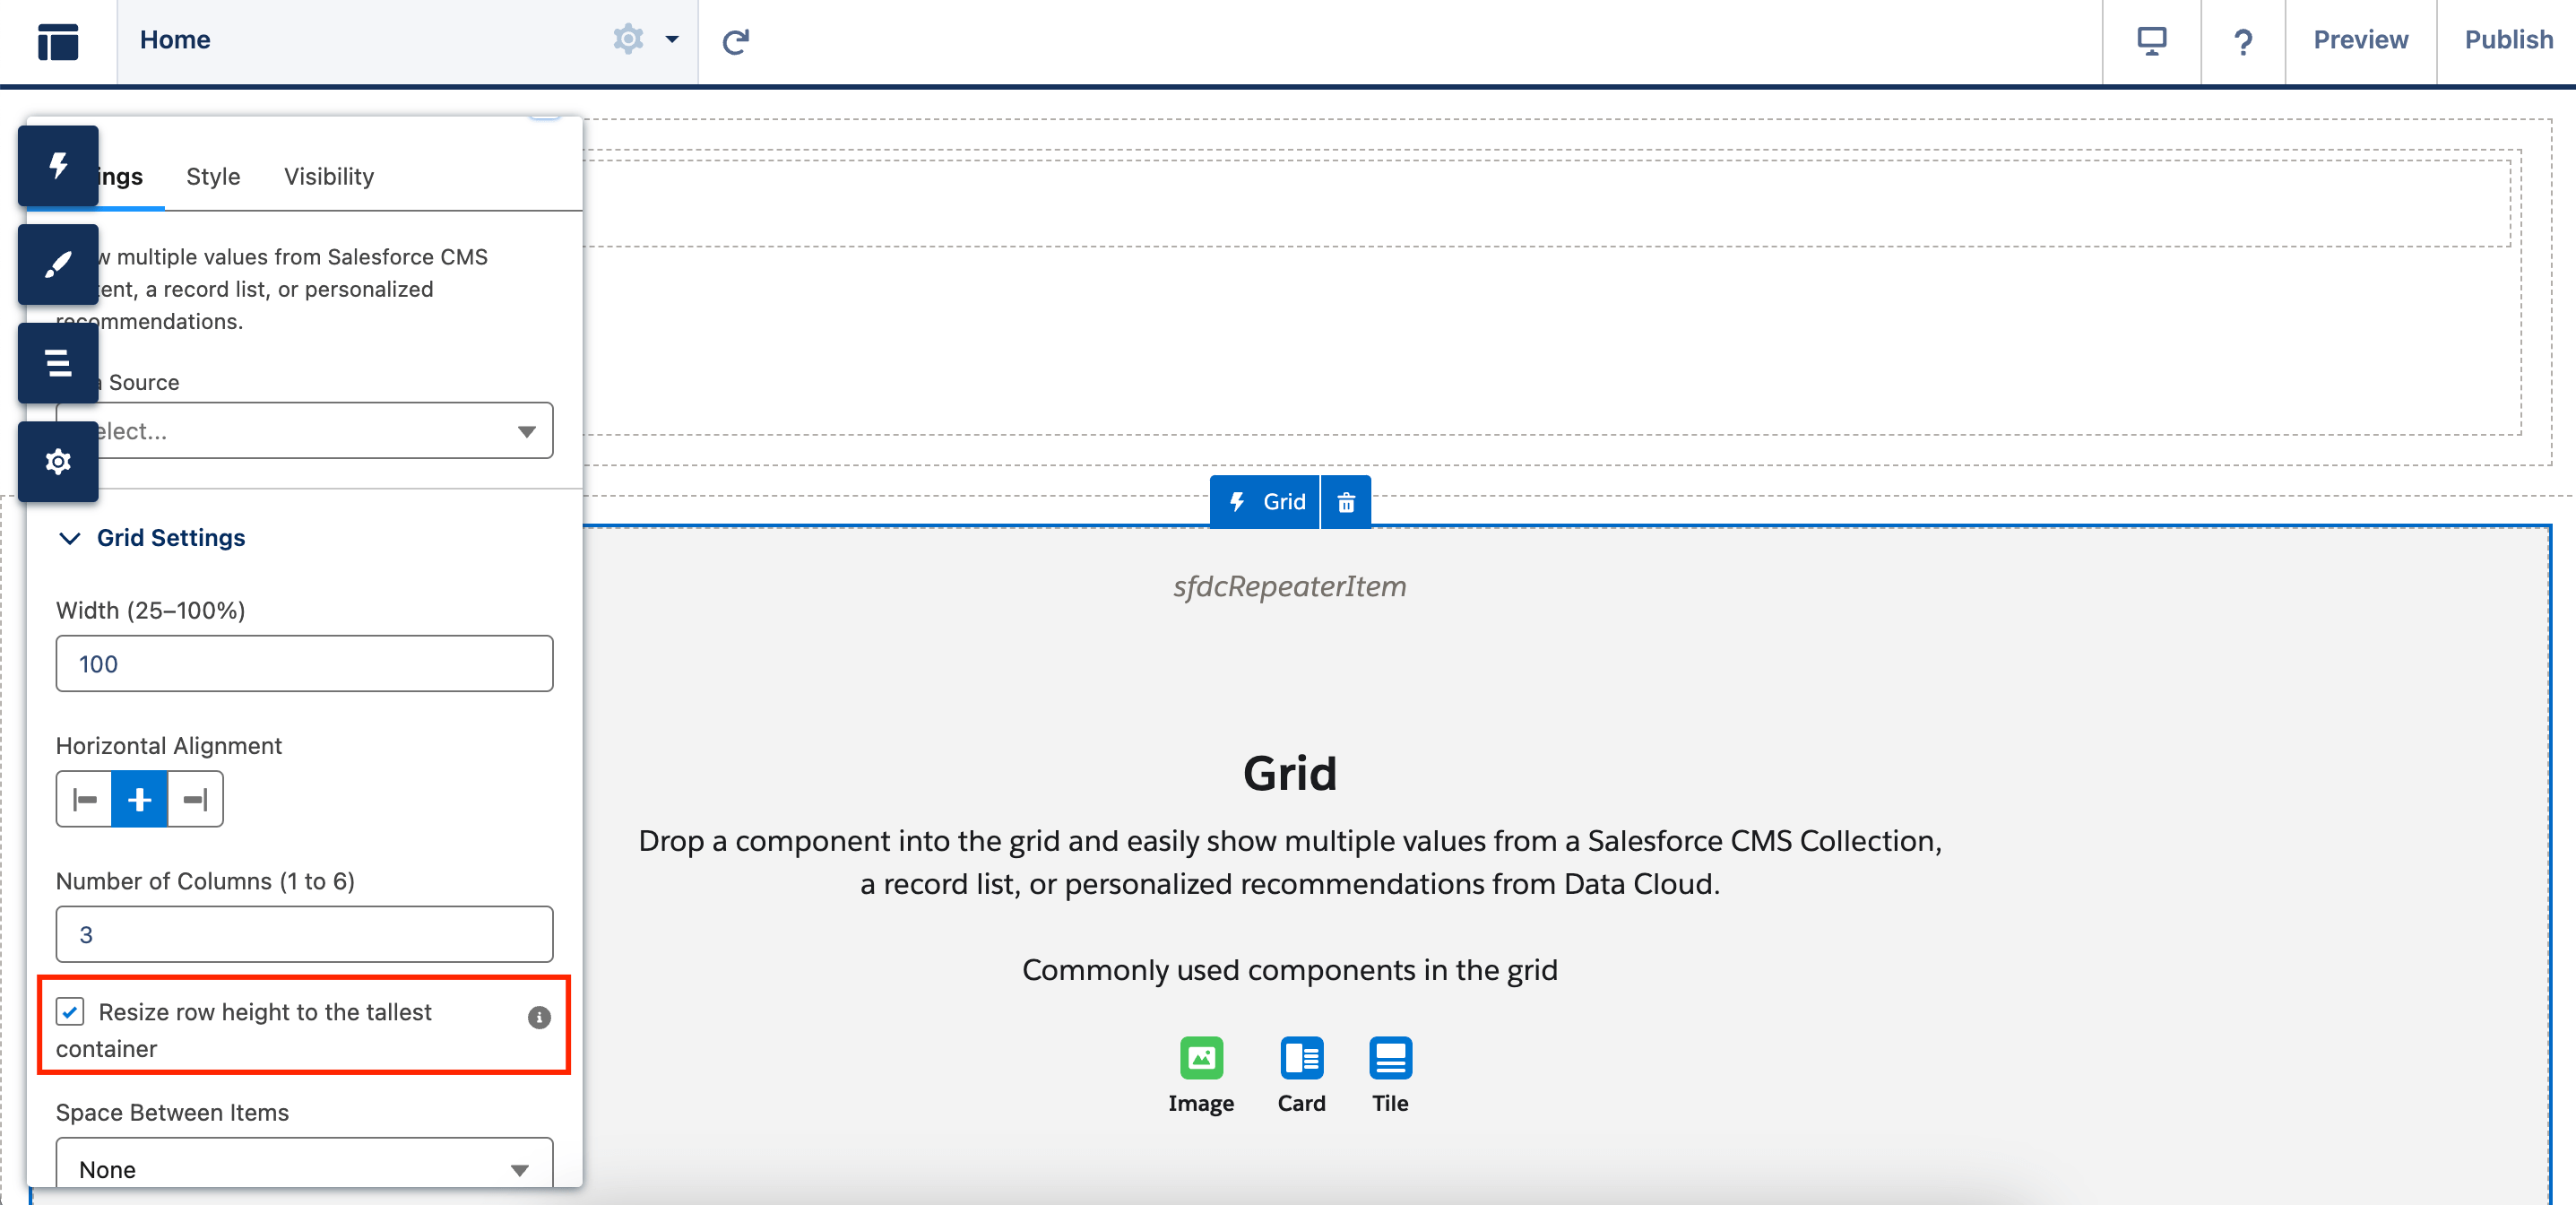
For all LWR sites, the Grid component now offers a new feature that allows you to adjust the height of all cells in the grid to match the tallest container. This enables you to maintain vertical alignment of the grid cells.
5. Use Improved Data Cloud to Capture More Events
Ecommerce folks, this is your high time! You can now record checkout, order, and cart events on your improved LWR websites. Once you link your websites to Data Cloud, the integration takes care of the background process of linking your LWR sites to Data Cloud. What events can be captured?
- Begin checkout
- Enter contact info during checkout
- Register during checkout
- Enter shipping address during checkout
- Enter billing address during checkout
And a lot of others! Check out the full list in the official release notes.
To set up Data Cloud integration, go to Experience Builder, and select Settings → Integrations. On the Data Cloud tile, hit Add to Site and Share site data with Data Cloud (in our screenshot, it’s currently unavailable).
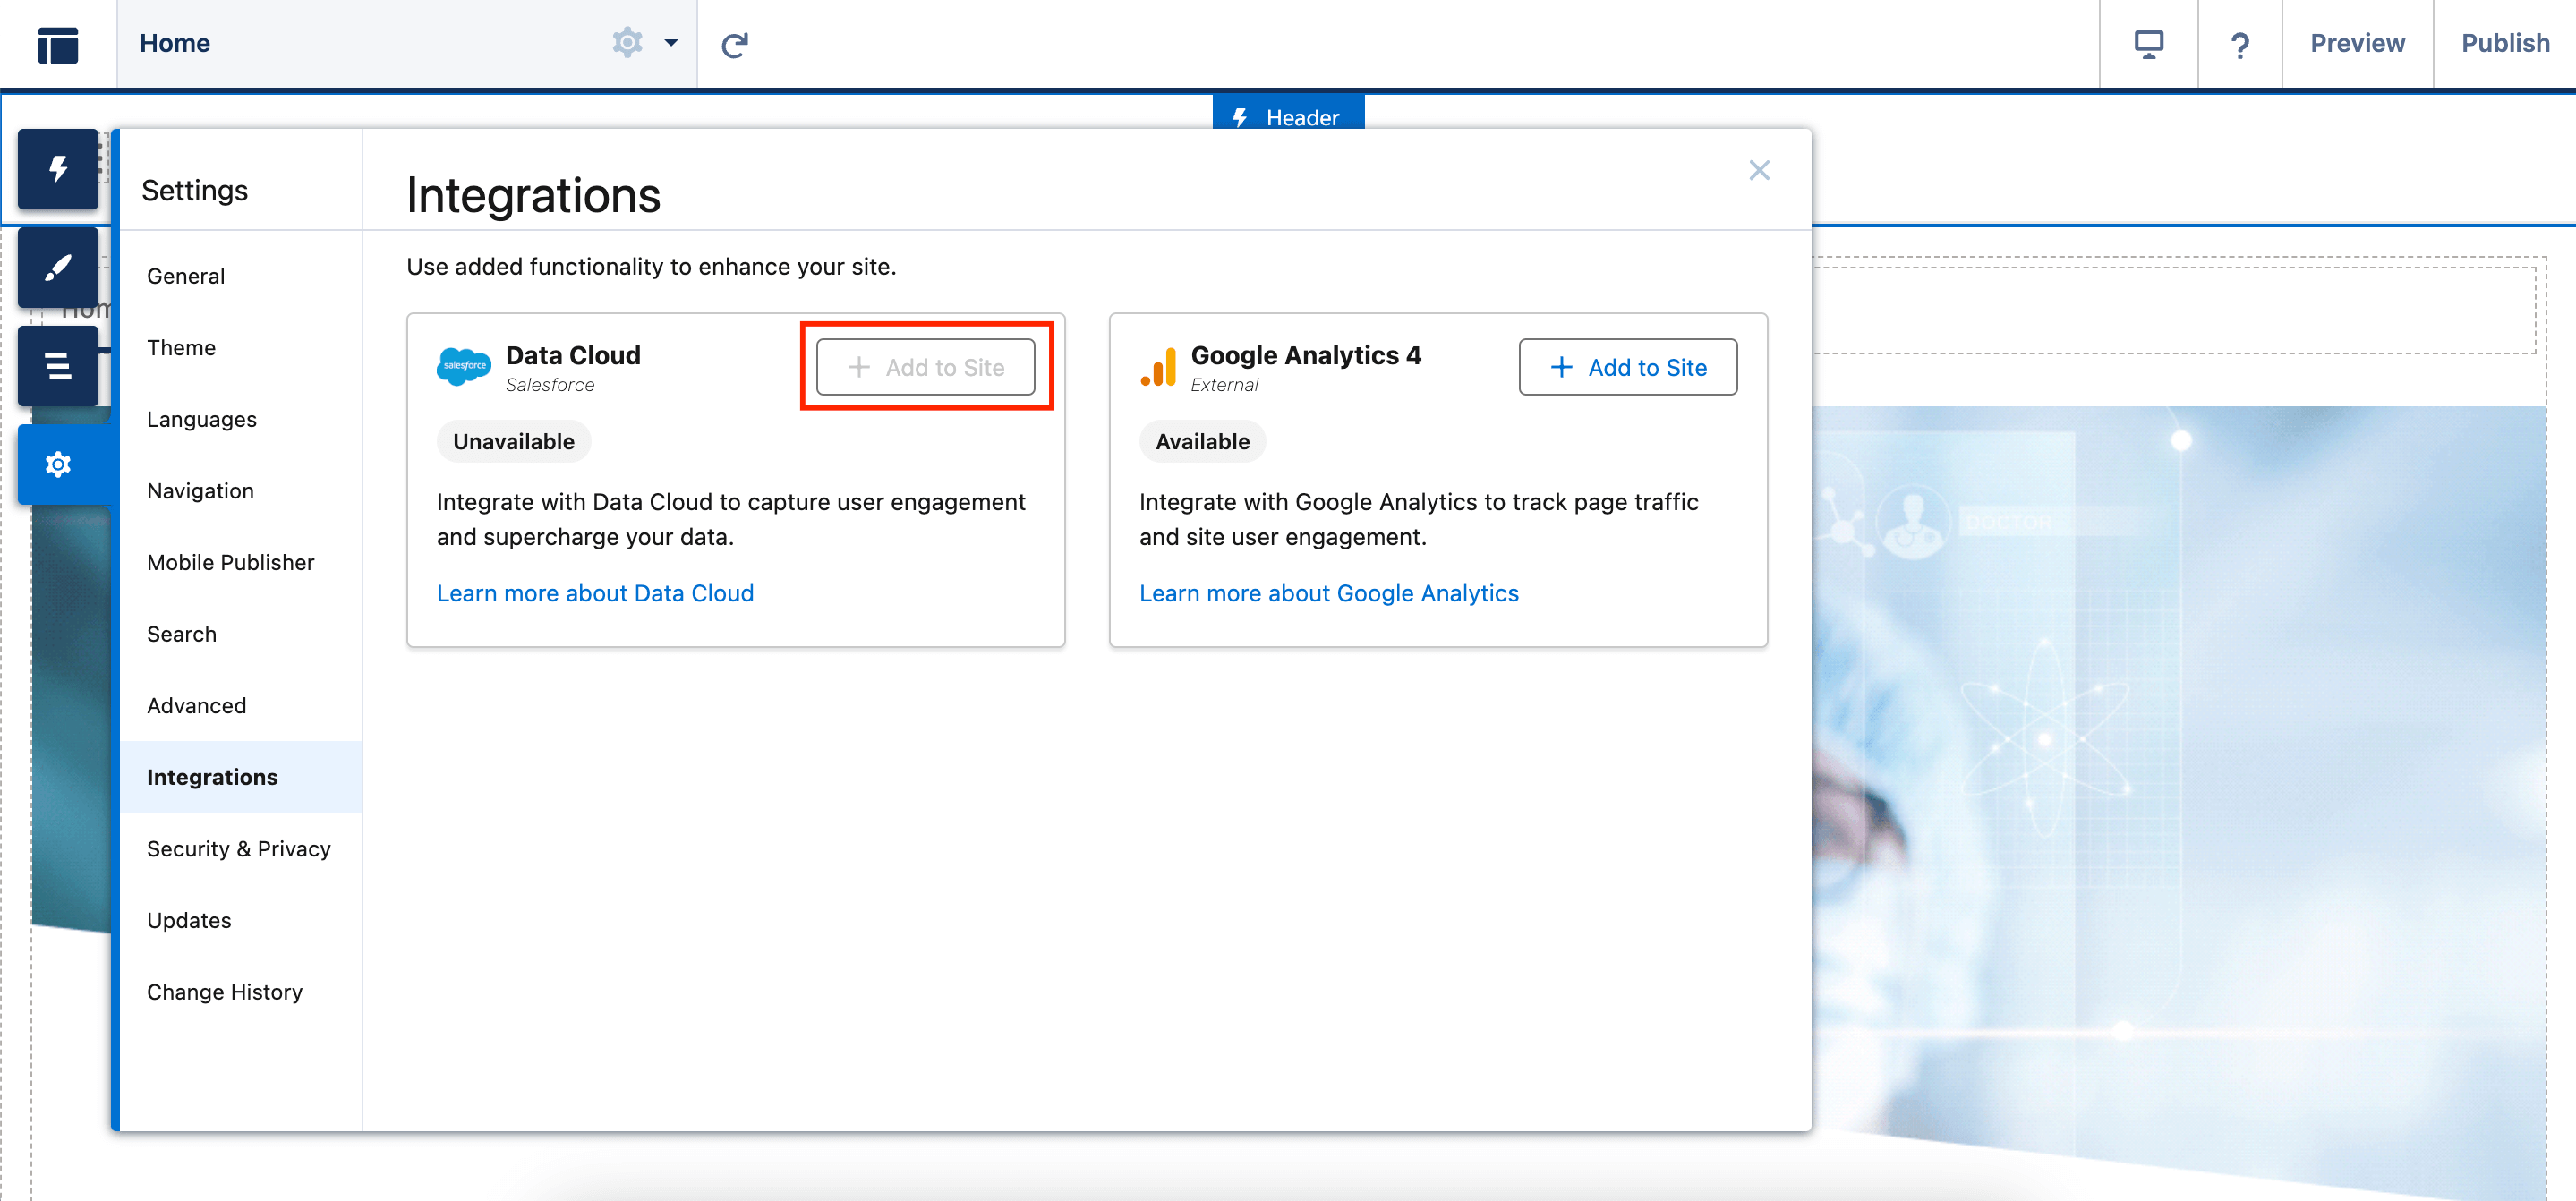
When Data Cloud is enabled, the integration version is listed on the integration card. To start sending user engagement data to Data Cloud after your version upgrade, do not forget to publish your site.
6. Link Files from Your LWR Site to Salesforce (Beta)
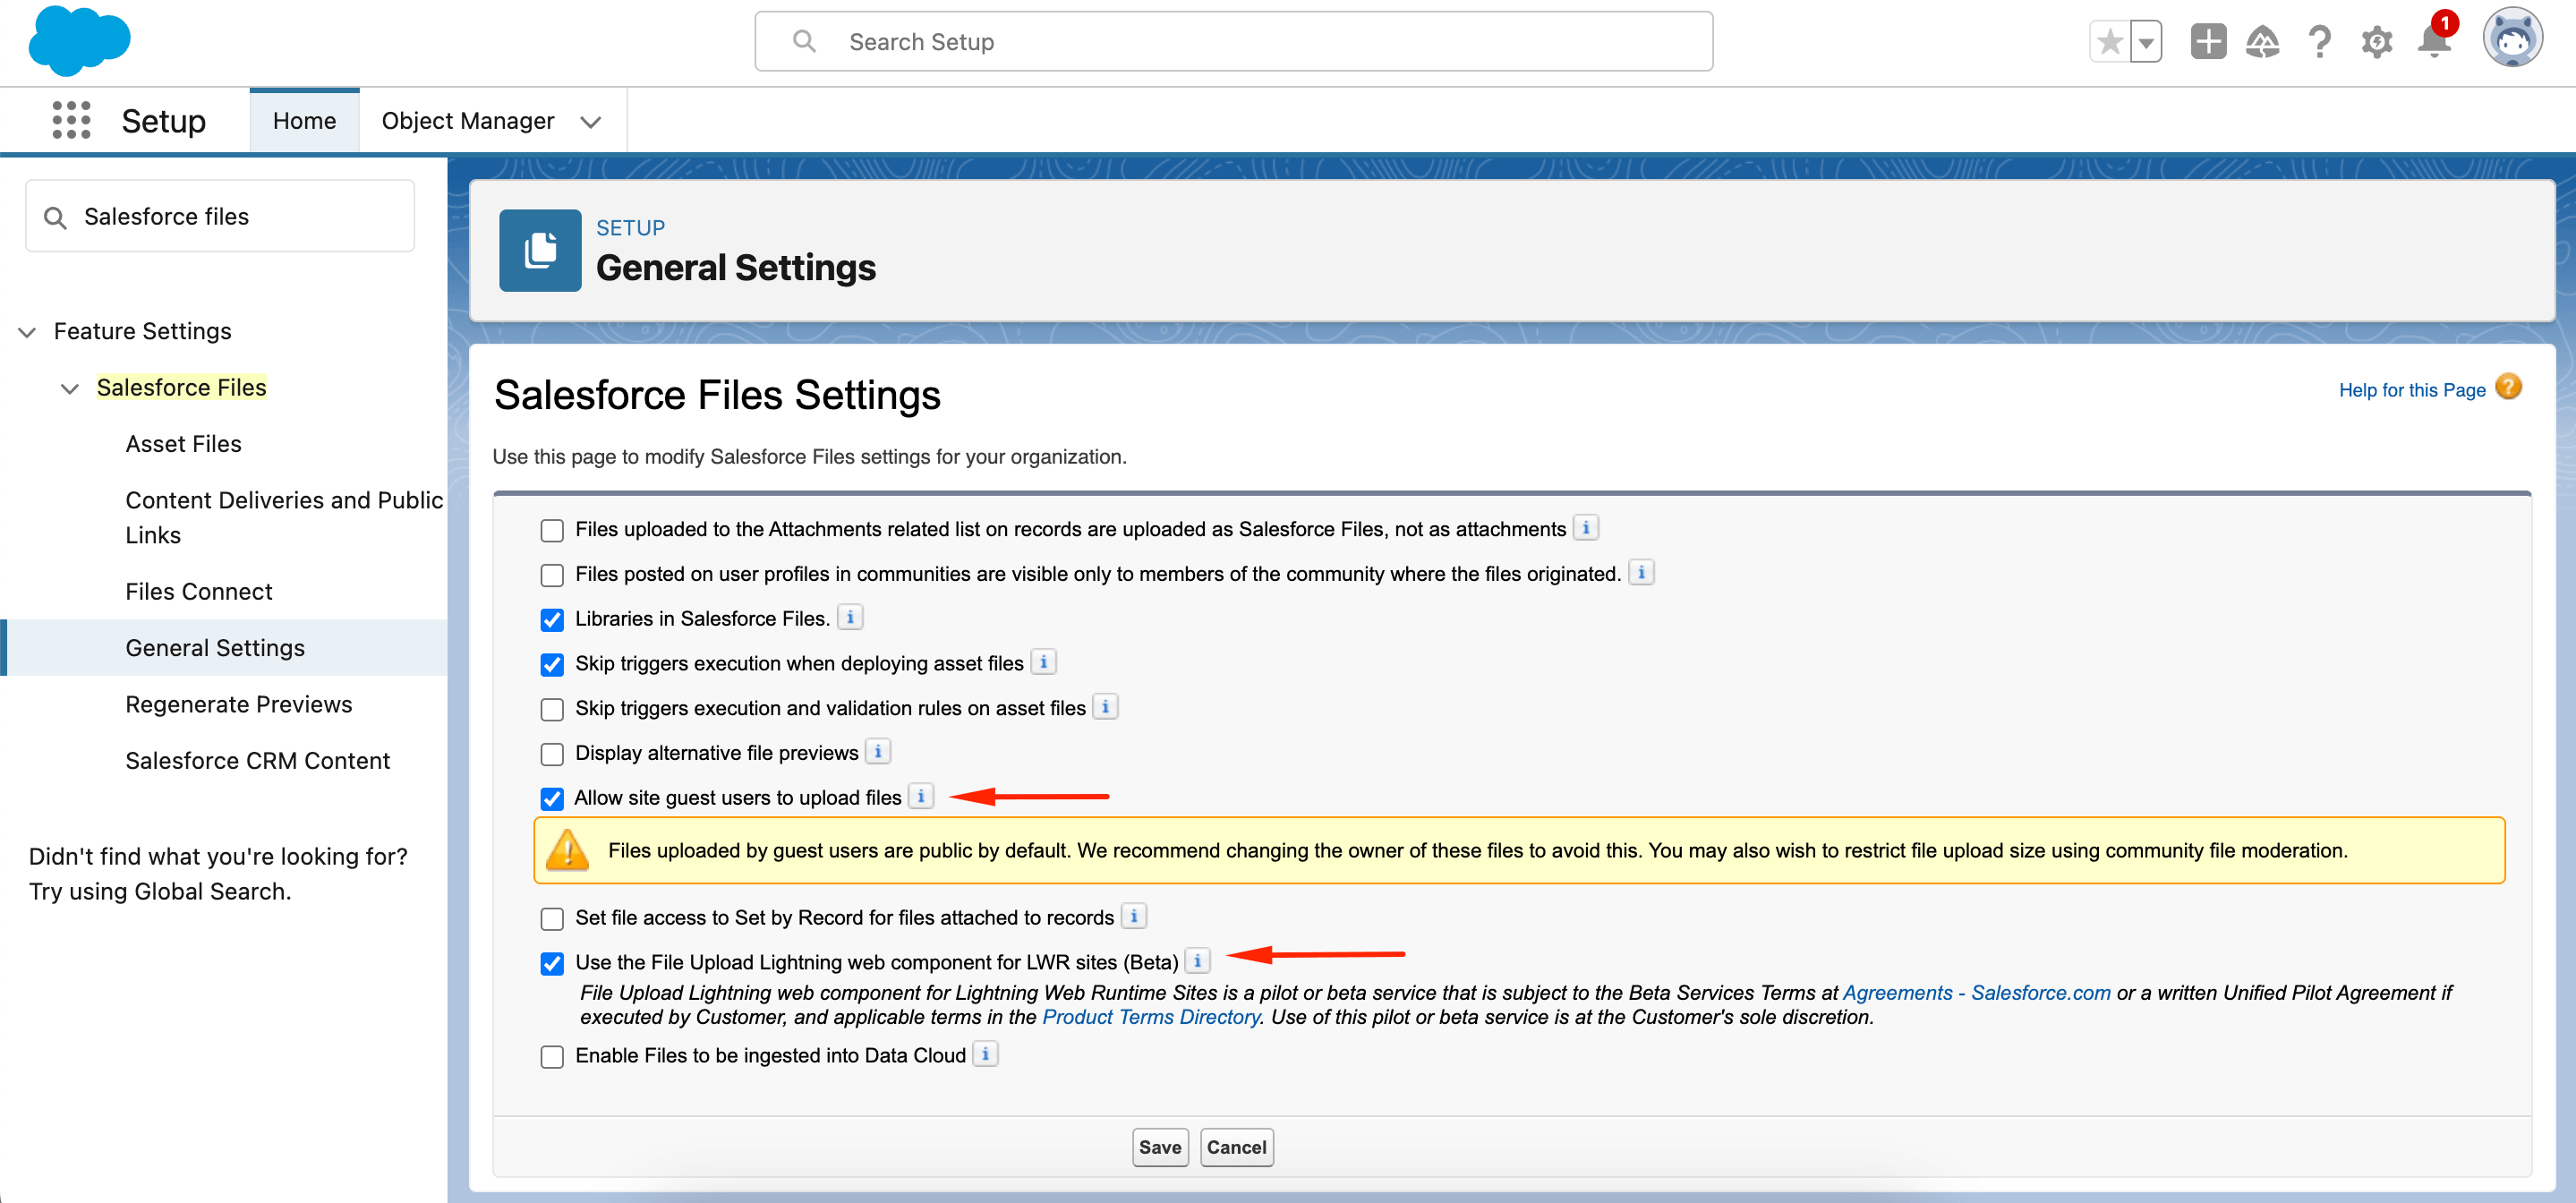
You can now utilize the File Upload Lightning web component configuration to transfer files from an LWR site or an improved LWR site to your Salesforce organization. Before, the File Upload component was exclusively accessible for Aura sites.
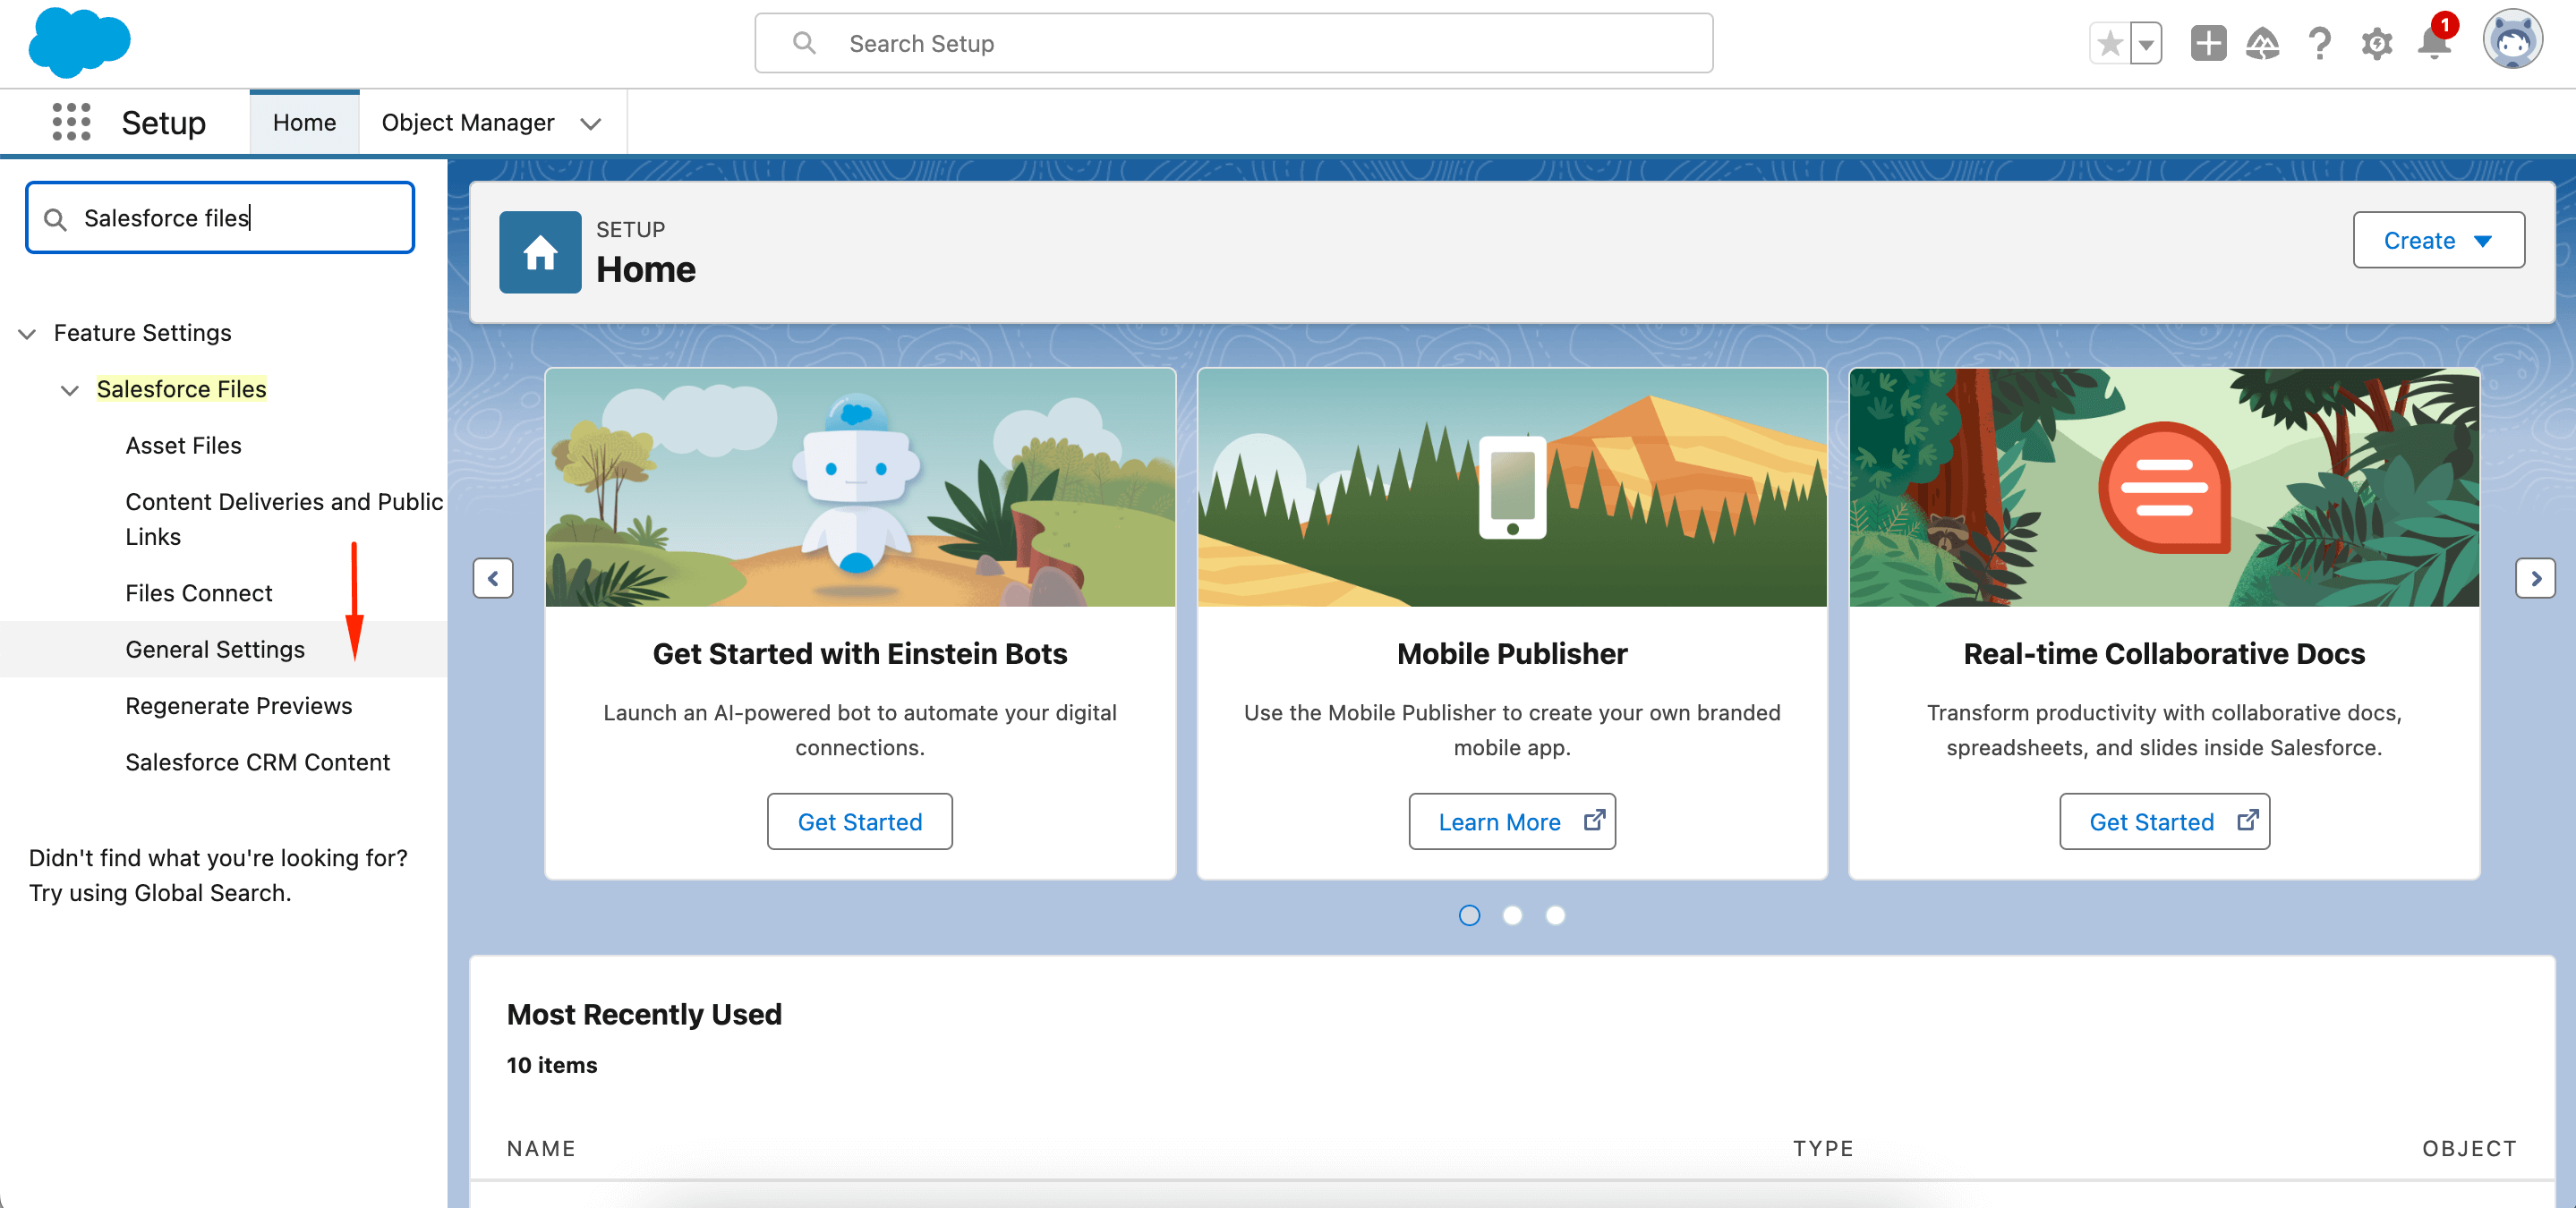
While in the Setup of your Salesforce org, type in Salesforce Files in the Quick Find box. Choose General Settings → Allow site guest users to upload files → Use the File Upload Lightning web component for LWR sites (Beta).
Minor Experience Cloud Enhancements in the Salesforce Winter ’25 Release
This was quite a list of top upgrades Experience Cloud faces this release. However, we don’t want to leave some minor yet powerful improvements away.
Export and Integrate Shared Business Across Salesforce Orgs with Partner Connect
You can simplify cooperation on the business you share with reliable associates. Partner Connect establishes a secure connection between two Salesforce orgs, enabling a partner to transfer specific records from a vendor’s Experience Cloud site to the partner’s org. This connection remains active for the exported records, offering vendors and partner users a read-only view of the independent progress of the records for each company.
Improve LWR Site Performance with Experience Delivery (Pilot)
Enhance the scalability and speed of your LWR sites by utilizing Experience Delivery, an advanced new platform for hosting LWR sites. In addition to rapid page loading times, this updated platform offers enhanced security and search engine optimization.
Note! To participate in this pilot, contact your Salesforce account executive. This pilot is for developers who are familiar with:
- Building LWR or enhanced LWR sites with Experience Builder
- Developing custom Lightning web components that are server-side ready
- Working with Salesforce DX
Use the Latest Features from Mobile Publisher for Experience Cloud
The Mobile Publisher is now available for Experience Cloud LWR sites. You can protect your app’s information by activating snapshot prevention, which hides the app’s snapshot when it’s running in the background on a device.
Additionally, you can now configure Marketing Cloud notifications for an Android app using consolidated Google Firebase fields in the Mobile Publisher Setup.


