Three easy steps to create a Survey.
Hello everybody! Many of you have already heard about the Salesforce Community Cloud Survey component which is available for use with Spring 18 release and it looks awesome.
Unfortunately, this component is paid or available for free for those who has Health Cloud license.
Before you start using the Salesforce Survey, you have to enable it in your org. From Setup, type Survey in the Quick Find box and choose Survey Settings. Enable Survey.
If you have active communities in your organization, you can choose the default one to create public surveys there.
Once you enabled Survey, “Surveys” tab will be created in your org. To get into the Survey builder, choose “Open Latest Version” function.
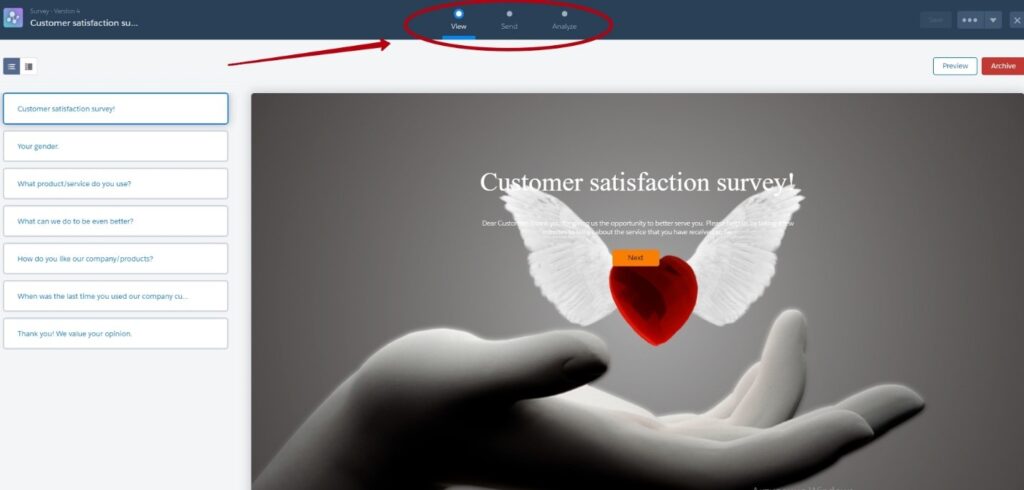
Survey builder has 3 areas: view, send and analyze. These are three easy steps to create a Survey and to get a feedback from your customers.
Step # 1. Build your Survey.
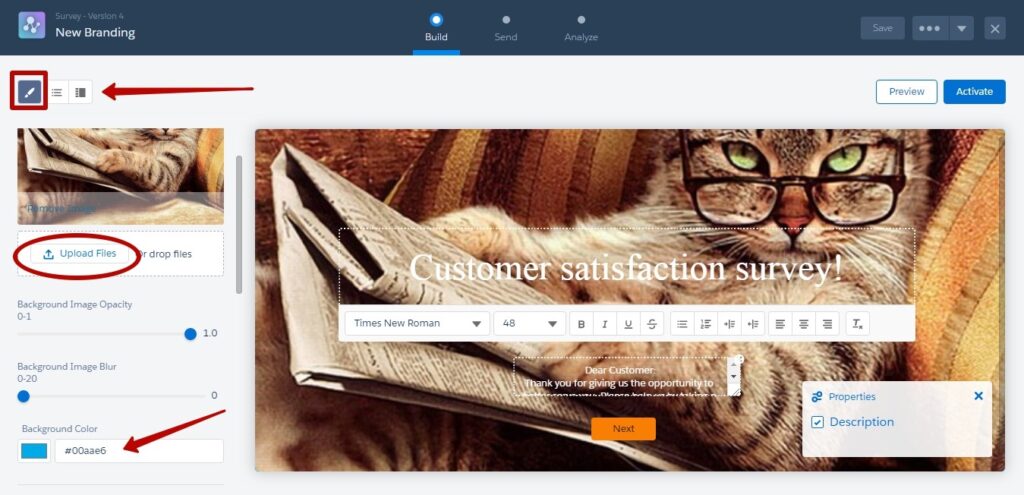
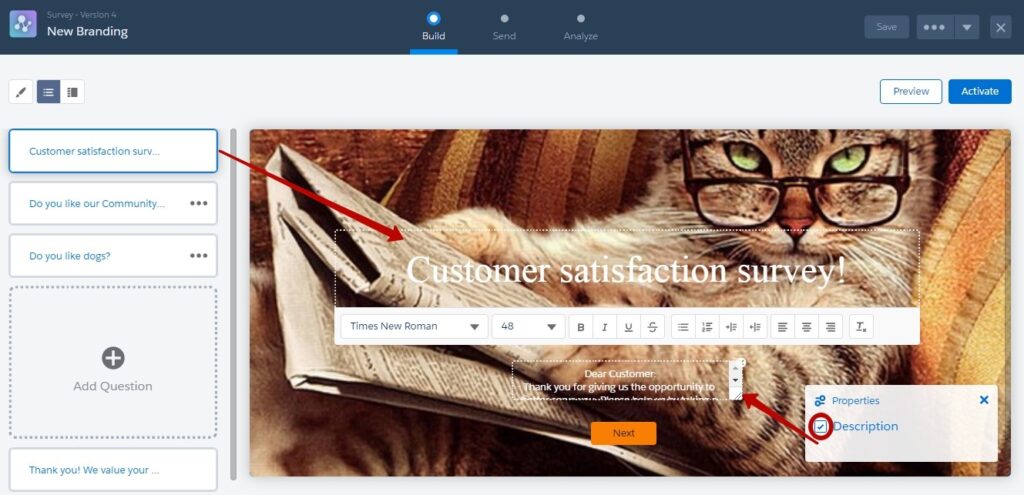
You can create a unique branding for your survey. Change its background image, choose text and buttons colors using HEX code within the “Style” option.
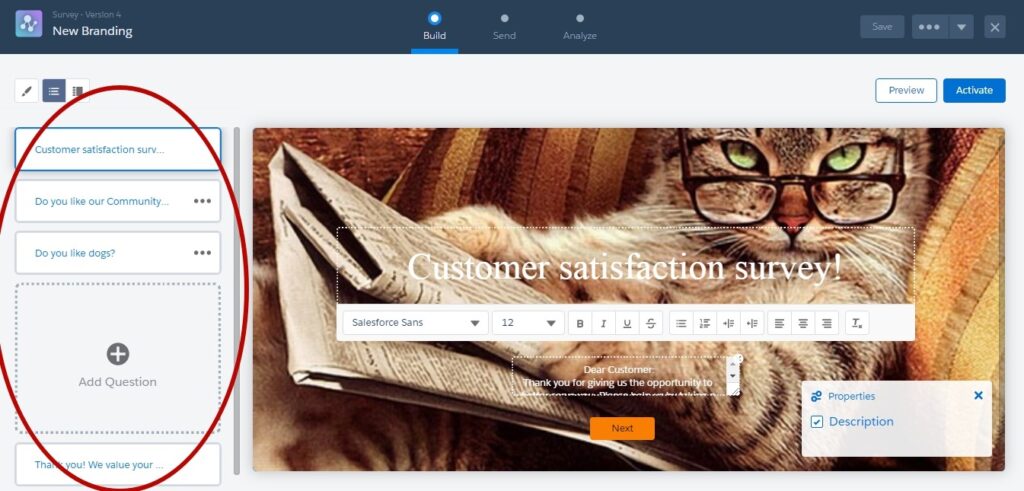
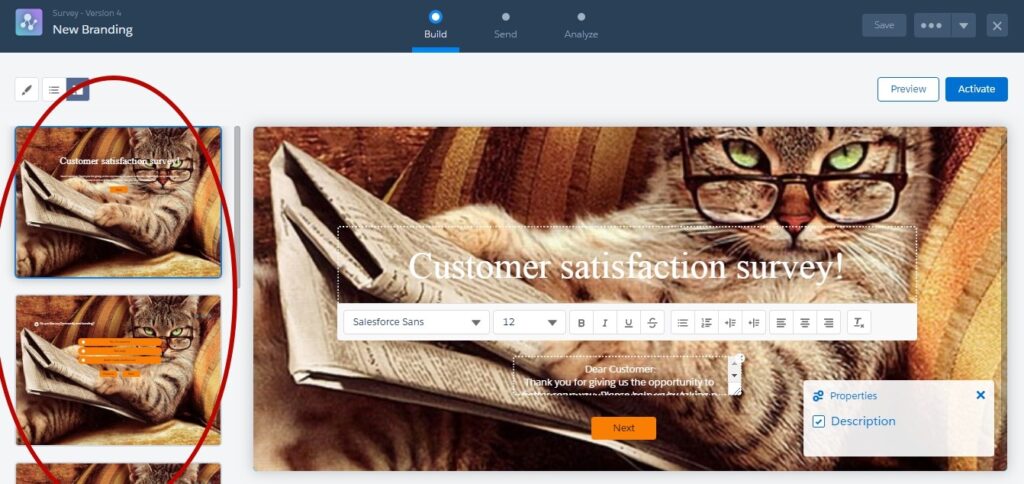
The other two buttons next to the Style allows you to see the Survey as a List or a Set of Tiles.
The first page of a Survey is usually a Welcome page. Here you can add the name of your Survey, change fond and add or remove a description field using the properties box in the down right corner.
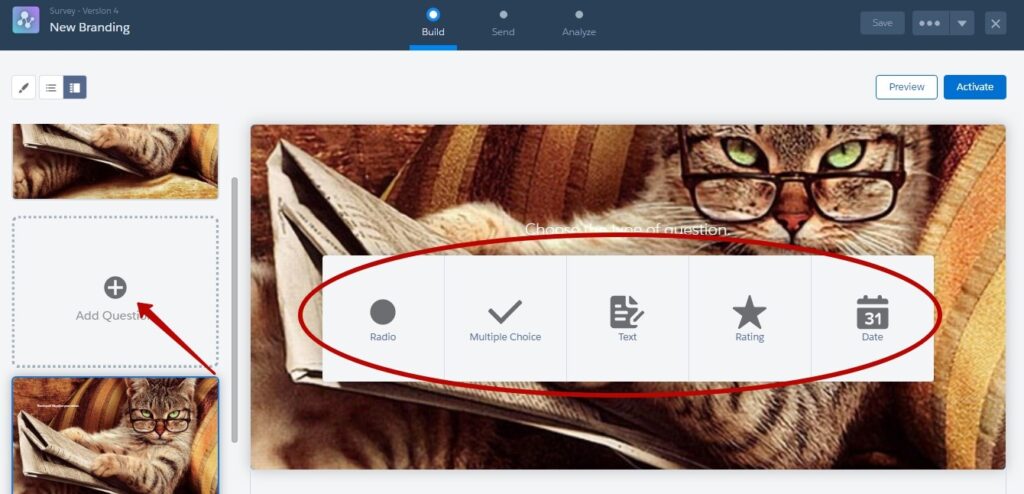
To add questions, click “Add question” button and choose one of the types:
- Radio – single-select option
- Multiple choice – multiple-select option
- Text
- Rating
- Date
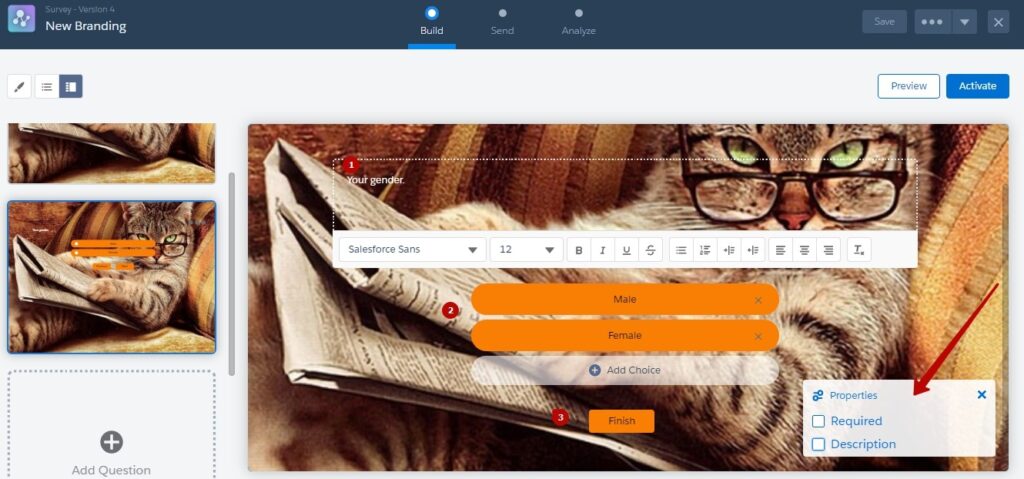
Type a question, add choices if necessary and click Finish. Use Properties box if you want to make this question required or add a description. You can add as many questions and use different types in your Survey as you wish.
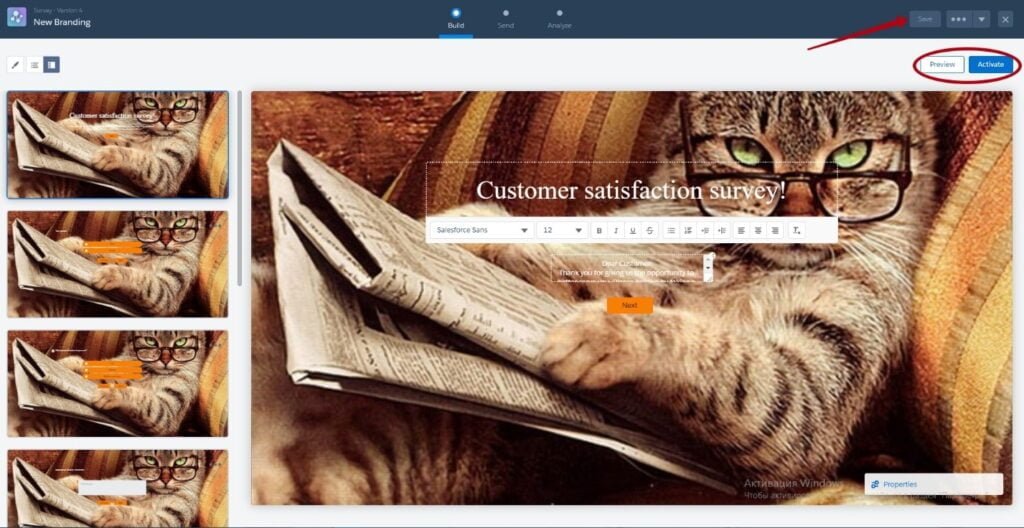
When you finish, click “Save” to save your changes. “Preview” your Survey to check questions and variants. If everything done in a proper way, “Activate” your Survey.
Step # 2. Send.
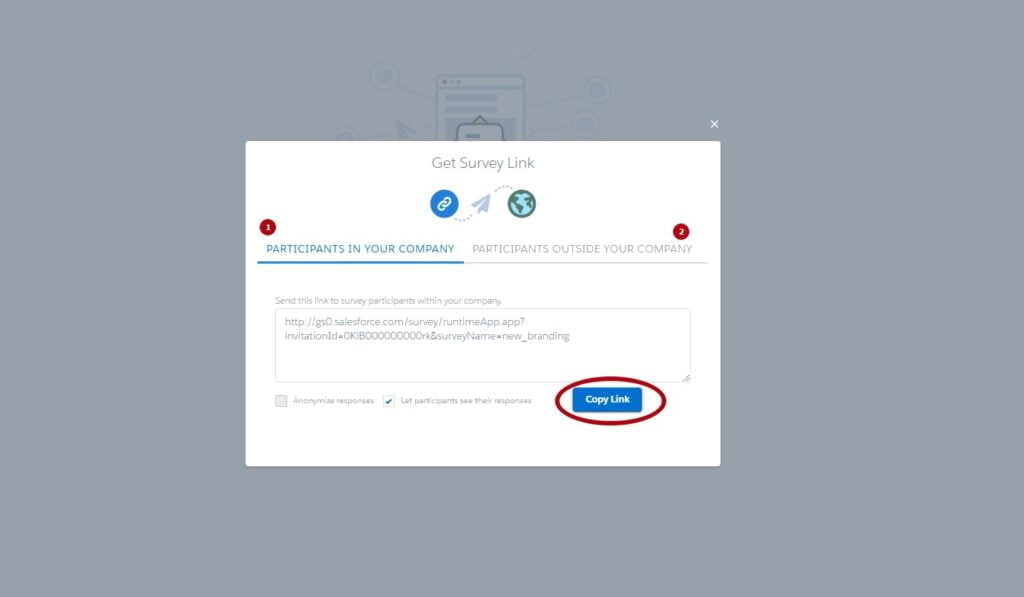
Go to the “Send” section. Here you can Copy the link for Survey and send it to participants in or outside your company. You can also enable such functions as “anonymize responses”, “let participants see their responses” for internal users, and “don’t require authentication” for external users.
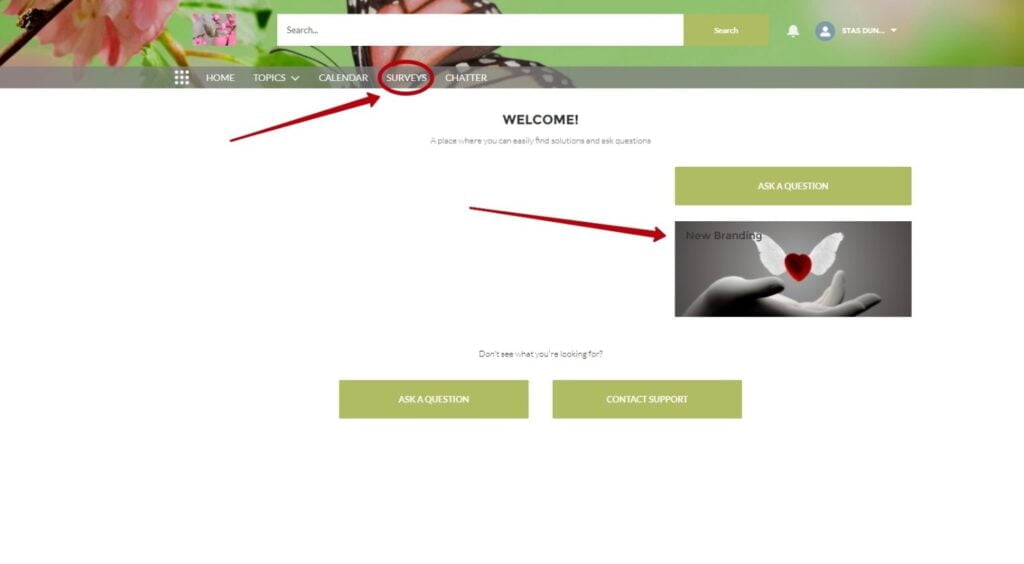
To add Survey to the Community, just go to the Community Builder and drag and drop the “Surveys” component to the template. You can create a separate page either use an existent one, for example Home page or even a sidebar.
Step # 3. Analyze the feedback.
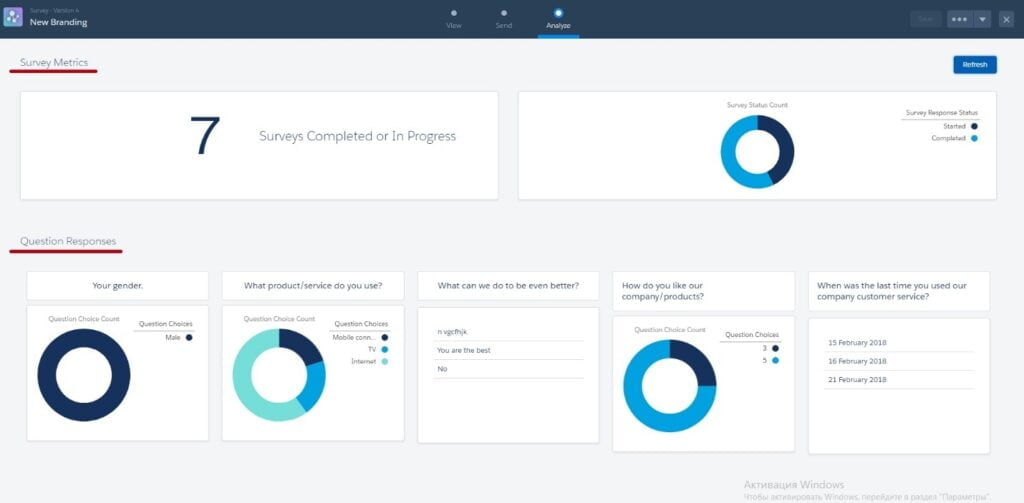
Within the “Analyze” section you can see how many surveys were done and what are the responses.
An “Analyze” section is a simple analytics page where you can see how many surveys were done and how many are in progress. The responses are shown in donate charts for rating and choice questions and in lists for text and date questions.
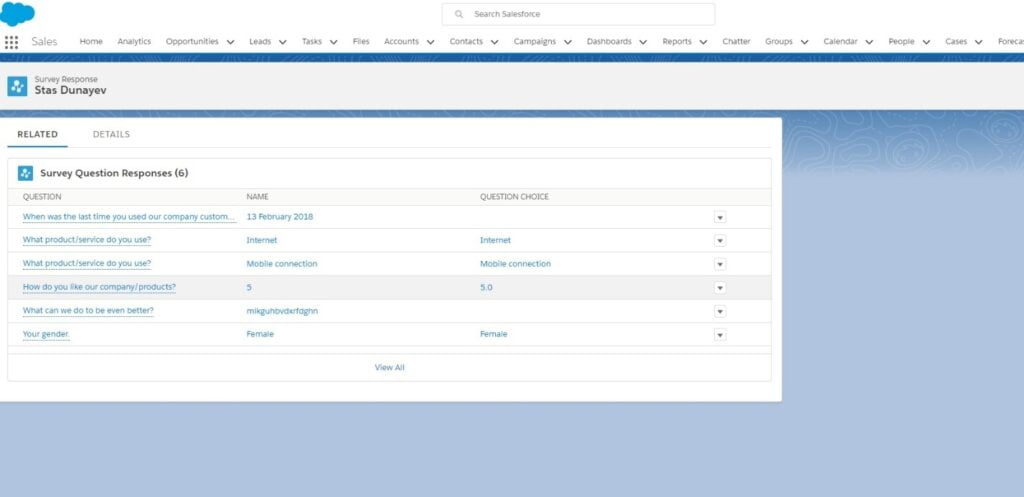
You can also check the responses of each concrete person in your org.
Go to the Surveys tab and choose the survey; in the Related section follow the necessary invitation link, depending on whose answers you would like to see: an internal or external user. Go to the Related section again and choose a submitter name to see the user’s answers.


