Community Guide for Absolute Beginners
In our new series of posts for ‘absolute beginners’, I want to share my experience of working with Salesforce Community Cloud.
When I first got introduced to Salesforce Experience Cloud, I really liked the idea and the product. However, I didn’t realise that building a community from scratch would turn out to be rather a challenging task and I wasn’t at all sure where to start. Do you feel like that now? You have to create a community, but you don’t know how? This ‘absolute beginners’ series of posts is for you. It wasn’t written for technical people or developers, but for people like you who are just starting their journey with Salesforce and Community Cloud. I hope this guide will help you to build your first community and, most importantly, to make it valuable and useful to your company and your customers.
Let’s start by discussing what a community is and what it’s needed for.
A community is a branded site that connects your customers, partners and employees. You can customise and create multiple communities to meet your business needs. Communities provide access to data in your Salesforce for users outside your org.
Internal users can easily access your communities too, from the App Launcher in the Lightning Experience interface or in Setup –> All Communities in Salesforce Classic.
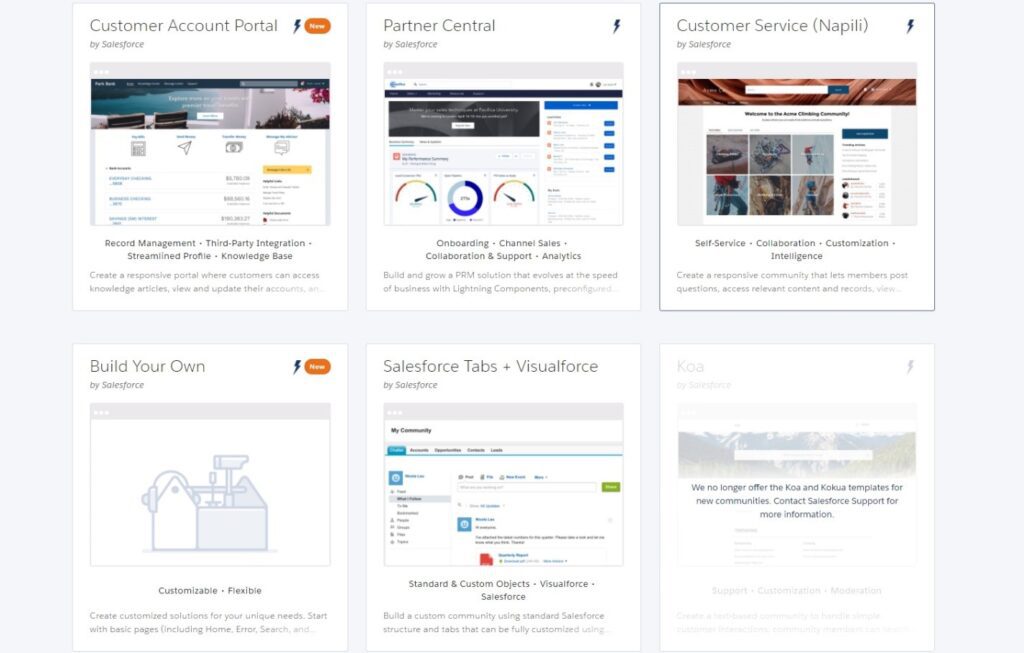
You can choose one of the available readymade templates for your community, build your own, if you are a developer, or get a third-party template from the recently introduced Lightning Bolt section of AppExchange: https://appexchange.salesforce.com/appxStore?type=BoltTemplate. For now, for the sake of simplicity, we’ll use the most popular and feature-rich customer service template, Napili.
FIVE EASY STEPS TO START A COMMUNITY
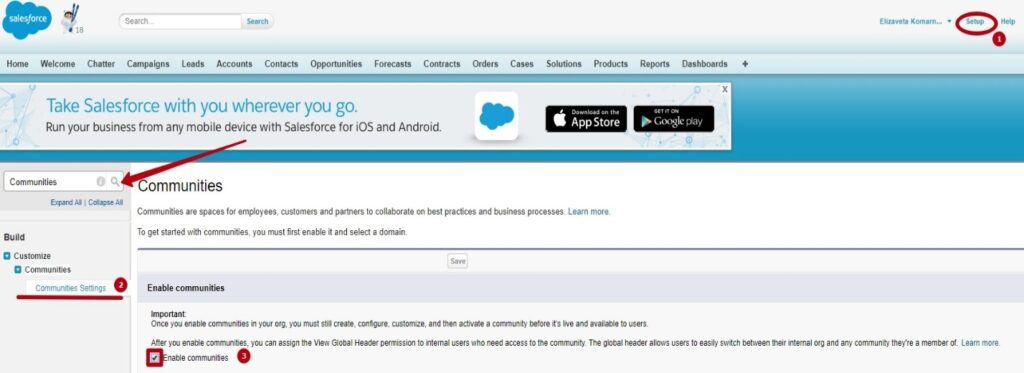
1. Enable Communities in your Org.
Go to Setup – Communities Settings – activate the ‘Enable Communities’ checkbox.
2. Select a Domain Name.
Note! Once you set up a domain, you can’t change it and it will be used for all communities in your organisation (unless you purchase and set up your own domain). You create a unique URL for each community during the creation process.
3. Create a Community.
Go to Setup – All Communities – New Community.
4. Choose a Template.
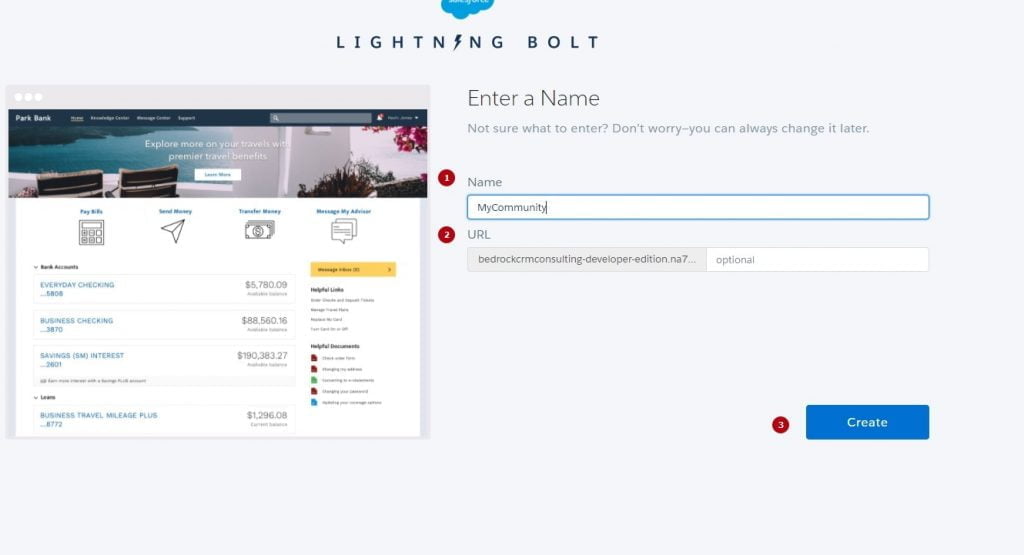
Choose a template (as I mentioned above, the Napili template is a good starting point) – press Get Started – Enter a name and URL – Create.
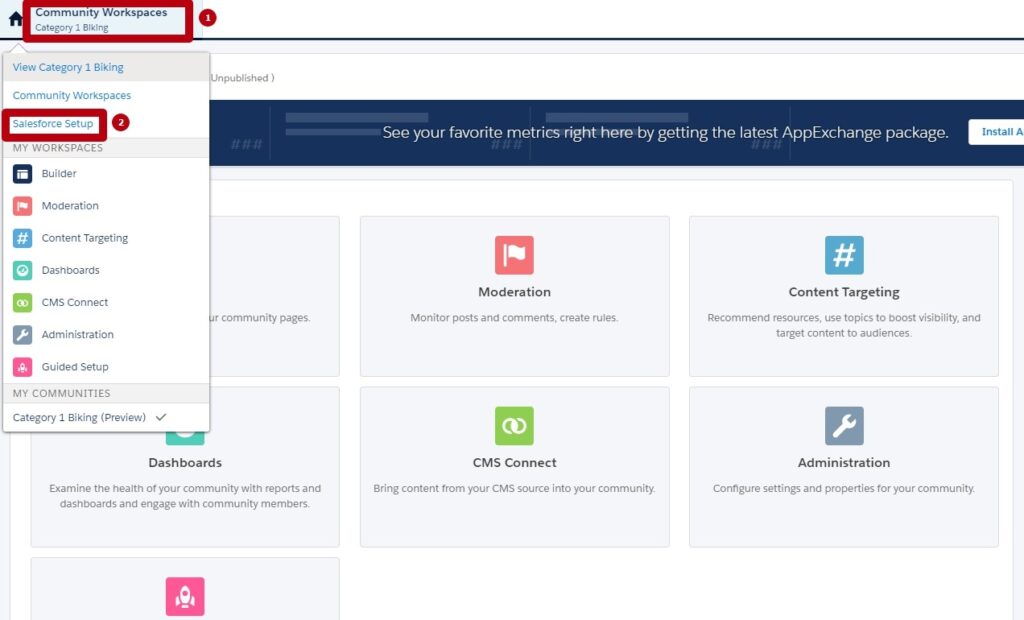
5. Go to the Community Workspace page.
Community Workspace is the main place for the administration of your community. It has a number of separate sections, where you can configure different areas of your community, and we’ll talk about Community Builder in my next post.
To get back to Setup, click Community Workspaces – Salesforce Setup.


