COMMUNITY GUIDE FOR ABSOLUTE BEGINNERS 5
Community Workspaces. Get familiar with some elements of Administration. Gamification.
Hello, dear reader! Welcome our next post about how to create a Community for “Absolute beginners”. This is our fifth part, in which you can get familiar with Community Workspaces, some elements of Administration, and know what is Gamification.
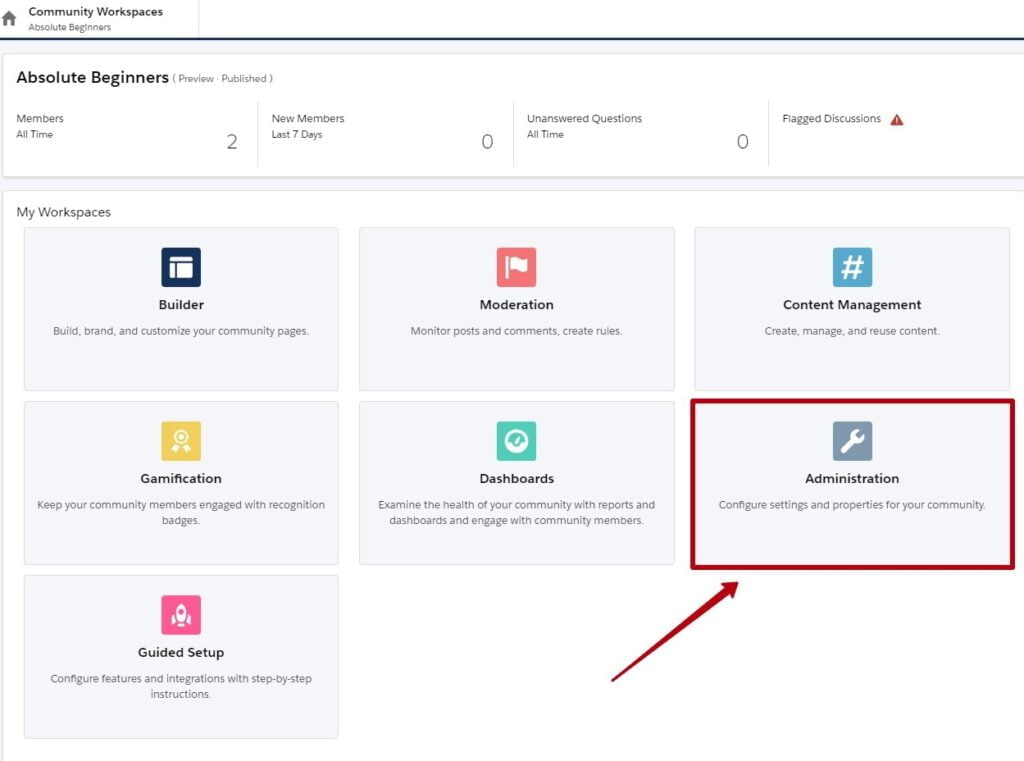
Community Workspaces is a special community management interface joined into different spaces where you can view and add dashboards, members, create content, community’s reputation and gamification system; assign moderators and add moderation rules and criteria.
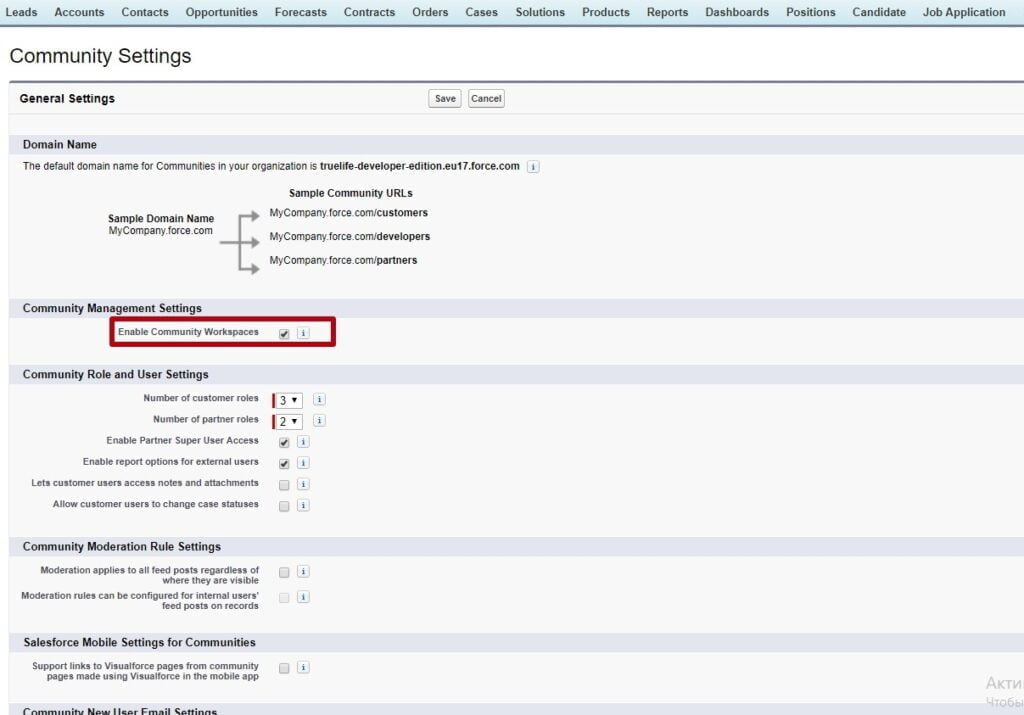
Workspaces have to be enabled in Setup – Community Settings. For new communities, workspaces are enabled by default.

This time, we learn more about Administration and Gamification workspaces.
Administration provides a number of community settings divided into different sections. Administration settings differ from Community Settings you enabled in your org and contain corresponding configuration for a specific community.
Let’s go to Setup – All Communities – “Workspaces” next to the Community name – Administration.

1) In the “Settings” section you can activate/deactivate your community and change its name and template.
2) The “Preferences” section provide a number of checkbox settings.
For example:
- you can enable Nicknames for a community instead of user’s first and last names;
- allow direct messages and/or discussion threads;
- allow members to flag and/or upvote a content;
- enable reputation levels (read more in COMMUNITY GUIDE FOR ABSOLUTE BEGINNERS 3)

3) To define who is allowed to log in to the Community, go to “Members” section.
There are two ways for granting member access:
- via Profile
- via Permission set

“System Administrator” profile is selected by default.
Choose profiles which users need to have access to a community and add them to the right column.
4) “Login and Registration” settings give an administrator the ability to customize user’s login experience and registration. For example, you can add auth. providers which allow user to authorize via Facebook or LinkedIn.

5) Communities are compatible with the standard salesforce email functionality such as templates or alerts. So, using the “Email” section, you can configure Welcome, Change/Forgot Password, and other emails.
You can also create unique templates with a special branding and logo.
6) “Pages” section allows you to override standard pages with custom ones. Using Advanced Customizations, namely, Go to Force.com, you can control Guest User profile.

There are also such Related lists available as Site Visualforce Standard/Custom Pages, Error Pages, Usage and Site History. Here you can customize pages and their visibility, monitor usage history and site changes.

7) Configure “Reputation level” and “Reputation points” for community members. Read more in COMMUNITY GUIDE FOR ABSOLUTE BEGINNERS 3.

8) “Rich Publisher app” allows you to associate an app with a community.
Another workspace which became available only with the latest Winter 19 release is Gamification. It allows you to use Recognition Badges to keep your members involved in a community.
To start using Gamification, you have to enable Thanks Settings on Work.com. You can enter it from a Gamification workspace or from organization Setup.

Once Recognition badges are enabled, you can use them, create new and manage who badge givers. Manage Badge Givers option is available only if this badge is not public.

Also, use Permission Sets to configure who can create and give Recognition badges.
A standalone Recognition Badges component is available on the user’s profile. It shows the last three badges earned by the user and a button to award new badges.

That’s all for this post. We hope given information was interesting and useful. In our next post we will talk about Content Management and Dashboards. You will see how to share your salesforce data within the community easily and how to add dashboards.


