What’s new with Salesforce Spring 20?
The Salesforce Spring 20 Release Notes are already here and soon all organizations will be able to renew their interfaces into the funny spring 20 fox! So, what news will the fox bring? What changes are waiting for us this Salesforce Spring 20?
The AC team has prepared a shortlist of the most interesting and important features of the new release.
1. Report Builder for Lightning Communities (Generally Available)
WOW! Now your community members can use reports directly on the community! They can view, analyze and collaborate on reports. Moreover, community users can now create and manage reports on the community by themselves (as long as you have given them permission of course!).
If you have a Customer Service, Customer Account Portal, Partner Central or Your Own template, congratulations, you can use Lightning Report Builder on the community.
So, first of all, enable report options for community users in Setup – Community Settings.
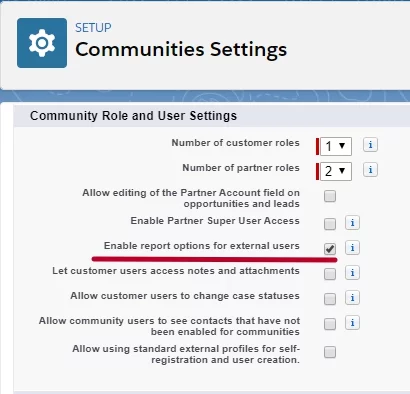
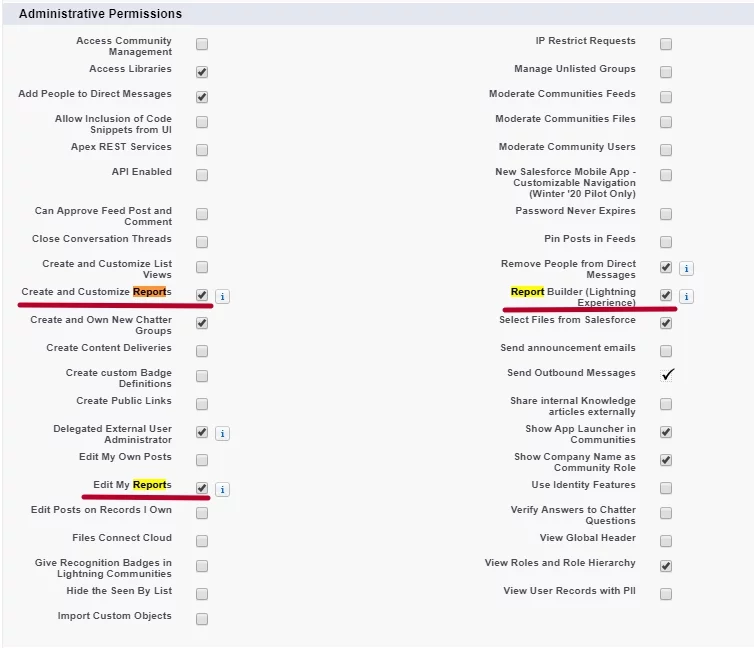
The Report Builder page is available to community users with a Partner Community or Customer Community Plus license and following permissions:
- Create and Customize Reports
- Report Builder
- Edit My Reports
If you do not plan to have community users creating reports, only viewing them:
- Run Reports
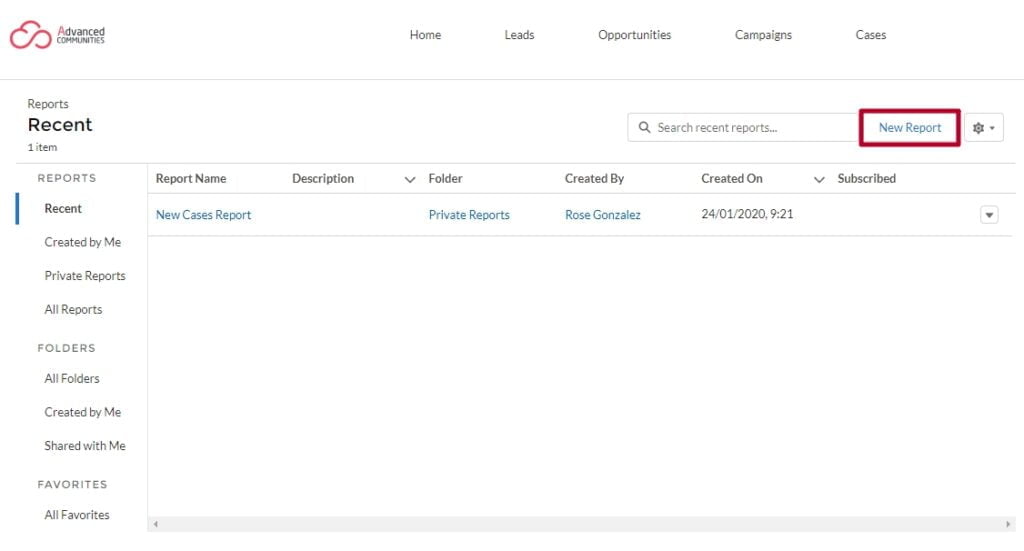
Add the Report page with the Report list component to the community navigation. The New Report button will be available on the Report List page for external users with appropriate access.
2. Important Critical Updates
Have you already prepared your org for new security updates?
What will change and what should you do?
To increase the safety of your Salesforce data, the security alert will automatically enable the Secure guest user record access setting in all orgs on 1 March 2020. This setting changes org-wide defaults for guest users to Private and restricts the sharing mechanisms that you can use to grant record access to guest users.
You can enable the following setting by yourself in Setup – Sharing Settings or follow the guide’s instructions in Setup – Security Alerts.
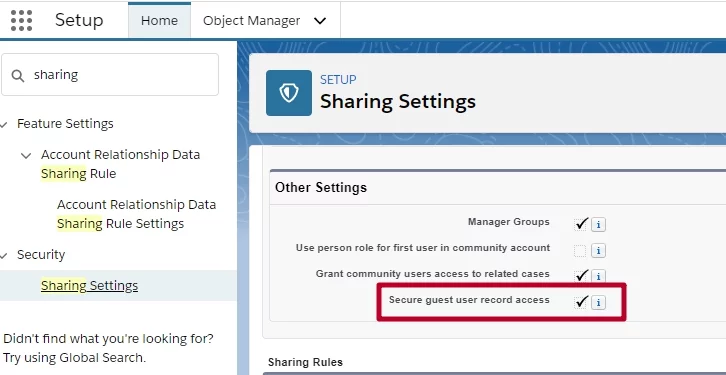
As soon as you enable the Secure guest user record access setting, the only way you can share records to guest users is through the sharing rule.
A guest user sharing rule is a criteria-based rule type that can grant Read-Only access.
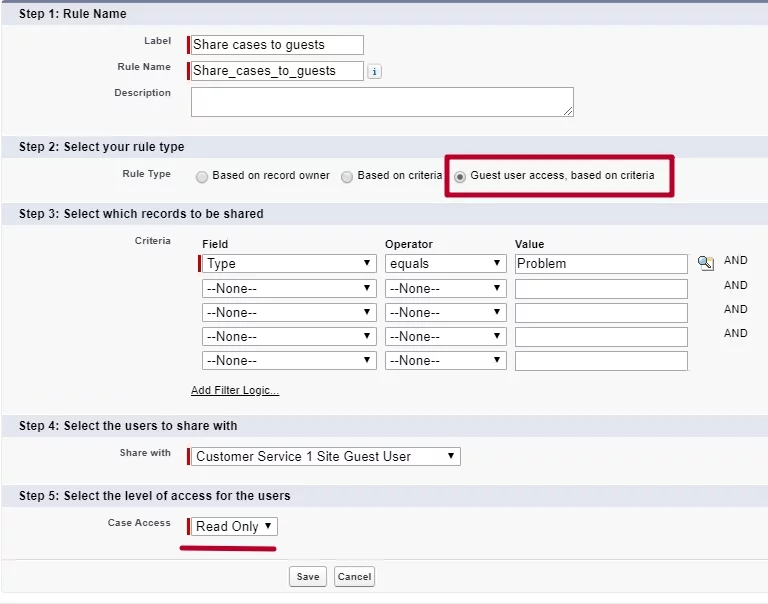
Guest users are no longer the records owners. Newly created records by guest users will be automatically assigned to a default user. The default user is the one who has created the community. To enable this setting go to Setup – Community Settings, and check the Reassign new records created by guest users to the default owner checkbox.
You can also change the default records owner in Experience (Community) Workspaces – Administration – Preferences.
Also, from Winter ’20, Salesforce restricts the use of standard external profiles by default. You will be able to enable this feature in Setup – Community Settings, however.

In Spring ’20, Salesforce rolls out two critical updates that will remove read access to custom settings and custom metadata types for users without the Customize Application permission.
This changes will affect:
- Lightning components
- Visualforce pages
- Applications that require direct API access
Once this launches, admins who have Customize application permission will be able to grant users access to custom settings and metadata types via profile or permission sets. You can also reverse granted permissions in Setup – Schema Settings.
Read more about Custom Settings Access and Custom Metadata Types Access.
3. External Account Hierarchy (Beta)
Sharing data with external users may become easier. Users with Partner Community and Customer Community Plus licenses can view the records of other external users within their account hierarchy. That means external users of the parent account do not have to use sharing rules to view the data from their child accounts.
As long as this feature is in the Beta version, it could not be available in some orgs. To enable this feature, search for it in Setup – Community Settings.
4. Talk to Customers Where They Want to with the Channel Menu
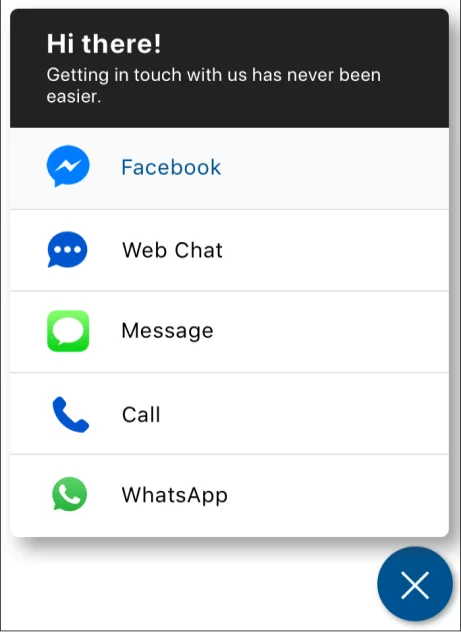
Give your customers a chance to contact you with any channel they want. Customize an Embedded Channel Menu and add up to six channels – such as chat, phone, and custom URL for Salesforce Classic and Lightning only channels: text message, Facebook Messenger, and WhatsApp – and the agents can respond directly from their Service Cloud.
Build your Channel Menu and create deployments in Service Setup.
You can also brand the button, header, fonts, and icons. Match your website tone with custom labels and set translations.
5. Let guest users schedule appointments with Lightning Scheduler
Lightning Scheduler is a tool for making appointments in Salesforce. And it can now also be used by unauthenticated users to schedule appointments.
The enhancements for guest users include an Enable Guest User attribute on the Review Service Appointment flow screen and a standard Inbound New Guest Appointment flow template.
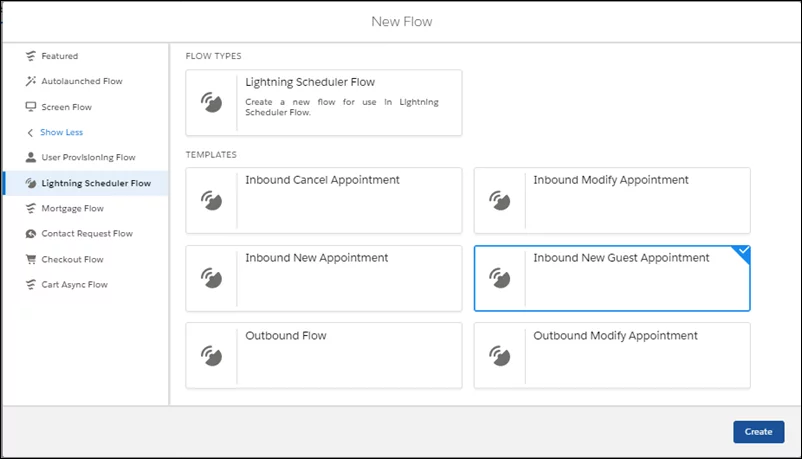
The Lightning Scheduler is available at an extra cost in the Lightning Experience while our great AC Resource Booking component is available at NO COST.
6. Enhanced Salesforce CMS
Salesforce CMS has now been enhanced with a lot of new options.
Access and manage everything in one place with Salesforce CMS Home. Enable access to CMS Home, CMS Experience and CMS Workspaces tabs to Default On in the relevant user profiles.
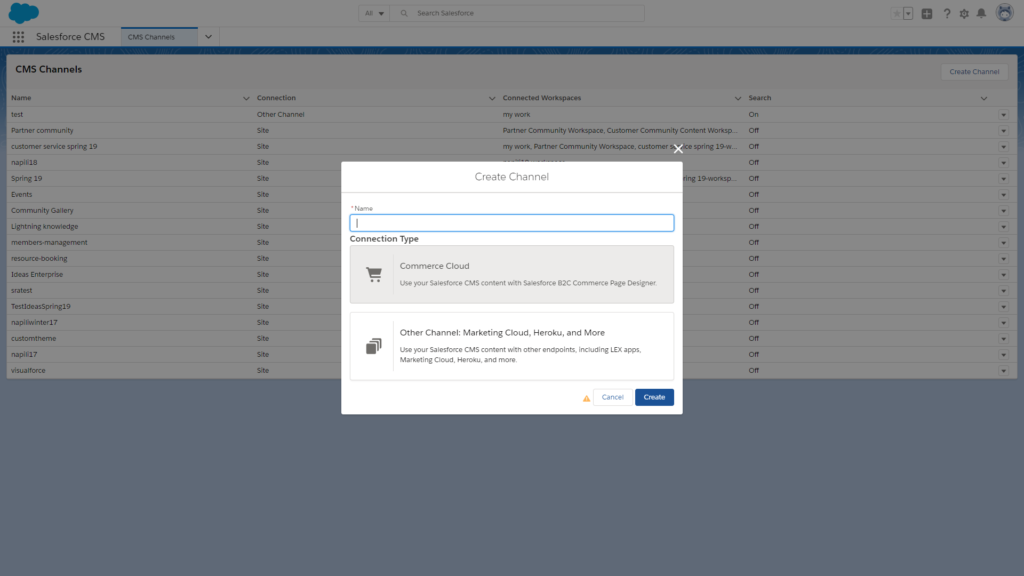
You should have a Manage CMS Workspaces and Channels user permission to create CMS channels and workspaces.
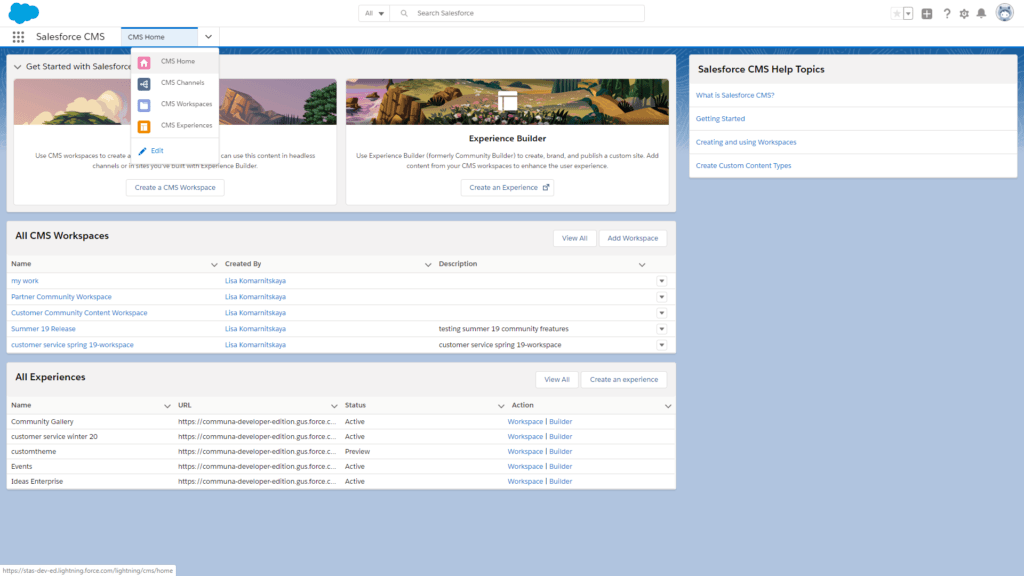
Share and reuse your content across multiple channels, both inside and outside Salesforce, including Commerce Cloud, Marketing Cloud, and Heroku.
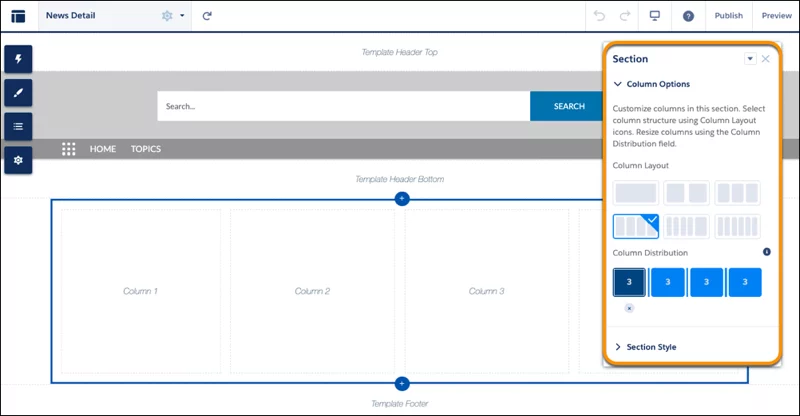
Use Flexible layout to create highly customized CMS Content pages in the Experience Builder.
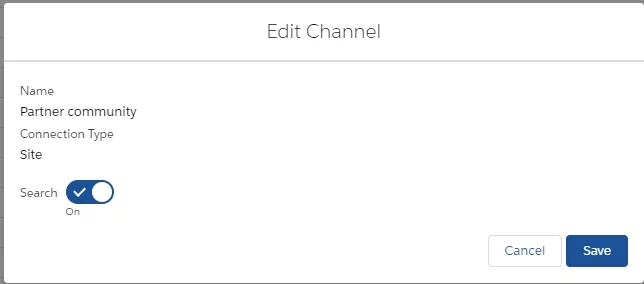
Let users easily find the relevant content by enabling search for CMS Channels. Edit the channel and switch the Search toggle On.
You can also add the Content object to the Global Search Box component in the Experience Builder.
7. Get more flexibility with Salesforce Surveys
Salesforce Surveys have been improved with greate new features. Now you can personalize the survey for every single customer and make it look digitally perfect with improved branding features.
Create a pixel-perfect experience with the following branding features:
- Change the opacity of the content card and answer choices
- The visibility of the Pages and Branding tabs improved
- The default background color for surveys changed to white
- The color of the ranking item buttons varies according to the color of the answer choice buttons
- Add images into the Rich Text area
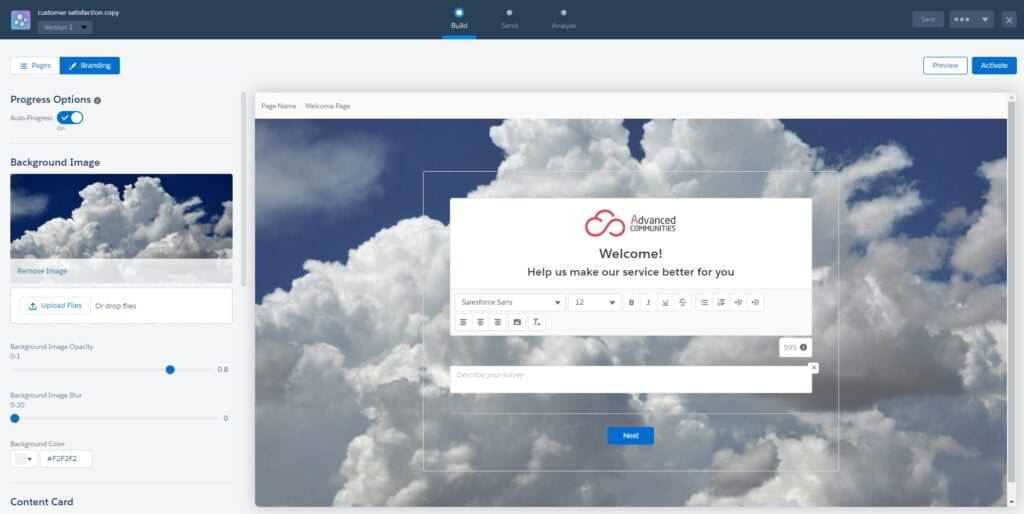
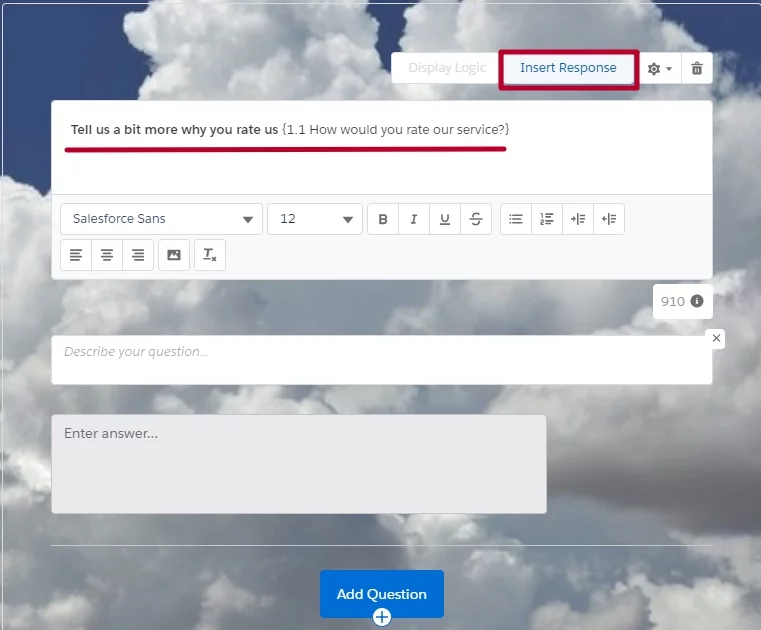
And that’s not all, you can now provide a better context to your participants and personalize survey questions by inserting participants’ responses from previous pages. How? – Very Easy!
Click the “Insert Response” button and select the question to use its response in the next one.
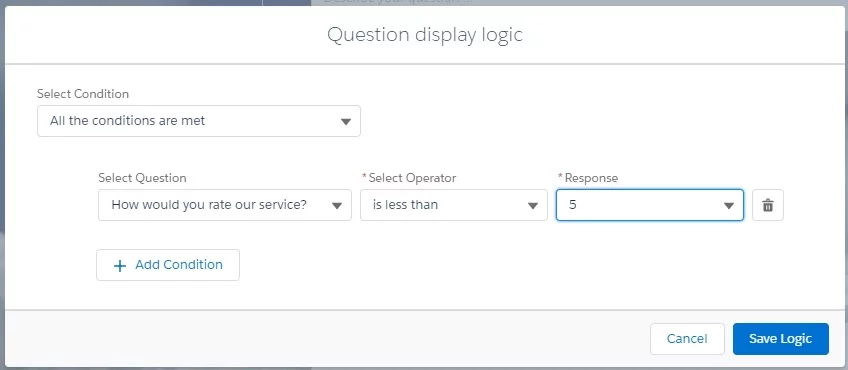
You can also decide which questions participants view next by using the display logic option.
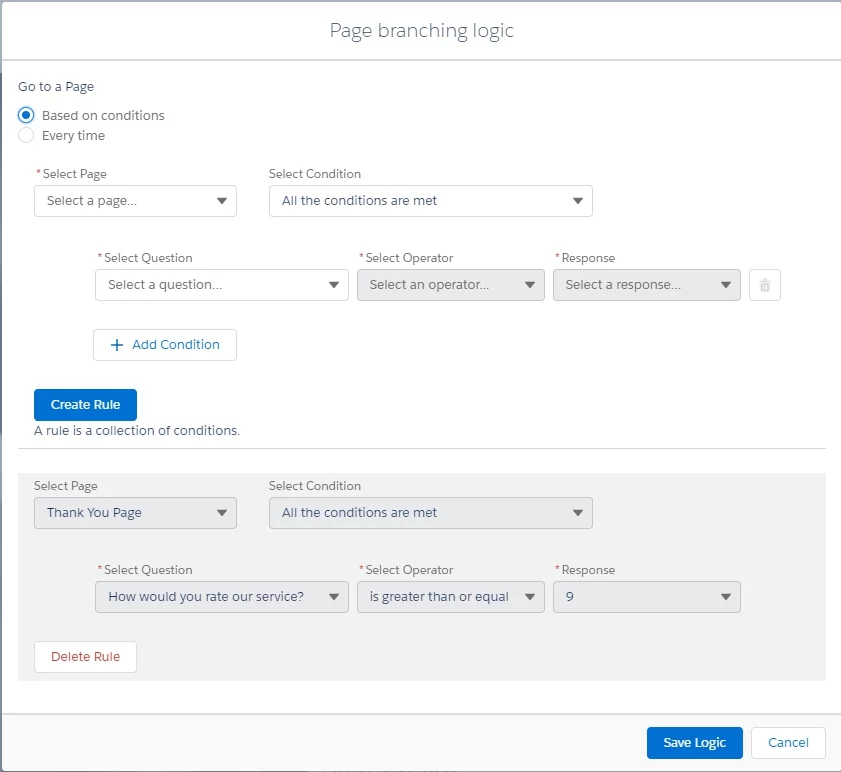
Moreover, create multiple paths journey for participants depending on their answers. Determine which page the participant views next by using the page branch logic.
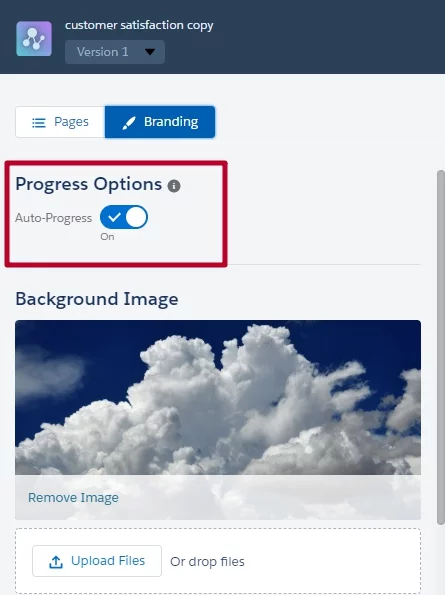
And finally, automate the process by enabling the Auto-Progress that automatically takes participants to the next page.
That’s all for this time! But we’ll be back with more new features and updates for you soon!


![Salesforce Industries: A Closer Look at the Specifics [2025 Edition] 18 salesforce industries](https://advancedcommunities.com/wp-content/uploads/2024/07/salesforce-industries.png)


