Last updated: December 13, 2024
If you’ve ever wondered how to seamlessly migrate data into Salesforce or upgrade your existing data, you’re in the right place. Data migration is a crucial process, and doing it right ensures a smooth transition to Salesforce, the leading CRM platform.
Migrations to Salesforce can vary, including those from on-premises MS SQL Server databases, competitor CRM systems, “old” Salesforce instances into “new” Salesforce instances, and others.
In this blog, we’ll break down the complex world of Salesforce data migration strategy into simple steps and stages, focusing on Salesforce data migration best practices for you to follow to avoid common pitfalls, ensure data accuracy, and set the foundation for a successful migration journey, whether you’re a Salesforce beginner or a seasoned user.
Understanding Salesforce Data Migration
When we’re talking about data migration, we’re referring to the process of transferring your data from one place, like an old system, to a new and improved one, in this case, Salesforce. Imagine you’re relocating your favorite books to a new bookshelf – you want everything organized and easily accessible.
Why is this important? Well, think of your Salesforce data as the heartbeat of your business. It includes customer information, sales records, and other essential details. Getting it right during data migration ensures that your business continues to run smoothly without missing a beat.
Salesforce data migration challenges
Thinking about embarking on the Salesforce data migration project but wondering how to move the thousands of users and millions of posts, reputation points, likes, followers, hashtags, comments, groups, images, and files accumulated over the years? Yes, just like moving can be a bit tricky with delicate items, data migration has its hurdles, and you need to be prepared for the challenges you may face during the process of moving to the Salesforce environment.
The success of Salesforce data migration depends on the data quality you’re moving. In most cases, the data is messy, scattered, or in different formats. Consequently, during the Salesforce migration process, you’ll be paying much attention to the data quality, ensuring it’s clean and accurate for a successful Salesforce data migration.
Salesforce Data Migration Stages
Now that we’ve got a handle on what Salesforce data migration is, let’s talk about getting ready for the big move – and that means planning!
Salesforce data migration general phases include: pre-migration planning & preparation, the actual data migration process, and post-migration monitoring and optimization. So, let’s discover all of them to understand the complete journey you’ll need to pass.
Pre-migration planning & preparation
In this stage, you need to assess the current data landscape to understand what kind of information you have, where it is, and how it’s structured. This step helps you decide what data is essential and what can be left behind.
It’s essentially important to define migration goals and objectives. Think about what you want to achieve with this decision. Are you aiming for better organization, improved customer insights, or something else? Defining clear goals and objectives helps everyone involved understand the purpose of the migration and stay on track.
Now, you can move to the migration planning stage. Create a comprehensive data migration plan that will outline the steps you’ll take, who’s responsible for what, and the timeline for the entire process.
Salesforce data migration process
Now, you are ready to move to the next stage — actually transferring data to Salesforce. During this phase, you’ll handle various tasks, starting with data cleanup and extraction and ending with data mapping and loading into Salesforce.g with data cleanup and extraction and ending with data mapping and loading into Salesforce.
It’s important to import object data in a particular order to maintain record relationships. You will need to match and replace old record Ids in your import files with the newly created data’s record Ids from within your target Salesforce org to properly prepare relational data for import.
You’ll begin by identifying duplicates and fixing errors in the source data, ensuring it’s all neat and ready for Salesforce. Deduplication is an optional process. If you decide to delete duplicates, don’t forget about doing data fix of related records. When finished with duplicates and all necessary fixes, you will start the data extraction process with the help of the ETL (Extract, Transform, Load) software you chose to use beforehand. If you are migrating data from one Salesforce instance to another, you may want to use a Data Loader tool for the bulk import or export of Salesforce records. Data Loader is the most widely used tool for data migrations in Salesforce. After extracting the data, you will initiate the data mapping process and, finally, load the data into Salesforce.
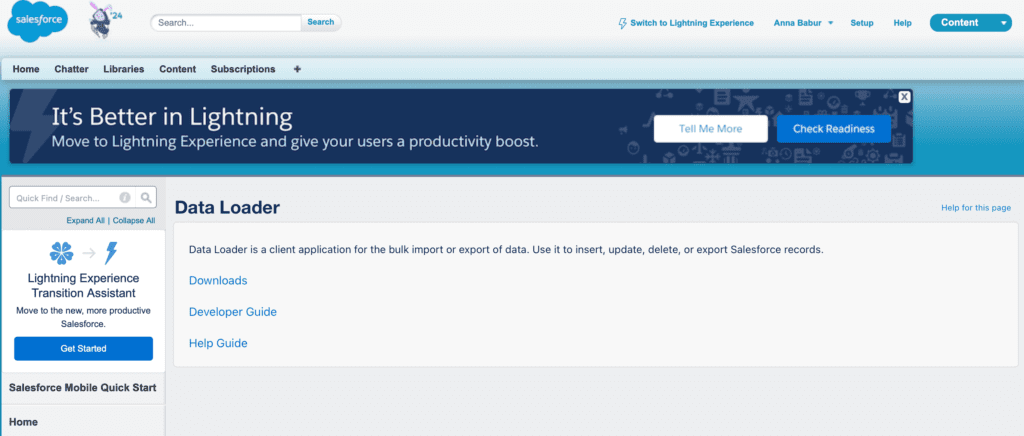
To access the tool in Salesforce just type Data Loader in the Quick Find menu and choose “Data Loader” under the “Integrations” option. Choose Downloads to be redirected to the external page where you can download the Salesforce Data Loader software.
Post-migration check
After completing the smooth data migration, you’ll need to run tests to ensure everything went smoothly. Once the source data is in the Salesforce environment, ensure that it has been transferred correctly and is in the right format.
Also, verify that relationships are accurately represented in Salesforce. Check the record counts, do data validation through spot-checks, and run critical processes to confirm success. In this stage, perform the User Acceptance Testing (UAT) to verify data accuracy, and that what was originally requested is being delivered. If the source data is good and everything works correctly, you can proceed from the sandbox to production.
Salesforce Data Migration Steps
There are tons of tools you can use for migrating data but most Salesforce admins do it with the help of ETL data migration tools, importing through Data Loader, or custom-built apps using the Bulk API. You can also use the Salesforce Data Import Wizard to import data for many standard Salesforce objects (Accounts, Contacts, Leads, Solutions, Campaign Members, and Person Accounts), as well as importing data for custom objects. No matter the complexity or toolset the following Salesforce data migration steps hold up.
Salesforce data migration checklist
- Initial Salesforce data assessment. Evaluate existing data types to understand its quality, structure, and relevance for migration. Plus, set your data migration goals.
- Template design and query planning. Develop a template for organizing customer data and plan queries to extract relevant information.
- Data cleansing. This step might feel a bit boring, but it’s essential. Your goal is to get the data ready for a smooth import eliminating record duplicates, data errors, or wrong/missing data.
- Data mapping. This step is essential to ensure that the imported field data from an old CRM is correctly brought to Salesforce. Your task is to maintain data quality, no matter what.
- Destination org preparation. Now you need to arrange a proper data access by setting up the target Salesforce environment, ensuring it is ready to receive the migrated data.
- Salesforce data migration process. Execute the data migration plan, moving all the data types from the source system to the destination Salesforce org. Use Data Loader, the most widely used among the other data migration tools, to perform export and import of data.
- Post-migration testing & quality assurance (UAT). This your last step before the production release. User acceptance testing (UAT) is a very important part of your Salesforce testing strategy as it helps you ensure that everything works as intended and is ready to be transferred to production.
- Data migration to production. After making sure everything is perfect and ready to migrate data, you can start to transfer data into your new Salesforce space.
Data Migration to Salesforce: Best Practices
As mentioned before, we’ve curated a list of Salesforce data migration best practices to help you prepare for the data migration task. These tips and best practices are useful for both beginners and experienced admins, dealing with data migration in Salesforce.
Before starting the Salesforce data migration process
- Create your plan of action (object order, data cleansing, data quality check, needed transformations, etc.). Don’t forget to document it all and save it in that folder.
- Download a full data export from multiple data sources before starting.
- Data cleansing. Ensure your source data is cleaned and you review what will be transferred before importing data. Define duplicate rules to proactively keep data clean after migration.
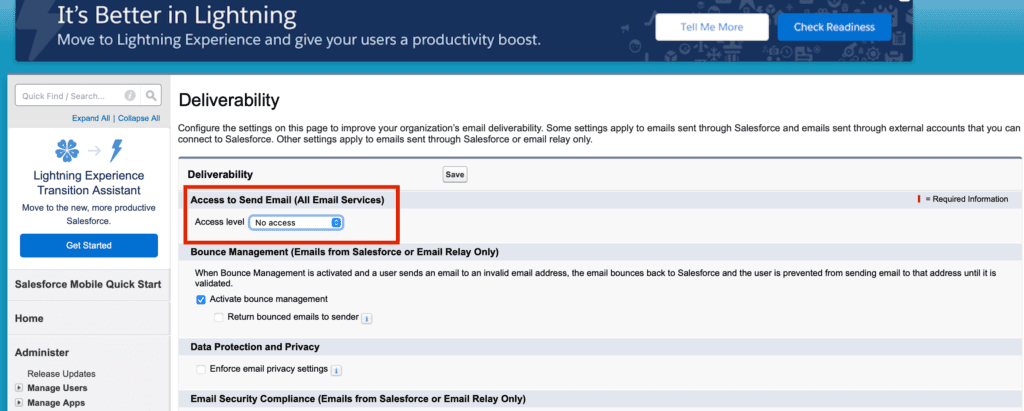
- Don’t forget to turn off email deliverability. To do this, type “email” in the Quick Find box, click “Deliverability” to access the email settings page, and set “Access to Send Email (All Email Services) Access Level” to “No access”.
When you’re on the road
- Study the schema to ensure an understanding of relationships in Salesforce data migration.
- Understand which automation you want on and off. Use additional tools/apps to quickly and easily disable an Org’s data validation rules, workflows, and Apex triggers. Print the page before updating so you have a backup for restoration.
- Keep your source data file labeled “Source”, save your prepped file with the word “Prepped’ in the name, and save your success and fail files. Keep these and your data export together on a company server, SharePoint, etc.
- Check if your objects have record ID’s. Always determine the default value to assign if record ID’s are null.
- Include legacy ID with each record.
- Create a custom field on the destination table to track the ID of the record on the origin system.
- Do a full data migration on the sandbox to estimate how long it would take in production.
- Detailed documentation of each step along the way and backups of everything are your lucky tickets to a successful data migration. If you skip these, you might end up in a big mess. So, make sure to save everything and keep backups. That way, you won’t waste time figuring out data problems instead of having fun with your friends during your weekend.
- Don’t forget about reporting. Our advice is to create as many reports as possible in Salesforce reports. You may use additional software for creating complex reports and building pipelines for reporting and other applications.
Whether you are new to data migration in Salesforce or an experienced admin, never stop exploring and learning best practices for transferring data. Read blogs, pass Trailhead modules, watch educational Salesforce data migration videos, use social channels to ask experts, etc.
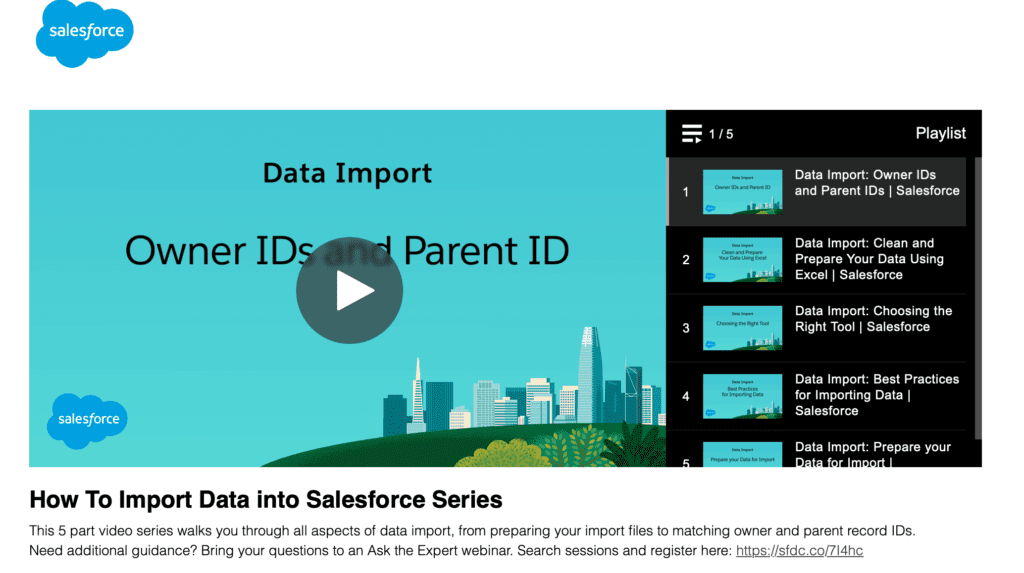
We recommend you watching a series of videos that will walk you through all aspects of data import, from preparing your import files to matching owner and parent record IDs – How To Import Data into Salesforce Series.
Looking for Help?
If you are still sitting on the fence about Salesforce data migration but you want to tackle the Salesforce data migration, consider reaching out to a specialized Salesforce migrations consultant – Advanced Communities.
We are an official Salesforce Experience Cloud consultant and an AppExchange provider with extensive experience in UI/UX, experience in Salesforce data model, and Salesforce data migration services. Feel free to reach out with all your data migration needs.
Q&A
What is the recommended order for data migration in Salesforce?
- Understand Requirements and Salesforce Data Model. Clearly define and understand the data migration requirements. Identify what data needs to be migrated, including objects, fields, and relationships.
- Schema Design. Design or review your Salesforce schema (objects, fields, and relationships).
- Import Users and Roles. If your migration involves user data, it’s often a good idea to start with importing users and roles.
- Reference Data. Load reference data such as picklist values, record types, and any other data that is referenced by other records.
- Import Data. During this stage you’ll handle various tasks, starting with extraction, data mapping and loading into Salesforce. Please, note, it’s important to import object data in a particular order to maintain record relationships. You will need to match and replace old record Ids in your import files with the newly created data’s record Ids from within your target Salesforce org to properly prepare relational data for import.
- Attachments and Files. Migrate attachments and files associated with records.
- Workflows and Automation. After migrating data, set up and activate workflows, processes, and automation that rely on the migrated data.
- Testing and validation. Perform thorough testing to ensure data integrity, accuracy, and that all functionalities are working as expected. Validate the migrated data with stakeholders to confirm that it meets business requirements.
- Go-Live. Plan and execute the go-live process.
- Post-Migration Support. Provide support and address any issues that may arise post-migration.
What are the 6 R’s of data migration?
Since every cloud migration is different, it’s important to have a clear plan. The 6 Rs—re-host, re-platform, repurchase, retain, retire, and re-factor—offer different ways to guide the migration. Think of each “R” as its own strategy, helping you make smart choices as you go through the migration process.
What are data migration tools in Salesforce?
TOP 5 Salesforce Data Migration Tools in Salesforce include Salesforce Data Loader, Salesforce Data Import Wizard, JitterBit Data Loader, Salesforce Inspector, Apex Data Loader.


